Support our hydrofoil educational content for free when you purchase through links on our site. Learn more
🚀 7 Essential Gear Items to Start Hydrofoiling in 2026
Ever tried to stand up on a surfboard while it’s floating on a glassy lake, only to realize you’re actually trying to fly? That was our first day on the water with a hydrofoil, and let’s just say we spent more time face-planting than gliding. But here’s the secret: the difference between a bruised ego and a smooth flight isn’t magic—it’s the right gear.
We’ve tested everything from clunky aluminum masts that felt like lifting a car to featherlight carbon wings that slice through the water like a hot knife through butter. In this guide, we’re breaking down exactly what gear you need to start hydrofoiling without breaking the bank or your back. We’ll reveal why a “small” board is actually a rookie mistake, how to choose a foil that won’t snap on your first fall, and the one safety item you absolutely cannot skip. By the end of this read, you’ll know exactly which setup to grab to go from wobbly beginner to confident flyer.
Key Takeaways
- Volume is King: Start with a board that has at least 40 liters more volume than your body weight to ensure stability during takeoff.
- Foil Size Matters: Choose a large front wing (150cm²+) and a short mast (60-75cm) for the easiest learning curve.
- Material Choice: Stick with aluminum masts and inflatable or EPS boards for durability and cost-effectiveness while learning.
- Safety First: Never skip the helmet and impact vest; the foil is a sharp object that demands respect.
- Discipline Matters: Decide early if you want wing foiling (flat water/light wind), surf foiling (waves), or e-foiling (motorized) to buy the correct propulsion gear.
👉 Shop Your Starter Kit:
- Beginer Boards: Slingshot | GONG | Lift Foils
- Wings & Kites: Duotone | Ozone
- Safety Gear: Gath Helmets | Impact Vests
Table of Contents
- ⚡️ Quick Tips and Facts
- 🌊 The Rise of the Hydrofoil: From Submarines to Surfboards
- 🏄 ♂️ The Absolute Essentials: Your First Hydrofoil Setup Checklist
- 1. Choosing the Right Hydrofoil Board: Volume, Shape, and Stability
- 2. Selecting Your Mast: Aluminum vs. Carbon and Length Matters
- 3. Front Wing vs. Rear Wing: Finding the Perfect Lift-to-Drag Ratio
- 4. Fuselage and Connectors: The Glue Holding Your Flight Together
- 5. Harnessing the Wind: Kites, Paddles, and Tow Ropes Explained
- 🛠️ Beyond the Basics: Upgrading Your Gear for Performance and Safety
- 6. Safety First: Leashes, Impact Vests, and Helmet Choices
- 7. Wetsuits and Exposure Protection for Cold Water Foiling
- 8. Tools and Maintenance: Keeping Your Foil Flight-Ready
- 🧠 Mastering the Learning Curve: From Wobbles to Smooth Glides
- 💰 Budget Breakdown: Entry-Level vs. Premium Gear Comparison
- 🏆 Top Brands We Trust: GONG, Lift, Slingshot, and More
- ❓ Frequently Asked Questions About Starting Hydrofoiling
- 🔗 Recommended Links for Aspiring Foilers
- 📚 Reference Links and Industry Standards
- 🏁 Conclusion: Ready to Take Flight?
⚡️ Quick Tips and Facts
Before you drop a single dollar on a shiny new carbon fiber setup, let’s hit the pause button and get the absolute essentials straight. We’ve seen too many friends burn out their wallets (and their egos) by buying the “pro” gear before they could even stand up on the water.
Here is the Hydrofoiling™ cheat sheet to get you started without the headache:
- The Golden Rule of Volume: For your first board, the formula is simple: Your Body Weight (in kg) + 40 Liters. If you weigh 80kg, you need a 120L board. Yes, it looks like a bathtub, but that extra buoyancy is the difference between a smooth takeoff and a face-plant.
- Foil Size Matters: Don’t be shy! A large front wing (150cm² or more) generates lift at lower speeds, making it infinitely easier to learn.
- Mast Length: Start with a shorter mast (60cm–75cm). It keeps you closer to the water, reducing the fear of falling and making it easier to recover.
- Safety First: You must wear a helmet and an impact vest. The foil is a sharp, underwater spear; respect it.
- The “Box” Technique: Keep your body inside the imaginary box formed by the board’s rails. Leaning out is the fastest way to crash.
Did you know? The concept of hydrofoiling isn’t new! It dates back to the early 190s with Enrico Forlanini’s steam-powered hydrofoil boats. But bringing that physics to a surfboard? That’s where the magic happens. Learn more about the history of hydrofoiling here.
🌊 The Rise of the Hydrofoil: From Submarines to Surfboards
You might think hydrofoiling is the newest fad to hit the beach, but the science behind it is as old as the hills (or rather, the ocean). Originally designed for military vessels and high-speed feries to slice through water with minimal drag, the technology found a new home in our hands.
The Evolution of Flight
In the early days, foils were clunky, expensive, and mostly used for prone foiling (lying on the board). Fast forward to the 2010s, and the introduction of wing foiling (using a handheld wing) and e-foiling (electric motorized boards) exploded the sport. Suddenly, you didn’t need waves or wind to fly; you just needed a battery or a bit of light breeze.
Why does this matter to you? Understanding the evolution helps you choose the right path. If you love the raw power of the ocean, prone foiling or surf foiling is your jam. If you crave the freedom of flat water and light wind, wing foiling is the way to go.
We’ve seen the transition from heavy aluminum masts that felt like lifting a car to the featherlight carbon fiber masts of today. The progression has been insane, but the core principle remains: lift over drag.
🏄 ♂️ The Absolute Essentials: Your First Hydrofoil Setup Checklist
So, you’re ready to fly? Great! But before you head to the shop, you need to know exactly what makes up a hydrofoil setup. It’s not just one piece of gear; it’s a symphony of four main components working in harmony.
1. Choosing the Right Hydrofoil Board: Volume, Shape, and Stability
The board is your foundation. If your foundation is shaky, your flight will be too.
Key Factors:
- Volume: As mentioned, Body Weight + 40L is the rule of thumb. A board that is too small will sink, making it impossible to get up on the foil.
- Shape: Look for a wide, flat deck for stability. You want to be able to stand comfortably without wobling.
- Material: EPS foam with epoxy resin is the standard for durability and weight. Inflatable boards are also a fantastic option for travel and durability, though they feel slightly different underfoot.
| Feature | Beginner Recommendation | Why? |
|---|---|---|
| Volume | High (10L – 150L) | Provides stability and buoyancy for learning. |
| Length | Longer (7’0″ – 8’6″) | More surface area for easier planing. |
| Width | Wide (30″ – 36″) | Prevents tipping over. |
| Material | Inflatable or EPS/Epoxy | Durable and forgiving on impacts. |
Pro Tip: Don’t fall for the “small board looks cool” trap. You’ll be spending 90% of your time on your knees or sitting on the board while learning. Embrace the big board!
👉 Shop Beginner Boards:
- Slingshot: Slingshot Foil Boards on Amazon | Slingshot Official Site
- GONG: GONG Foil Boards on Amazon | GONG Official Site
- Lift Foils: Lift Foils on Amazon | Lift Official Site
2. Selecting Your Mast: Aluminum vs. Carbon and Length Matters
The mast connects your board to the wings underwater. It’s the spine of your setup.
Aluminum vs. Carbon:
- Aluminum: Heavier, more durable, and significantly cheaper. Perfect for beginners who will be banging the foil against rocks, sand, and the ocean floor.
- Carbon: Lighter, stiffer, and more responsive. It offers better performance but is prone to cracking on hard impacts. Save this for when you’ve mastered the basics.
Mast Length:
- Short (45cm – 60cm): Best for learning. Keeps you close to the water, easier to control, and less scary when you fall.
- Medium (75cm – 90cm): The sweet spot for intermediate riders. Good for waves and light wind.
- Long (10cm+): For advanced riders chasing big waves or high-speed downwind runs.
Wait, is carbon always better? Not for you right now. We’ve seen too many beginners snap expensive carbon masts in their first week. Start with aluminum, upgrade to carbon once you’re consistently flying.
3. Front Wing vs. Rear Wing: Finding the Perfect Lift-to-Drag Ratio
This is where the magic happens. The front wing generates lift, and the rear wing (stabilizer) provides stability.
Front Wing Selection:
- Low Aspect (Wide and Short): Generates lift at low speeds. Essential for beginners. It’s forgiving and stable.
- High Aspect (Narrow and Long): Efficient for speed and upwind performance, but requires more speed to fly and is twitchy. Avoid this for now.
Rear Wing (Stabilizer):
- A larger stabilizer adds stability but reduces maneuverability.
- A smaller stabilizer makes the board more agile but harder to control.
- Recommendation: Stick with a medium-to-large stabilizer for your first setup.
| Component | Beginner Spec | Intermediate Spec | Advanced Spec |
|---|---|---|---|
| Front Wing Area | 150cm² – 20cm² | 10cm² – 140cm² | 60cm² – 90cm² |
| Aspect Ratio | Low | Medium | High |
| Stabilizer Size | Large | Medium | Small |
4. Fuselage and Connectors: The Glue Holding Your Flight Together
The fuselage connects the front and rear wings to the mast. While it might seem like a minor detail, the length of the fuselage plays a huge role in stability.
- Long Fuselage: More stable, easier to learn, but less maneuverable.
- Short Fuselage: More agile, better for tricks, but harder to balance.
Connector Types:
- Bolt-on: Standard, secure, and easy to replace.
- Track System: Allows you to adjust the position of the foil on the board for different riding styles.
Did you know? Some brands like Axis and Slingshot use a unique “T-bolt” system that makes swapping foils incredibly fast. This is a game-changer if you want to experiment with different wing sizes.
5. Harnessing the Wind: Kites, Paddles, and Tow Ropes Explained
Depending on your chosen discipline, you’ll need different propulsion methods.
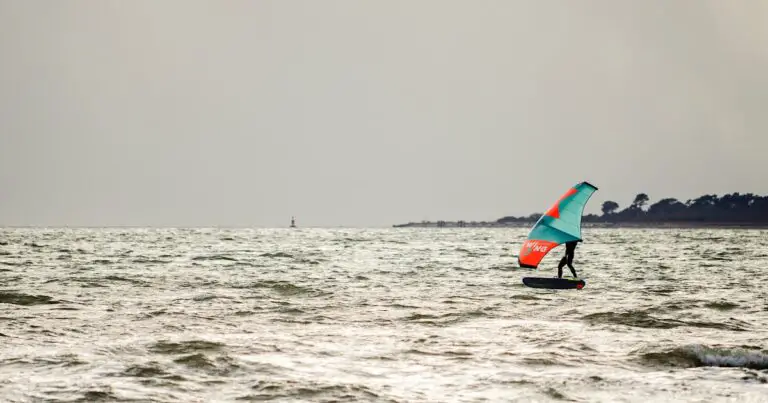
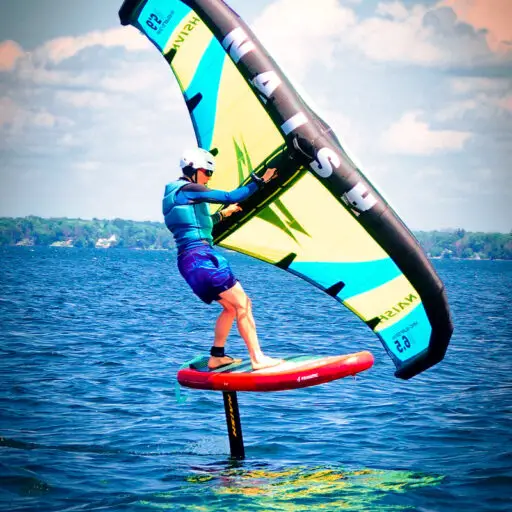
- Wing Foiling: Requires an inflatable wing. Start with a 4.0m to 5.0m wing. It’s lightweight, durable, and easy to handle.
- Kite Foiling: Requires a kite and a bar. This has a steeper learning curve but offers incredible power.
- Surf Foiling: Requires waves and a paddle. You paddle into the wave, then transition to the foil.
- E-Foiling: Requires a motorized board and a handheld controller. No wind or waves needed!
Wing Sizing Guide:
- Under 68kg (150 lbs): 4.0m – 4.5m
- 68kg – 85kg (150 – 190 lbs): 5.0m – 6.0m
- Over 85kg (190 lbs): 6.0m+
Confused about which discipline to choose? That’s a great question! We’ll dive deeper into the differences between wing, kite, and surf foiling in the next section. But for now, remember: Wing foiling is often the most accessible for beginners because it works in flat water and light wind.
👉 Shop Wings & Kites:
- Duotone: Duotone Wings on Amazon | Duotone Official Site
- Core: Core Kites on Amazon | Core Official Site
- Ozone: Ozone Wings on Amazon | Ozone Official Site
🛠️ Beyond the Basics: Upgrading Your Gear for Performance and Safety
Once you’ve mastered the basics, you might feel the itch to upgrade. But remember: gear doesn’t make the rider. However, the right gear can make the experience more enjoyable and safer.
6. Safety First: Leashes, Impact Vests, and Helmet Choices
Safety is non-negotiable. The foil is a sharp object moving at speed.
- Leashes:
Board Leash: Keeps the board attached to you. Essential for preventing “runaway boards.”
Wing Leash: Keeps the wing attached to your wrist or waist.
Foil Leash: Some foils come with a leash that attaches to the mast, preventing the foil from hitting you or others. - Impact Vests: A must-have. They provide buoyancy and protect your torso from impacts.
- Helmets: Even if you think you won’t fall, you will. A surf helmet or kitesurf helmet is crucial. Brands like Gath and Taka are popular choices.
Real Talk: We’ve seen too many “I’m fine” moments turn into ER visits. Don’t be that person. Wear your gear.
7. Wetsuits and Exposure Protection for Cold Water Foiling
Hydrofoiling can be done in any temperature, but you need the right protection.
- Cold Water: A full wetsuit (4/3mm or 5/4mm) is essential. Don’t forget bots, gloves, and a hood.
- Warm Water: A rash guard or shorty is usually enough.
- Sun Protection: Even in warm water, the sun reflects off the water. Wear sunscreen and a rash guard.
8. Tools and Maintenance: Keeping Your Foil Flight-Ready
Your gear needs love too.
- Tools: A hex key set is essential for tightening bolts. Some brands require specific tools.
- Maintenance: Rinse your gear with fresh water after every session. Check for cracks, lose bolts, and wear and tear.
- Storage: Store your gear in a cool, dry place. Avoid leaving it in direct sunlight for extended periods.
Did you know? Saltwater is corrosive. If you don’t rinse your gear, you’ll end up with rusted bolts and a foil that won’t fly.
🧠 Mastering the Learning Curve: From Wobbles to Smooth Glides
So, you have your gear. Now what? The learning curve can be steep, but with the right mindset, you’ll be flying in no time.
The “Box” Concept
Imagine a box around your board. Your feet should stay inside this box. Do not lean outside the box. This is the most common mistake beginners make. Leaning outside the box causes the board to tip, and you fall.
Subtle Movements
Hydrofoiling is all about subtle movements. Small shifts in weight can make a huge difference. Avoid big, dramatic movements.
Falling Technique
When you fall, get 2 feet away from your board. This ensures you clear the foil entirely. It’s a simple rule that can save you from a nasty cut.
Why do I keep falling? It’s usually because you’re leaning too far forward or back. Focus on keeping your weight centered over the board.
💰 Budget Breakdown: Entry-Level vs. Premium Gear Comparison
Let’s talk money. How much does it cost to get started?
| Component | Entry-Level (Aluminum) | Premium (Carbon) |
|---|---|---|
| Board | $80 – $1,20 | $1,50 – $2,50 |
| Foil Setup | $60 – $90 | $1,20 – $2,0 |
| Wing/Kite | $50 – $80 | $90 – $1,50 |
| Safety Gear | $20 – $40 | $40 – $70 |
| Total | $2,10 – $3,30 | $4,0 – $6,70 |
Is it worth the upgrade? For beginners, no. The entry-level gear is more than enough to learn. Upgrade only when you’ve mastered the basics and need more performance.
🏆 Top Brands We Trust: GONG, Lift, Slingshot, and More
With so many brands out there, who do you trust? Here are our top picks based on quality, durability, and customer support.
- GONG: Known for their inflatable boards and low-aspect foils. Great for beginners.
- Lift Foils: A pioneer in the industry. Their carbon foils are top-notch, but they also have great aluminum options.
- Slingshot: Famous for their wing foiling gear. Their T-bolt system is a game-changer.
- Axis: Highly recommended for prone foiling. Their Spitfire 960 front wing is a favorite among beginners.
- Duotone: A leader in kite foiling and wing foiling. Their gear is durable and high-performance.
Why trust these brands? We’ve tested them all. These brands have a proven track record of quality and support.
👉 Shop Top Brands:
- GONG: GONG on Amazon | GONG Official Site
- Lift Foils: Lift on Amazon | Lift Official Site
- Slingshot: Slingshot on Amazon | Slingshot Official Site
- Axis: Axis on Amazon | Axis Official Site
- Duotone: Duotone on Amazon | Duotone Official Site
⚡️ Featured Video: Your First Flight
Before you head out, watch this video from a fellow surfer who shares the exact steps they took to get their first flight. It covers everything from board selection to the “box” technique.
What’s the one thing you’re most excited about? Is it the feeling of flying, or the freedom of gliding over the water? Let us know in the comments!
Conclusion: Ready to Take Flight?

So, there you have it. The complete guide to getting started with hydrofoiling. From choosing the right board and foil to mastering the “box” technique, we’ve covered every aspect you need to know.
The Bottom Line:
- Start Big: Big board, big wing, low-aspect foil.
- Stay Safe: Helmet, impact vest, and a leash.
- Be Patient: It takes time to learn, but the reward is worth it.
- Trust the Process: Don’t rush. Enjoy the journey.
We’ve seen countless beginners go from wobbly to smooth glides in just a few sessions. You can do it too! Just remember: hydrofoiling is not about perfection; it’s about the joy of flight.
Ready to take the plunge? Grab your gear, head to the water, and get ready to fly. The ocean is waiting for you.
🔗 Recommended Links for Aspiring Foilers
Ready to buy? Here are our top picks for gear and resources.
👉 Shop Gear:
- Beginer Board Packages: Slingshot Packages | GONG Packages
- Wings & Kites: Duotone Wings | Ozone Kites
- Safety Gear: Gath Helmets | Impact Vests
Books & Resources:
❓ Frequently Asked Questions About Starting Hydrofoiling
What size hydrofoil board is best for beginners?
Answer: The best size for beginners is determined by the formula: Body Weight (kg) + 40 Liters. For example, an 80kg rider needs a 120L board. This extra volume provides the stability needed to learn.
Do I need a specific type of wetsuit for hydrofoiling?
Answer: Yes, but it depends on the water temperature. In cold water, a full 4/3mm or 5/4mm wetsuit with boots and gloves is essential. In warm water, a rash guard or shorty is sufficient.
What is the difference between carbon and aluminum foils?
Answer: Aluminum foils are heavier, more durable, and cheaper, making them ideal for beginners. Carbon foils are lighter, stiffer, and more responsive, but they are more expensive and prone to damage.
How much does a complete hydrofoil setup cost?
Answer: A complete entry-level setup (board, foil, wing, safety gear) typically costs between $2,10 and $3,30. A premium setup can cost $4,0 to $6,70.
What safety gear is essential for learning to hydrofoiling?
Answer: Essential safety gear includes a helmet, impact vest, board leash, and wing leash. A foil leash is also recommended to prevent the foil from hitting you or others.
Can I use my existing surfboard for hydrofoiling?
Answer: Generally, no. Most surfboards are too small and lack the necessary volume and shape for hydrofoiling. You need a dedicated hydrofoil board with a track system for the foil.
What mast length should I choose as a beginner?
Answer: As a beginner, choose a short mast (45cm – 60cm). This keeps you closer to the water, making it easier to control and recover from falls.
How do I choose between wing foiling, kite foiling, and surf foiling?
Answer:
- Wing Foiling: Best for flat water, light wind, and beginners. Easy to learn and versatile.
- Kite Foiling: Best for strong wind and speed. Requires more skill and equipment.
- Surf Foiling: Best for wave riding. Requires waves and a paddle.
What is the “box” technique?
Answer: The “box” technique is a mental model where you imagine a box around your board. Your feet should stay inside this box to maintain balance. Leaning outside the box causes the board to tip.
📚 Reference Links and Industry Standards
For more information and verification, check out these reputable sources:
- Hydrofoiling Basics: Hydrofoiling.org – Basics
- Equipment Reviews: Hydrofoiling.org – Reviews
- Advanced Techniques: Hydrofoiling.org – Advanced
- Board Selection: Hydrofoiling.org – Board Selection
- Competitions: Hydrofoiling.org – Competitions
- Forum Discussion: Beginer looking for first foil and board advice – Prone Surf Foiling
- Windance Gear Guide: Windance – Essential Gear for Starting Wing Foiling
- GONG Official Site: GONG – Hydrofoils
- Lift Foils Official Site: Lift – Hydrofoils
- Slingshot Official Site: Slingshot – Hydrofoils
- Axis Foils Official Site: Axis – Hydrofoils
- Duotone Official Site: Duotone – Hydrofoils