Support our hydrofoil educational content for free when you purchase through links on our site. Learn more
🚀 5 Key Parts of a Hydrofoil Board & How They Fly (2026)

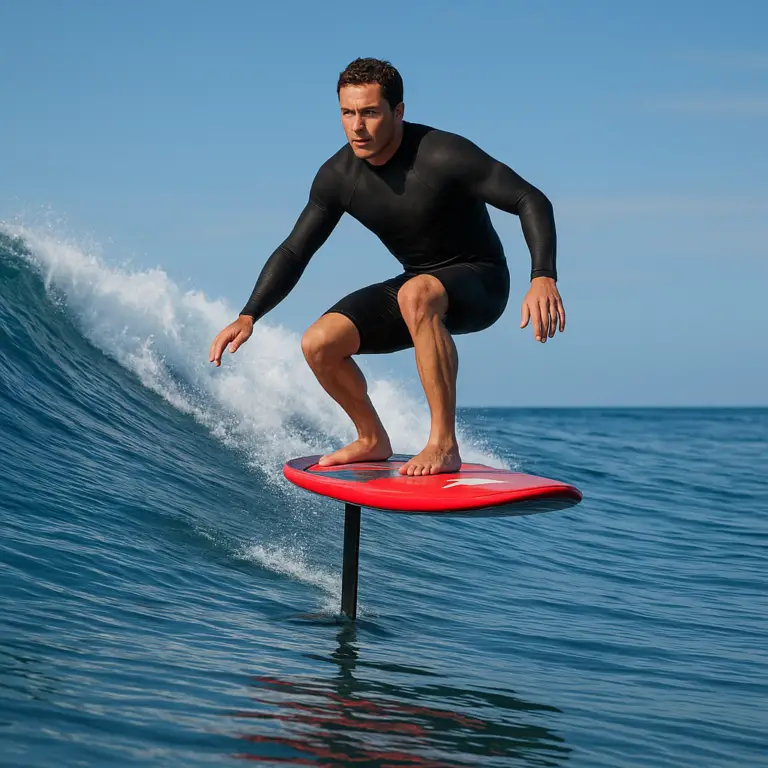
The secret to flight isn’t magic; it’s the precise interplay between your mast, fuselage, front wing, rear wing, and board, working as a single aerodynamic unit to lift you above the water. To answer what are the key components of a hydrofoil board and how do they work together, you simply need to understand that the mast provides height, the fuselage sets the stability, the wings generate lift and balance, and the board acts as your launchpad.
We’ve all seen the videos where riders glide silently over chopy waves, looking like they’re on a cloud. I remember my first time trying to explain this to a friend who thought I was just holding a surfboard with a stick taped to the bottom. “It’s not a stick,” I yelled over the wind, “it’s a wing!” That moment of realization—when the water noise vanished and the board rose—is what drives us to obsess over every millimeter of our setup.
Did you know that water is roughly 80 times denser than air? This density means a hydrofoil generates massive amounts of lift at surprisingly low speeds, but it also means a tiny mistake in your setup can send you tumbling. Getting the balance right between these five components is the difference between a smooth glide and a face-plant.
Key Takeaways
- The System Works as One: Your mast, fuselage, front wing, rear wing, and board must be matched correctly; a mismatch in any single part ruins the entire flight.
- Lift vs. Stability: The front wing creates the lift to get you airborne, while the rear wing provides the counter-balance to keep you stable.
- Mast Length Dictates Height: Shorter masts (40-60cm) offer easier control for beginners, while longer masts (75cm+) are essential for riding over chop and downwinders.
- Material Matters: Carbon fiber offers superior stiffness and lightness for performance, whereas aluminum provides durability and affordability for learning.
- Tuning is Critical: Small adjustments like shimming the rear wing or moving the mast position can completely transform how your board feels on the water.
Table of Contents
- ⚡️ Quick Tips and Facts
- 🌊 From Submarines to Surf: The Evolution of Hydrofoil Technology
- 🚀 What Is a Hydrofoil and How Does It Defy Gravity?
- 🔧 The Anatomy of Flight: Key Components of a Hydrofoil System
- 1. The Mast: Your Vertical Lifeline to the Sky
- 2. The Fuselage: The Silent Connector Between Wings
- 3. The Front Wing: Generating Lift and Speed
- 4. The Rear Wing: Balancing Act and Stability Control
- 5. The Board: Your Floating Launchpad
- 🎯 Matching Your Gear: Selecting the Right Hydrofoil Setup for Your Style
- Wing Foiling vs. Kite Foiling: How Components Differ by Discipline
- Beginer vs. Advanced: Choosing the Right Wing Size and Aspect Ratio
- Mast Length Matters: Low Profile vs. High Altitude Riding
- 🛠️ Dialing It In: Tuning Your Hydrofoil for Peak Performance
- Mast Positioning: Finding the Sweet Spot
- Rear Wing Shimming: Fine-Tuning Pitch and Stability
- Front Wing Selection for Specific Conditions
- 🚫 Common Setup Mistakes & How to Fix Them
- Mast Placement Errors: Too Far Forward or Back?
- Choosing the Wrong Front Wing for Your Skill Level
- Ignoring Rear Wing Adjustments and Shim Effects
- Using the Wrong Board Volume for Your Weight
- Not Marking Your Perfect Setup for Future Sessions
- 🌬️ The Physics of Flight: Understanding Lift, Drag, and Stall
- 🏄 ♂️ Real Talk: Stories from the Hydrofoil Lineup
- ❓ FAQ: Getting Started with Hydrofoil Mechanics
- 🏁 Final Thoughts: Mastering Your Hydrofoil Setup
- Conclusion
- Recommended Links
- Reference Links
⚡️ Quick Tips and Facts
Before we dive into the nitty-gritty of carbon fiber and aluminum alloys, let’s get the “aha!” moments out of the way. If you’re reading this, you’ve probably seen someone gliding silently above the chop, looking like they’re defying gravity. Here’s the scoop:
- It’s All About Lift: Just like an airplane wing, a hydrofoil generates lift as water flows over it. Once that lift exceeds the weight of you and the board, you fly.
- The “Sweet Spot”: There is a specific speed range where the foil works best. Go too slow, and you drop; go too fast without adjusting, and you might pitch forward. Finding that balance is the holy grail.
- Materials Matter: Carbon fiber is the gold standard for high-performance foils because it’s stiff and light, while aluminum is the budget-friendly, durable workhorse for beginners.
- One Size Does Not Fit All: A foil setup that works for a 180lb rider in 10 knots of wind will be a disaster for a 120lb rider in 25 knots. Customization is key.
- Safety First: A hydrofoil is essentially a sharp metal stick moving at speed. Always wear a helmet and impact vest when learning.
For a deeper dive into the different platforms you can choose from, check out our guide on What are the different types of hydrofoil boards?.
🌊 From Submarines to Surf: The Evolution of Hydrofoil Technology
You might think hydrofoiling is the new kid on the block, but the concept is actually as old as the hills (or rather, the sea). The idea of lifting a hull out of the water to reduce drag dates back to the early 20th century with seaplanes and hydrofoil boats.
“The moment the board lifts clear of the water for the first time, everything changes. The noise disappears, the drag vanishes, and you’re left with a sensation that’s difficult to compare to anything else.” — eFoilgc
In the world of surfing and wind sports, the technology didn’t really take off until the late 90s and early 20s. Pioners like Dave Kalama and Manu Bertin started experimenting with modified surfboards and kite foils. They realized that by adding a wing underneath, they could ride in waves that were too small for traditional surfing or in winds too light for planing.
Fast forward today, and we have modular systems where you can swap wings, masts, and fuselages like Lego bricks. The evolution has moved from clunky, welded aluminum pieces to sleek, pre-preg carbon fiber assemblies that weigh less than a bag of chips.
🚀 What Is a Hydrofoil and How Does It Defy Gravity?
So, how does a board with a stick under it actually fly? It’s not magic; it’s Bernoulli’s Principle and Newton’s Third Law working in tandem.
When water flows over the curved surface of the front wing, it travels faster over the top than the bottom. This creates a pressure difference: lower pressure on top, higher pressure on the bottom. This pressure difference generates an upward force called lift.
Simultaneously, the rear wing (or stabilizer) provides a downward force to balance the board, preventing it from flipping over. The mast connects these two wings to the board, acting as the bridge between the water and the air.
The Physics of Flight in Plain English
Imagine you’re holding your hand out of a car window. Tilt it slightly up, and your hand rises. That’s a hydrofoil in action, but instead of air, it’s water (which is 80 times denser, so the forces are massive!).
- Lift: The upward force generated by the front wing.
- Drag: The resistance the foil creates as it moves through water.
- Stall: When the angle of attack is too steep, the water flow separates from the wing, and lift disappears instantly. This is the dreaded “drop.”
🔧 The Anatomy of Flight: Key Components of a Hydrofoil System
Let’s break down the machine. A hydrofoil isn’t just one piece; it’s a symphony of components working in harmony. If one instrument is out of tune, the whole performance suffers.
1. The Mast: Your Vertical Lifeline to the Sky
The mast is the vertical pillar that connects the fuselage to the board. It determines your riding height.
- Short Masts (40-60cm): Great for beginners, wave riding, and tight turns. They keep you close to the water, making it easier to recover from a fall.
- Long Masts (75-90cm+): Essential for downwinders, racing, and chopy conditions. They keep the board high above the waves, but they require more speed to get up and are harder to control.
Pro Tip: If you’re just starting, don’t buy the longest mast you can find. You’ll spend more time falling than flying.
2. The Fuselage: The Silent Connector Between Wings
The fuselage is the horizontal bar that holds the front and rear wings together. It dictates the aspect ratio and the stability of the setup.
- Long Fuselage: More stable, easier to learn, but slower to turn.
- Short Fuselage: More agile, better for frestyle and tight turns, but requires more skill to balance.
3. The Front Wing: Generating Lift and Speed
This is the star of the show. The front wing generates the majority of the lift. Its size and shape determine your low-end speed and top-end performance.
- High Aspect Ratio: Long and narrow. Fast, efficient, great for racing and downwinders, but harder to turn.
- Low Aspect Ratio: Short and wide. Slow, stable, great for beginners and wave riding.
4. The Rear Wing: Balancing Act and Stability Control
The rear wing (stabilizer) is often overlooked, but it’s crucial. It provides the counter-balance to the front wing.
- Large Rear Wing: More stability, easier to control, but creates more drag.
- Small Rear Wing: Less drag, more speed, but requires precise weight distribution.
5. The Board: Your Floating Launchpad
While the foil does the flying, the board is your platform. It needs enough volume to support your weight when you’re not flying, but not so much that it creates drag when you are.
- Volume: Beginners need 10L+; advanced riders can go down to 60L or less.
- Shape: Wide tails offer stability; narrow tails offer speed.
🎯 Matching Your Gear: Selecting the Right Hydrofoil Setup for Your Style
Choosing the right components is like picking the right shoes. You wouldn’t wear running spikes for a marathon, and you shouldn’t use a racing foil for your first wave session.
Wing Foiling vs. Kite Foiling: How Components Differ by Discipline
While the physics are the same, the gear differs based on how you get your power.
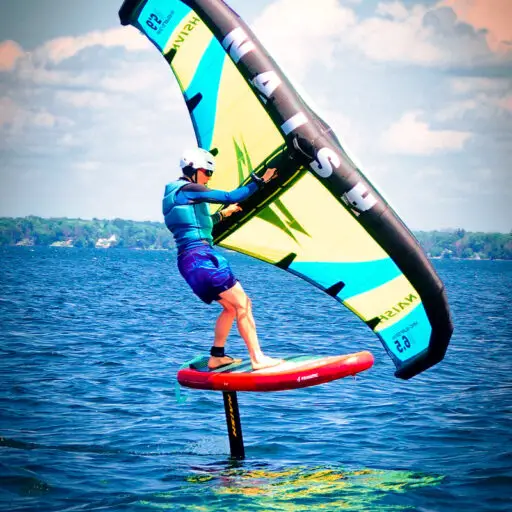
- Wing Foiling: Uses a handheld wing. Foils tend to be slightly larger and more stable to handle the variable power of the wing.
- Kite Foiling: Uses a kite. Foils are often more specialized for speed and upwind performance.
- Surf Foiling: Uses waves. Foils are designed for quick turns and maneuverability.
Beginner vs. Advanced: Choosing the Right Wing Size and Aspect Ratio
If you’re new to the game, low aspect ratio is your best friend. It gives you a wider range of speeds and more forgiveness.
- Beginer: 150cm² – 20cm² front wing, 40-50cm mast.
- Intermediate: 10cm² – 150cm² front wing, 60-75cm mast.
- Advanced: <10cm² front wing, 75cm+ mast.
Mast Length Matters: Low Profile vs. High Altitude Riding
We’ve all seen the videos of riders flying 3 feet above the water. It looks cool, but it’s not always practical.
- Low Profile: Better for learning, wave riding, and crowded lineups.
- High Altitude: Better for downwinders, open ocean, and avoiding chop.
🛠️ Dialing It In: Tuning Your Hydrofoil for Peak Performance
Once you have your gear, the real fun begins: tuning. A well-tuned foil feels like an extension of your body.
Mast Positioning: Finding the Sweet Spot
The position of the mast on the board is critical.
- Too Far Forward: The board will pitch up, and you’ll struggle to get on foil.
- Too Far Back: The board will pitch down, and you’ll stall.
- The Sweet Spot: Usually around the middle of the board’s volume, but it depends on your weight and the foil size.
Rear Wing Shimming: Fine-Tuning Pitch and Stability
Some foils come with shims (thin wedges) that you can place under the rear wing.
- Positive Shim: Tilts the rear wing up, increasing stability and making it easier to get on foil.
- Negative Shim: Tilts the rear wing down, increasing speed and responsiveness.
Front Wing Selection for Specific Conditions
- Light Wind: Go big. A larger front wing generates lift at lower speeds.
- Strong Wind: Go small. A smaller front wing reduces drag and prevents you from flying uncontrollably.
- Chopy Water: Go for a larger rear wing for stability.
🚫 Common Setup Mistakes & How to Fix Them
Even the pros make mistakes. Here are the most common pitfalls we see at the beach.
Mast Placement Errors: Too Far Forward or Back?
The Symptom: You can’t get on foil, or you stall immediately.
The Fix: Move the mast 1-2cm at a time. Start slightly forward and move back until you find the balance.
Choosing the Wrong Front Wing for Your Skill Level
The Symptom: You feel like you’re fighting the board, or you can’t get up to speed.
The Fix: If you’re struggling, go bigger. If you’re flying too fast and can’t control it, go smaller.
Ignoring Rear Wing Adjustments and Shim Effects
The Symptom: The board feels unstable or “tippy.”
The Fix: Add a shim to the rear wing to increase stability. It’s a cheap and easy fix.
Using the Wrong Board Volume for Your Weight
The Symptom: You sink immediately when you stop, or the board is too heavy to carry.
The Fix: Match your board volume to your weight. A general rule is 10-15 liters per 10kg of body weight for beginners.
Not Marking Your Perfect Setup
The Symptom: You spend 20 minutes adjusting the mast every session.
The Fix: Use a permanent marker to mark the perfect position on your board. You’ll thank yourself later.
🌬️ The Physics of Flight: Understanding Lift, Drag, and Stall
Let’s geek out for a second. Understanding the physics will make you a better rider.
- Lift: Generated by the pressure difference. More speed = more lift.
- Drag: The resistance. More surface area = more drag.
- Stall: When the angle of attack is too steep, the water flow separates from the wing. The lift disappears, and you drop.
The Angle of Attack: This is the angle between the chord line of the wing and the oncoming water. Too steep, and you stall. Too shallow, and you don’t generate enough lift.
🏄 ♂️ Real Talk: Stories from the Hydrofoil Lineup
I remember my first time on a foil. I was convinced I’d never get it. I spent an hour just falling, falling, and falling. Then, suddenly, I felt that lift. The board rose, the water noise vanished, and I was gliding. It was like magic.
But it wasn’t just me. We’ve all been there. One minute you’re a mess of flailing limbs, and the next, you’re flying. That’s the beauty of hydrofoiling. It’s a journey of trial and error, but the reward is worth it.
❓ FAQ: Getting Started with Hydrofoil Mechanics

How does the mast length affect hydrofoil board performance?
The mast length determines your riding height. Shorter masts (40-60cm) are easier to control and better for beginners and wave riding. Longer masts (75cm+) are for advanced riders, downwinders, and chopy conditions.
Read more about “🚀 12 Best Hydrofoil Boards for Every Rider (2026)”
What materials are best for constructing a hydrofoil board wing?
Carbon fiber is the best material for performance due to its stiffness and light weight. Aluminum is a great option for beginners because it’s durable and affordable.
Read more about “🚀 Mastering Hydrofoil Lift-to-Drag Ratio: The Ultimate Guide (2026)”
Can beginners use a hydrofoil board and what size should they start with?
Yes! Beginners should start with a large front wing (150cm²+) and a short mast (40-50cm). This provides maximum stability and lift at low speeds.
How do you adjust the foil angle of attack for different riding conditions?
You can adjust the angle of attack by changing the shim under the rear wing or by adjusting your weight distribution. For light wind, you want a higher angle; for strong wind, a lower angle.
Read more about “🌊 Can Hydrofoils Conquer Chopy Water? (2026)”
🏁 Final Thoughts: Mastering Your Hydrofoil Setup
So, there you have it. The key components of a hydrofoil board and how they work together. From the mast to the front wing, every piece plays a crucial role in your flight.
Remember, there’s no “perfect” setup. It’s all about finding what works for you and your conditions. Don’t be afraid to experiment, make mistakes, and learn from them. That’s the fun part!
Ready to take the plunge? Check out our Hydrofoil Equipment Reviews for the latest gear, or dive into Advanced Hydrofoiling Techniques to take your skills to the next level.
Conclusion

Hydrofoiling is more than just a sport; it’s a journey of discovery. By understanding the key components of your setup and how they work together, you can unlock a world of smooth, silent flight. Whether you’re a beginner looking to get your first flight or an advanced rider chasing the perfect downwinder, the right gear and tuning can make all the difference.
Our Recommendation: Start with a modular system from a reputable brand like Axis, Gorilla, or Slingshot. These brands offer a wide range of components that allow you to grow with the sport. Don’t be afraid to invest in carbon fiber if you’re serious about performance, but don’t overlook the durability of aluminum for your first setup.
Remember, the best foil is the one that gets you out on the water. So, grab your gear, head to the beach, and start flying!
Recommended Links
👉 Shop Hydrofoil Boards on:
- Amazon: Hydrofoil Boards
- Walmart: Hydrofoil Boards
- Slingshot Official: Slingshot Hydrofoils
👉 Shop Foil Components on:
- Amazon: Hydrofoil Wings
- Axis Foils: Axis Foils
- Gorilla Foils: Gorilla Foils
Books & Guides:
- The Complete Guide to Hydrofoiling on Amazon
Reference Links
- eFoilgc: Beginners Guide to eFoiling
- Mackiteboarding: Which Complete Wing Foil Package is Right for Me?
- Hydrofoiling.org: Hydrofoil Basics
- Hydrofoiling.org: Hydrofoil Equipment Reviews
- Hydrofoiling.org: Advanced Hydrofoiling Techniques
- Hydrofoiling.org: Hydrofoil Board Selection
- Hydrofoiling.org: Hydrofoil Brands Comparison