Support our hydrofoil educational content for free when you purchase through links on our site. Learn more
🛠️ Hydrofoil Board Maintenance & Repair Guide: Fly Longer, Break Less (2026)


The single most effective way to extend your foil’s life is a fresh water rinse within five minutes of exiting the ocean combined with blue thread locker on every bolt. This simple Hydrofoil board maintenance and repair guide transforms a $2,0 investment from a seasonal rental into a decade-long companion.
We learned this the hard way when a seized mast tore the T-box out of our favorite board after a single season of saltwater neglect. It wasn’t a manufacturing defect; it was a failure to respect the galvanic corrosion that eats aluminum alive in minutes.
Did you know that salt crystals left to dry in your wing joints act like sandpaper, grinding away protective anodization every time you assemble your gear? That microscopic abrasion is what turns smooth flights into wobbly disasters.
Key Takeaways
- Immediate Action: Rinse with fresh water within 5 minutes of every session to prevent galvanic corrosion.
- Critical Hardware: Always use Loctite 243 (Blue) thread locker and marine anti-seize on all bolts to prevent seizing.
- Damage Control: Inspect for delamination and stress cracks before every ride; never ride with a wet core.
- Storage: Disassemble your foil completely for off-season storage to relieve stress and prevent hidden corrosion.
- Repair Reality: Small dings can be fixed with UV-cure resin, but structural cracks require professional attention.
Table of Contents
- ⚡️ Quick Tips and Facts
- 📜 From Surfing to Sky: The Evolution of Hydrofoil Board Technology
- 🛠️ Essential Hydrofoil Board Maintenance: A Step-by-Step Guide
- 🚑 Hydrofoil Board Repair Mastery: Fixing Common Damage
- 🧰 The Ultimate Hydrofoil Maintenance Toolkit: What You Actually Need
- 🧪 Chemicals and Cleaners: What to Use and What to Avoid
- ❄️ Winter Storage and Off-Season Care for Your Foil Setup
- 🚀 Troubleshooting: Why Your Foil is Wobling, Draging, or Squeaking
- 🏆 Top Brands and Gear We Trust for Long-Lasting Foils
- 📊 Maintenance Schedule: Daily, Weekly, and Seasonal Checklists
- 🌊 Conclusion
- 🔗 Recommended Links
- ❓ FAQ
- 📚 Reference Links
⚡️ Quick Tips and Facts
Before we grab our wrenches and dive into the nitty-gritty of keeping your foil flying, let’s hit the pause button on the “rinse and repeat” cycle you might be doing wrong. We’ve seen too many beautiful carbon wings turn into pitted, seized messes because of a few simple oversights.
Here is the Hydrofoiling™ rapid-fire truth bomb:
- The 5-Minute Rule: If you don’t rinse your foil with fresh water within 5 minutes of exiting the ocean, you are essentially marinating your aluminum mast in a saltwater brine that accelerates galvanic corrosion. It’s not just “a little rust”; it’s structural suicide.
- The “Blue” vs. “Red” Trap: Never, ever use red thread locker (Loctite 271) on your foil bolts. It’s designed to be permanent. You want Loctite 243 (Blue), which holds against vibration but lets you take it apart when you need to. Using red means you’ll be drilling out stripped threads next season.
- Torque Matters: Overtightening is just as bad as loosening. Stripping the aluminum insert in your board is a nightmare that often requires a helicoil repair or a new board. Stick to the manufacturer’s specs (usually 15–20 Nm for mast bolts).
- Salt is the Enemy: Salt crystals are abrasive. If you let them dry in the joint between your fuselage and mast, they act like sandpaper every time you assemble or disassemble, grinding away the protective anodization.
- Carbon is Fragile: A tiny ding on a carbon wing isn’t just cosmetic. It can lead to delamination and catastrophic failure under load. If you see a “spiderweb” crack, stop riding immediately.
Did you know? According to marine corrosion studies, the electrochemical reaction between aluminum and stainless steel in saltwater can degrade structural integrity in as little as 6 to 12 months if left unprotected. That’s why we treat our anti-seize like it’s liquid gold.
📜 From Surfing to Sky: The Evolution of Hydrofoil Board Technology
To understand how to fix it, you have to understand what you’re riding. Hydrofoiling isn’t just a new fad; it’s the culmination of decades of hydrodynamic experimentation.
We started with the hydrofoil surfboards of the 1960s, where pioneers like Bob Babbitt experimented with lifting foils to reduce drag. Fast forward to the 2010s, and the technology exploded with the introduction of carbon fiber and modular systems. Suddenly, weren’t just gliding; were flying.
The shift from heavy aluminum foils to lightweight carbon fiber changed everything. Carbon offers incredible stiffness-to-weight ratios, allowing for higher speeds and more responsive turns. However, this material sensitivity means our maintenance game has to be sharper. We can’t just slap some wax on it and hope for the best.
The evolution also brought us modular connectivity. Today’s foils from brands like Axis, Slingshot, and Armstrong allow you to swap wings, fuselages, and masts. This modularity is a dream for performance but a nightmare for maintenance if you don’t keep those connection points clean.
Curious about the physics? How does a board that weighs 20 pounds lift a 20-pound rider? It’s all about lift generation and drag reduction. If you want to dive deeper into the mechanics, check out our breakdown on What is hydrofoiling and how does it work?.
The transition from fixed foils to the T-box and US Box systems also introduced new failure points. The T-box, while secure, can crack if the board is dropped or if the mast is overtightened. Understanding this history helps us appreciate why a simple rinse is so critical—it’s the difference between a board that lasts a decade and one that lasts a summer.
🛠️ Essential Hydrofoil Board Maintenance: A Step-by-Step Guide
Okay, you’ve got the history, but what do you actually do when you get home? We’ve broken this down into a ritual that should become as automatic as brushing your teeth.
🧼 Post-Rinse Rituals: Washing Your Foil and Board
This is the Golden Rule of hydrofoiling. If you skip this, the rest of this guide is useless.
- Fresh Water Flush: As soon as you step off the board, grab a hose or a bucket of fresh water. Rinse the entire setup. Pay special attention to the screw holes and the connection points where the mast meets the board and the wings meet the fuselage.
- Disassemble (If Possible): If you have the time and the space, take the foil apart. Salt loves to hide in the crevices of the fuselage-to-wing joint.
- The “Soak” Method: For stubborn salt buildup, soak your aluminum components in a 1:1 solution of warm fresh water and white vinegar for 15–30 minutes. This neutralizes the salt without damaging the anodization. Note: Do not soak carbon parts for extended periods.
- Dry Thoroughly: Use a microfiber towel to wipe everything down. Do not let it air dry. Trapped moisture is the breeding ground for corrosion.
Pro Tip: We once saw a rider try to “save time” by just rinsing the board and leaving the foil assembled. Three months later, the mast was seized so tight to the fuselage that it required a hydraulic press to separate. Don’t be that rider.
🔍 Inspecting the Fuselage and Mast for Stress Cracks
Once clean and dry, it’s time for the pre-ride inspection.
- Visual Check: Look for any discoloration, white powder (aluminum oxide), or hairline cracks.
- The “Twist” Test: Hold the mast and fuselage and try to twist them. There should be zero play. If you feel any movement, your bolts are loose or the threads are stripped.
- Carbon Check: Run your fingers over the carbon surfaces. You’re looking for “soft spots” or areas that feel spongy, which indicate delamination.
- Mast Integrity: Check the base of the mast where it enters the board. This is a high-stress area. If you see cracks here, do not ride.
🔧 Tightening Bolts and Checking Threadlocker Integrity
This is where many people mess up.
- Use a Torque Wrench: Guessing is not an option. Most manufacturers specify 15–20 Nm for mast bolts and 10–15 Nm for wing bolts.
- Threadlocker: Apply Loctite 243 (Blue) to the threads before assembly. This prevents vibration from loosening the bolts.
- Anti-Seize: Apply a thin layer of marine anti-seize (like Tef-Gel or Permatex) to the threads. This prevents galvanic corrosion between the dissimilar metals (aluminum mast, stainless steel bolts).
Warning: “More is not better.” A thin film is all you need. Excess anti-seize can attract dirt.
🛡️ Wing Care: Dings, Delamination, and Edge Repair
Your wings are the most vulnerable part of the setup.
- Leading Edge: This is the first point of impact. Check for nicks or separation of the carbon layers.
- Trailing Edge: Sharp trailing edges can cause cavitation and noise. If they are razor-sharp, lightly sand them with 60–10 grit paper at a 30-degree angle to dull the edge slightly.
- Ding Repair: Small dings can be filled with UV-cure resin (like Solarez). For larger dings exposing the foam core, you need a two-part epoxy repair.
🌊 Deck Pad and Handle: Preventing Slips and Splits
Don’t forget the board itself!
- Deck Pad: Check for peling edges or bubbles. A loose pad can cause you to slip during a takeoff.
- Handle: If your board has a handle, ensure it’s secure. A loose handle can be a major safety hazard if you fall.
- Foil Box: Inspect the foil box for cracks. This is a critical structural component. If the box cracks, the board is likely done.
🚑 Hydrofoil Board Repair Mastery: Fixing Common Damage
Sometimes, despite your best efforts, things break. Here is how to handle the most common disasters without losing your mind (or your board).
🔨 Epoxy Resin Magic: Patching Core Blows and Cracks
Scenario: You hit a rock, and there’s a hole exposing the foam core.
- Assess: If the core is wet, you have a problem. Waterlogged foam is heavy and can lead to delamination.
- Dry: You must dry the core completely. This might mean drilling a small hole to let water out and using a hairdryer (on low heat) to dry it out.
- Fill: Mix a two-part epoxy with a filler (like microbalons or silica) to create a paste.
- Apply: Pack the epoxy into the hole, overfilling slightly.
- Cure: Let it cure according to the manufacturer’s instructions.
- Sand: Sand it smooth, starting with coarse grit and moving to fine grit.
Warning: Never ride a board with a wet core. It will add significant weight and can cause the board to break in half under load.
🦠 Dealing with Water Intrusion and Mold
If you smell a musty odor coming from your board, you have water intrusion.
- Drain: Drill small drain holes in the lowest point of the board (if it doesn’t have one already).
- Dry: Let the board dry in a warm, dry place. Use a dehumidifier if necessary.
- Prevent: Ensure all plugs and inserts are sealed properly.
🔩 Replacing Broken Mast Inserts and T-Boxes
This is a job for the brave (or the desperate).
- Remove: You may need to drill out the old insert.
- Clean: Clean the hole thoroughly.
- Install: Use a helicoil insert or a new T-box insert. This requires precision and the right tools.
- Recommendation: If you aren’t comfortable with this, take it to a professional shaper. A botched repair can ruin the board.
🎨 Sanding and Finishing: Blending Repairs Seamlessly
- Wet Sanding: Always wet sand to prevent clogging the sandpaper and to reduce dust.
- Grit Progression: Start with 120 grit, move to 20, then 40, and finish with 60 or higher for a smooth finish.
- Polishing: Use a marine polish to restore the shine.
🧰 The Ultimate Hydrofoil Maintenance Toolkit: What You Actually Need
You can’t fix a foil with a butter knife. Here is the Hydrofoiling™ essential toolkit:
- Torque Wrench: 1/4″ drive, adjustable range 5–25 Nm.
- Hex Keys: Metric set (2mm, 2.5mm, 3mm, 4mm, 5mm, 6mm).
- Thread Locker: Loctite 243 (Blue).
- Anti-Seize Lubricant: Permatex or Tef-Gel.
- Microfiber Towels: A pack of 10.
- Soft Brushes: For cleaning crevices.
- Epoxy Repair Kit: Two-part epoxy with filler.
- UV-Cure Resin: Solarez for quick fixes.
- Sandpaper: Wet/dry, ranging from 120 to 10 grit.
- Spare Bolts: Always carry a spare set of mast and wing bolts.
- Wing Covers: Neoprene covers or pool noodles for transport.
🧪 Chemicals and Cleaners: What to Use and What to Avoid
Not all chemicals are created equal. Here is what you should and shouldn’t use.
| Chemical Type | Recommended | Avoid | Why? |
|---|---|---|---|
| Cleaner | Mild biodegradable soap, Vinegar solution | Bleach, Harsh acids | Bleach damages carbon resin and anodization. |
| Lubricant | Tef-Gel, Permatex Anti-Seize | WD-40 (standard) | Standard WD-40 is a solvent, not a lubricant, and can attract dirt. |
| Resin | Solarez (UV), Two-part Epoxy | Super Glue (Cyanoacrylate) | Super glue is brittle and not suitable for structural repairs. |
| Polish | Marine wax, UV-resistant polish | Automotive wax (some) | Some automotive waxes contain abrasives that can damage carbon. |
Did you know? Using the wrong cleaner can void your warranty. Always check the manufacturer’s guidelines before applying any chemical.
❄️ Winter Storage and Off-Season Care for Your Foil Setup
When the season ends, your foil needs a vacation too.
- Disassemble: Never store the foil assembled. This relieves stress on the components.
- Clean: Give it a deep clean. Remove all salt, sand, and grime.
- Lubricate: Apply a fresh coat of anti-seize to all threads.
- Store: Keep it in a cool, dry place. Avoid attics or garages with extreme temperature fluctuations.
- Cover: Use a padded board bag and foil covers to protect against UV and dings.
- Check: Inspect every few months to ensure no corrosion has started.
🚀 Troubleshooting: Why Your Foil is Wobling, Draging, or Squeaking
Nothing kills the vibe like a noisy, wobbly foil. Here is how to diagnose the problem.
- Wobling:
Cause: Loose bolts, damaged wings, or bent mast.
Fix: Tighten bolts, inspect wings for damage, check mast for straightness. - Dragging:
Cause: Incorrect wing angle, fouled prop (eFoil), or water in the board.
Fix: Adjust wing angle, check prop, ensure board is dry. - Squeaking/Whistling:
Cause: Sharp trailing edges or loose components.
Fix: Dull trailing edges, tighten all bolts. - Reduced Power (eFoil):
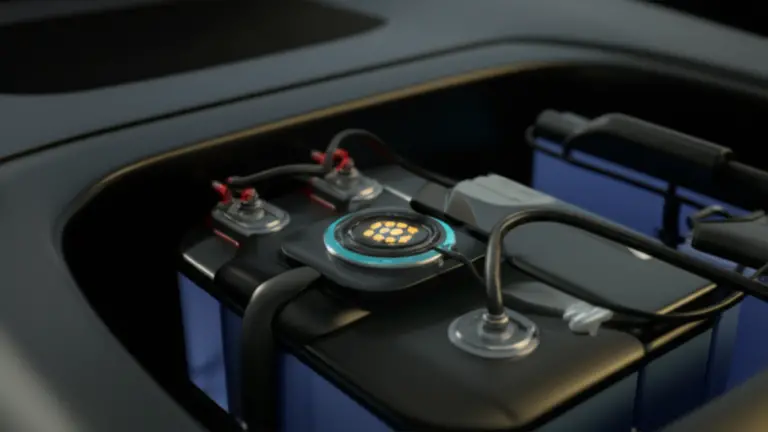
Cause: Dirty connectors, outdated firmware, or aging battery.
Fix: Clean contacts, update firmware, check battery health.
🏆 Top Brands and Gear We Trust for Long-Lasting Foils
We’ve tested a lot of gear, and these brands consistently deliver quality and durability.
- Axis: Known for their robust aluminum masts and high-performance carbon wings. Their T-box system is industry standard.
- Slingshot: Pioners in the industry, offering a wide range of foils for all skill levels. Their Carbon wings are incredibly responsive.
- Armstrong: Famous for their modular design and high-quality titanium hardware.
- Fliteboard: The leader in eFoil technology, with excellent battery management systems.
- Lift Foils: Known for their durable construction and user-friendly design.
👉 Shop
- Axis: Amazon | Official Site
- Slingshot: Amazon | Official Site
- Armstrong: Amazon | Official Site
- Fliteboard: Official Site
- Lift Foils: Official Site
📊 Maintenance Schedule: Daily, Weekly, and Seasonal Checklists
Consistency is key. Here is a schedule to keep your foil in top shape.
| Frequency | Task | Details |
|---|---|---|
| After Every Ride | Rinse | Fresh water rinse of all components. |
| Inspect | Check for dings, cracks, and loose bolts. | |
| Dry | Wipe down with microfiber towel. | |
| Weekly | Deep Clean | Disassemble and clean threads. Apply anti-seize. |
| Torque Check | Verify all bolts are at spec. | |
| Monthly | Full Inspection | Check for corrosion, delamination, and wear. |
| Lubricate | Re-apply anti-seize and thread locker. | |
| Seasonal | Storage Prep | Deep clean, disassemble, and store properly. |
| Professional Check | Consider a professional inspection for major components. |
Remember: A loose mast bolt isn’t just annoying; it’s a safety hazard. Always check your torque settings before every ride.
🌊 Conclusion

So, there you have it. The complete guide to keeping your hydrofoil board flying high and your wallet from crying over repair bills. We started with the simple truth: neglect is the enemy. Whether it’s a quick rinse after a session or a deep dive into epoxy repairs, the effort you put into maintenance pays off in performance, safety, and longevity.
Remember, 90% of foil failures are preventable. By following the steps we’ve outlined—from the post-ride rinse to the seasonal storage—you can ensure your foil lasts for years, not just seasons. And if you do encounter a problem, don’t panic. Most issues can be fixed with the right tools and a little patience.
Final Thought: The ocean is unpredictable, but your gear doesn’t have to be. Treat your foil with respect, and it will reward you with countless hours of flight.
Now, go out there, rinse that foil, and catch some air!
🔗 Recommended Links
Ready to upgrade your gear or grab some repair supplies? Check out these trusted sources:
- Torque Wrenches: Amazon | Walmart
- Anti-Seize Lubricant: Amazon | Permatex Official
- Epoxy Repair Kits: Amazon | West System
- UV-Cure Resin: Amazon | Solarez Official
- Hydrofoil Board Bags: Amazon | Etsy
- Books on Composite Repair: Amazon
❓ FAQ

How often should I replace the mast and fuselage on my hydrofoil board?
There is no set expiration date, but regular inspection is crucial.
- Aluminum Masts: Check for hairline cracks and corrosion every season. If you see significant pitting or cracks, replace immediately.
- Carbon Masts: Inspect for delamination and soft spots. Carbon can last indefinitely if not damaged, but impact damage can compromise its integrity.
- Fuselages: Check for cracks and wear at the connection points. If the fuselage is bent or cracked, it’s time for a replacement.
Read more about “🌊 Hydrofoil Environmental Impact: The Surprising Truth (2026)”
What is the best epoxy resin for repairing carbon fiber hydrofoil wings?
For structural repairs, a two-part epoxy resin designed for carbon fiber is essential.
- West System: Known for its strength and versatility.
- System Three Resins: Excellent for marine applications.
- Solarez: Great for quick, non-structural fixes (UV-cure).
- Note: Always follow the manufacturer’s instructions for mixing and curing.
Read more about “How to Maintain & Repair Your Hydrofoil Board: 10 Pro Tips (2025) 🛠️”
How do I prevent corrosion on aluminum hydrofoil components in saltwater?
Prevention is key.
- Rinse Immediately: Fresh water after every use.
- Anti-Seize: Apply marine anti-seize to all threads and connection points.
- Disassemble: Store the foil disasembled to prevent salt buildup in crevices.
- Dry Thoroughly: Never let it air dry.
- Regular Inspection: Check for white powder (aluminum oxide) and clean immediately.
Read more about “Can You Hydrofoil in Fresh & Salt Water? (2026) 🌊”
Can I fix a cracked hydrofoil wing myself or do I need a professional?
It depends on the damage.
- Small Dings: You can fix these yourself with UV-cure resin or epoxy.
- Cracks in Wings/Mast: NEVER DIY. This is a critical safety risk. Seek a professional repair shop immediately.
- Delamination: Minor delamination can sometimes be fixed by injecting epoxy, but extensive delamination requires professional attention.
📚 Reference Links
- Hydrofoiling.org: How to Maintain & Care for Your Hydrofoil Board: The Ultimate 2026 Guide
- Axis Foils: Maintenance Guide
- Slingshot: Care & Maintenance
- Armstrong Foils: Support & Maintenance
- Permatex: Anti-Seize Lubricant Info
- West System: Epoxy Repair Guide
- Solarez: UV Resin Instructions