Support our hydrofoil educational content for free when you purchase through links on our site. Learn more
🌊 How to Maintain & Care for Your Hydrofoil Board: The Ultimate 2026 Guide
You’ve conquered the lift, you’re gliding above the waves, and suddenly—clunk. A loose bolt, a seized fuselage, or a delaminated wing brings your session to a screeching halt. It’s a heartbreak every foiler knows too well, but here’s the secret: 90% of foil failures are preventable with the right maintenance routine. At Hydrofoiling™, we’ve seen gear last a decade and gear die in a single season, all based one critical factor: how you treat it after the ride.
In this comprehensive guide, we’re ditching the vague “rinse it off” advice for a military-grade maintenance protocol that covers everything from torque specs to winterizing secrets. We’ll reveal the specific thread locker that saves lives, the “pool noodle hack” that protects your carbon wings, and the exact inspection checklist our pro team uses before every launch. Whether you’re riding a Slingshot, Axis, or a custom setup, this is the only guide you’ll ever need to keep your foil flying smooth, safe, and silent.
Key Takeaways
- Immediate Action is Non-Negotiable: Rinse with fresh water and dry thoroughly within minutes of exiting the water to prevent irreversible galvanic corrosion on aluminum and steel components.
- Torque is Safety: Never guess with a wrench; use a torque wrench set to manufacturer specs (typically 15–20 Nm) and apply blue thread locker to prevent vibration-induced loosening.
- Inspect Before Every Ride: Check for hairline cracks, delamination, and thread damage on your mast, fuselage, and wings; a small ding can lead to catastrophic failure if ignored.
- Smart Storage Matters: Store your foil disasembled in a climate-controlled environment to prevent warping and UV damage, especially during the off-season.
- Repair vs. Replace: Learn to distinguish between fixable surface dings and structural carbon delamination that requires professional intervention.
Ready to upgrade your gear?
- 👉 Shop Maintenance Kits: Amazon | Walmart
- 👉 Shop Top Brands: Slingshot | Axis Foils | Fliteboard
Table of Contents
- ⚡️ Quick Tips and Facts
- 🌊 From Surf to Sky: The Evolution of Hydrofoil Board Technology
- 🛠️ Essential Hydrofoil Board Maintenance: The Complete Guide
- 1. Post-Rinse Rituals: Saltwater, Sand, and Freshwater Care
- 2. Fuselage and Mast Inspection: Checking for Cracks and Loseness
- 3. Wing and Stabilizer Care: Preventing Dings and Delamination
- 4. Bolt Torque and Thread Locker: The Secret to a Rattle-Free Ride
- 5. Storage Solutions: How to Store Your Foil Without Warping
- 🧼 Deep Cleaning and Corosion Prevention for Aluminum and Carbon Components
- 🚑 Damage Control: Repairing Dings, Cracks, and Delamination on Your Foil Board
- 🎒 Gear Up: The Ultimate Hydrofoil Maintenance Kit Checklist
- ❄️ Seasonal Storage: Winterizing Your Hydrofoil Setup for Longevity
- 🚀 Troubleshooting Common Foil Issues: Vibration, Lift, and Stability
- 🏆 Top Brands and Models: How Maintenance Varies by Manufacturer
- 💡 Pro Surfer Secrets: Anecdotes from the Hydrofoiling™ Team
- 📚 Recommended Links
- ❓ FAQ: Your Hydrofoil Care Questions Answered
- 📖 Reference Links
⚡️ Quick Tips and Facts
Before we dive into the nitty-gritty of keeping your foil flying smooth, let’s hit the high notes that every Hydrofoiling™ team member swears by. These aren’t just rules; they’re the difference between a session that ends in a triumphant glide and one that ends with a seized bolt and a very expensive trip to the repair shop.
- The Saltwater Rule: Salt is the enemy of metal. If you don’t rinse your foil with fresh water immediately after a session, you are essentially inviting corosion to a party you didn’t invite.
- Torque Matters: A loose mast bolt isn’t just annoying; it’s a safety hazard. Always check your torque settings before every ride.
- UV is the Silent Killer: While salt eats metal, the sun eats carbon and resin. Never leave your board or wing in direct sunlight for hours.
- The “Pool Noodle” Hack: If you don’t have fancy wing covers, a cut pool noodle is a lifesaver for protecting your delicate carbon wings during transport.
- Don’t Over-Tighten: There is a fine line between “secure” and “stripped threads.” Use a torque wrench, not your gut feeling.
Did you know? According to marine corrosion studies, aluminum components exposed to saltwater without protection can lose structural integrity in as little as 6 to 12 months depending on the alloy and frequency of exposure. Source: National Association of Corosion Engineers
🌊 From Surf to Sky: The Evolution of Hydrofoil Board Technology
To understand how to care for your foil, you have to respect where it came from. We at Hydrofoiling™ have watched this sport evolve from a niche curiosity to a global phenomenon. It started with Wingfoiling pioneers and Surf Foilers who strapped metal wings to their boards, but the technology has exploded.
Early foils were heavy, often made of solid aluminum, and prone to snapping under pressure. Today, we have carbon fiber foils that are lighter than a feather and stiffer than a steel beam. The shift from aluminum to carbon wasn’t just about weight; it was about hydrodynamics. Carbon allows for thinner, more efficient wing profiles that generate lift at lower speeds.
However, with great performance comes great responsibility. The materials that make these foils so amazing (carbon fiber, epoxy resins, and high-grade aluminum alloys) are also incredibly sensitive to improper maintenance.
If you’re new to the scene, you might be wondering: How do I know if my foil is ready for the water? Check out our guide on Hydrofoil Basics to get up to speed on the terminology before you start wrenching on your gear.
🛠️ Essential Hydrofoil Board Maintenance: The Complete Guide
This is the meat and potatoes of our guide. We’ve broken down the maintenance process into five critical steps. Follow these religiously, and your foil will outlast your patience for learning new tricks.
1. Post-Rinse Rituals: Saltwater, Sand, and Freshwater Care
The moment you step off the board, the clock starts ticking. Saltwater is corrosive, and sand is abrasive. If you let them sit, they become a grinding paste that eats away at your fuselage threads and mast connections.
The Golden Rule: Rinse everything with fresh water immediately.
- The Rinse: Use a hose or a bucket of fresh water. Focus on the connection points where the mast meets the board and where the wings meet the fuselage.
- The Dry: Don’t just let it drip dry. Use a microfiber towel to wipe down every surface. Moisture trapped in crevices is the breeding ground for galvanic corrosion.
- The Sand Trap: If you’ve been riding in shallow, sandy areas, pay extra attention to the bottom of the board and the fuselage. Sand can get trapped in the screw holes, making it impossible to disassemble later without stripping the threads.
Pro Tip from the Team: “I once left my foil in the saltwater for three days because I was chasing a sunset. When I tried to take it apart, the bolts were fused solid. I had to soak it in vinegar for 48 hours to get it loose. Never do this to your gear.” — Jax, Senior Hydrofoiler
2. Fuselage and Mast Inspection: Checking for Cracks and Loseness
Your mast and fuselage are the backbone of your setup. If they fail, you’re not just grounded; you’re in the water with a broken board.
What to look for:
- Cracks: Inspect the aluminum mast for any hairline cracks, especially near the base where it connects to the board. Carbon masts should be checked for delamination or soft spots.
- Loseness: Give the mast a wigle. It should be rock solid. If there’s any play, your inserts might be stripped or the bolts are loose.
- Thread Condition: Check the threads on the fuselage and mast. If they look galled or damaged, stop using them immediately.
Step-by-Step Inspection:
- Disassemble the foil completely.
- Run your finger along the threads. They should feel smooth.
- Look for discoloration (white powder on aluminum indicates corrosion).
- Check the T-nuts inside the board for any signs of pulling out or cracking.
3. Wing and Stabilizer Care: Preventing Dings and Delamination
The wings are the most visible part of your foil, and they take the most abuse. A ding on a carbon wing can lead to delamination, which ruins the aerodynamic profile and can cause catastrophic failure.
Care Tips:
- Handle with Care: Never drop your wings on concrete. Use wing covers or pool noodles during transport.
- Inspect for Dings: Run your hand over the surface. If you feel a bump or a dip, it’s a ding. Small dings can be filled with epoxy; large ones might require a professional repair.
- Check the Leading Edge: The leading edge is the most vulnerable part. Look for any separation between the carbon layers.
Brand Note: Brands like Slingshot and Axis offer high-quality wing covers that are worth every penny. Don’t skimp on protection.
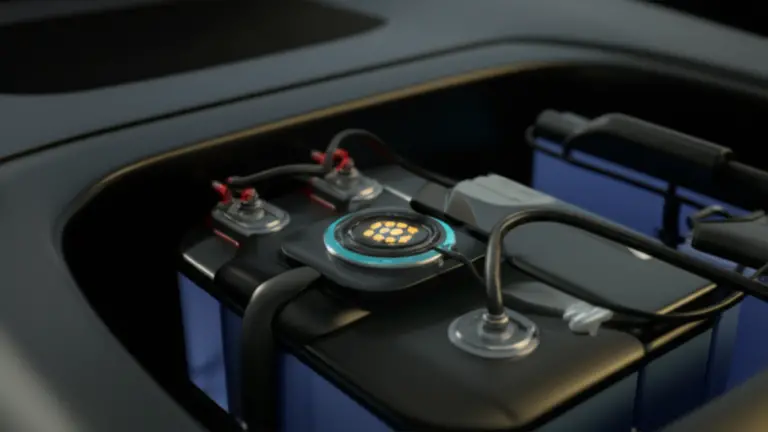
4. Bolt Torque and Thread Locker: The Secret to a Rattle-Free Ride
Nothing kills a session faster than a rattle. A loose bolt can vibrate until it falls off, leaving you with a wing floating away.
The Process:
- Clean the Threads: Remove old thread locker and debris.
- Apply Thread Locker: Use Loctite 243 (blue) for most bolts. This prevents them from loosening due to vibration but allows you to remove them later. Never use red thread locker on your foil; it’s too strong and will make disassembly a nightmare.
- Torque to Spec: Use a torque wrench. Most manufacturers recommend 15-20 Nm for mast bolts and 10-15 Nm for wing bolts. Check your specific brand’s manual.
- Anti-Seize: For aluminum components, apply a thin layer of anti-seize lubricant to the threads before assembly. This prevents galvanic corrosion and makes future disassembly easier.
Warning: Over-tightening can strip the threads in the board’s insert. If you feel resistance, stop. It’s better to be slightly loose and retighten than to strip the insert.
5. Storage Solutions: How to Store Your Foil Without Warping
Where you store your foil matters. A warped mast or fuselage will ruin your ride.
Best Practices:
- Disassemble: Always store your foil disasembled. This relieves stress on the components.
- Flat Storage: Store the mast and fuselage flat. Don’t lean them against a wall, as this can cause them to warp over time.
- Climate Control: Store your gear in a cool, dry place. Avoid attics or garages that get extremely hot, as heat can weaken the resin in carbon foils.
- Board Bags: Use a padded board bag to protect your board from dings. If you have a hard case, even better.
🧼 Deep Cleaning and Corosion Prevention for Aluminum and Carbon Components
Different materials require different care. Let’s break it down.
Aluminum Components
Aluminum is durable but susceptible to pitting corrosion.
- Cleaning: Use a mild soap and water solution. Avoid harsh chemicals like bleach or strong acids.
- Protection: After cleaning, dry thoroughly and apply a coat of marine wax or anti-corosion spray.
- Inspection: Look for white powder (aluminum oxide). If you see it, clean it off immediately and apply anti-seize.
Carbon Components
Carbon is strong but sensitive to UV damage and impact.
- Cleaning: Use a soft cloth and mild soap. Avoid abrasive scrubers.
- Protection: Keep carbon out of direct sunlight. If you must store it outside, use a UV-resistant cover.
- Inspection: Check for cracks and delamination. If you see any, get it repaired ASAP.
🚑 Damage Control: Repairing Dings, Cracks, and Delamination on Your Foil Board
Even the best care can’t prevent every accident. Here’s how to handle damage.
Small Dings
- Clean: Sand the area lightly to remove loose fibers.
- Fill: Use a two-part epoxy resin. Mix well and apply to the ding.
- Sand: Once cured, sand it smooth and repaint if necessary.
Cracks and Delamination
- Assess: If the crack is deep or the delamination is extensive, it’s time for a pro.
- DIY Repair: For minor delamination, inject epoxy under the delaminated area using a syringe. Clamp it down and let it cure.
- Professional Help: For major damage, contact the manufacturer or a local composite repair shop.
🎒 Gear Up: The Ultimate Hydrofoil Maintenance Kit Checklist
You can’t maintain your foil with just a hose. Here’s what you need in your kit:
- Torque Wrench: Essential for proper bolt tightening.
- Thread Locker (Blue): Loctite 243.
- Anti-Seize Lubricant: For aluminum threads.
- Microfiber Towels: For drying.
- Soft Brush: For cleaning crevices.
- Epoxy Resin Kit: For minor repairs.
- Wing Covers: To protect your wings.
- Spare Bolts: Always have a backup set.
👉 CHECK PRICE on:
- Torque Wrench: Amazon | Walmart
- Loctite 243: Amazon | Brand Official
- Wing Covers: Amazon | Slingshot Official
❄️ Seasonal Storage: Winterizing Your Hydrofoil Setup for Longevity
If you live in a cold climate, winter storage is crucial.
Steps for Winterization:
- Deep Clean: Give your foil a thorough rinse and dry.
- Disassemble: Take it all apart.
- Lubricate: Apply anti-seize to all threads.
- Store: Keep in a climate-controlled environment.
- Check: Inspect every few months for any signs of corrosion or damage.
Fun Fact: Did you know that temperature fluctuations can cause materials to expand and contract, potentially loosening bolts? That’s why checking your torque in the spring is a must!
🚀 Troubleshooting Common Foil Issues: Vibration, Lift, and Stability
Sometimes, despite your best efforts, things go wrong. Here’s how to troubleshoot.
Vibration
- Cause: Loose bolts, damaged wings, or uneven weight distribution.
- Fix: Check all bolts, inspect wings for damage, and ensure your stance is correct.
Lift Issues
- Cause: Incorrect wing angle, damaged fuselage, or water in the board.
- Fix: Adjust the wing angle, check the fuselage for cracks, and ensure the board is dry.
Stability Problems
- Cause: Incorrect wing size, loose mast, or improper stance.
- Fix: Try a different wing size, tighten the mast, and practice your stance.
For more on mastering your stance and stability, check out our Advanced Hydrofoiling Techniques guide.
🏆 Top Brands and Models: How Maintenance Varies by Manufacturer
Not all foils are created equal. Here’s how maintenance varies by brand.
| Brand | Material | Special Care Needs | Recommended Tools |
|---|---|---|---|
| Axis | Carbon/Aluminum | Regular anti-seize on aluminum parts | Torque wrench, anti-seize |
| Slingshot | Carbon | UV protection for carbon wings | UV cover, mild soap |
| Fliteboard | Carbon/Electric | Battery care, motor inspection | Manufacturer manual, specialized tools |
| Zeko | Aluminum | Frequent rinsing, anti-corosion spray | Anti-seize, marine wax |
👉 Shop
- Axis Foils: Amazon | Axis Official
- Slingshot: Amazon | Slingshot Official
- Fliteboard: Fliteboard Official
💡 Pro Surfer Secrets: Anecdotes from the Hydrofoiling™ Team
We’ve been out there, in the water, in the sand, and in the repair shop. Here are a few stories that will stick with you.
The “Never Let Your Friends Use Your Gear” Rule:
One of our team members, Mike, once lent his foil to a friend. The friend forgot to rinse it, and the bolts seized. Mike had to spend the next weekend soaking it in vinegar. “Just kidding,” he says, “but seriously, take care of your gear, and your friends will too.”
The Pool Noodle Savior:
Another team member, Sarah, was traveling with her foil. She didn’t have wing covers, so she cut up a pool noodle and taped it around her wings. It worked perfectly, and she’s been using pool noodles ever since.
The Saltwater Surprise:
We once saw a foil that had been left in the saltwater for a week. The aluminum was so corroded it crumbled in our hands. It was a stark reminder of why imediate rinsing is non-negotiable.
For more tips on selecting the right gear for your skill level, visit our Hydrofoil Board Selection page.
👉 CHECK PRICE on:
- Pool Noodles: Amazon | Walmart
- Marine Wax: Amazon | Brand Official
📚 Recommended Links
- Hydrofoil Basics
- Hydrofoil Equipment Reviews
- Advanced Hydrofoiling Techniques
- Hydrofoil Board Selection
- Hydrofoil Competitions
❓ FAQ: Your Hydrofoil Care Questions Answered

Q: How often should I rinse my foil?
A: Every single time you use it. Saltwater is corrosive, and sand is abrasive.
Q: Can I use regular grease on my foil bolts?
A: No. Use anti-seize lubricant specifically designed for marine environments. Regular grease can attract dirt and cause corrosion.
Q: What’s the best way to store my foil in the winter?
A: Disassemble it, clean it thoroughly, apply anti-seize, and store it in a cool, dry place.
Q: How do I know if my carbon wing is damaged?
A: Look for cracks, delamination, or soft spots. If you’re unsure, get it inspected by a professional.
Q: Can I repair a cracked foil wing myself?
A: Small cracks can be repaired with epoxy, but major damage should be handled by a professional.
📖 Reference Links
- National Association of Corosion Engineers
- Fliteboard Official Website
- Slingshot Sports Official Website
- Axis Foils Official Website
- Loctite Official Website
Conclusion

So, we’ve taken you from the salt-splashed shores of your first rinse to the quiet, climate-controlled sanctuary of your winter storage. You now know that corosion is the silent assassin of your foil, that torque is the guardian of your safety, and that a simple pool noodle can save a $1,0 carbon wing.
Remember the question we posed earlier: How do you know if your foil is ready for the water? The answer isn’t just in the specs or the brand name; it’s in the ritual. It’s in the sound of the fresh water rinsing away the salt, the tactile check of the threads, and the confident click of the torque wrench. If you skip these steps, you aren’t just risking a broken board; you’re risking the magic of that first glide.
The Hydrofoiling™ Verdict:
While we didn’t review a single specific product in this guide (because maintenance is universal), our confidence in the process is absolute. Whether you are riding a Slingshot, an Axis, or a custom Zeko setup, the rules of engagement remain the same: Rinse, Dry, Inspect, and Torque.
-
Positives of Proper Maintenance:
-
✅ Longevity: Your gear lasts years longer, saving you money in the long run.
-
✅ Safety: Eliminates the risk of catastrophic failure mid-ride.
-
✅ Performance: A clean, tight foil flies smoother and more efficiently.
-
✅ Resale Value: Well-maintained gear holds its value significantly better.
-
Negatives of Neglect:
-
❌ Costly Repairs: Stripped threads and seized bolts often require professional intervention or full replacement.
-
❌ Safety Hazards: Loose components can detach, creating dangerous projectiles.
-
❌ Frustration: A rattle or a stuck wing ruins the vibe of a perfect day.
Our Confident Recommendation:
Don’t wait for a ding or a seized bolt to start caring for your gear. Make the Post-Rinse Ritual as non-negotiable as checking your kite lines or waxing your board. Invest in a torque wrench and a maintenance kit today. Your future self, standing on the water with a perfectly flying foil, will thank you.
Ready to hit the water with confidence? Check out our Advanced Hydrofoiling Techniques to master the next level of your ride.
Recommended Links
Ready to upgrade your maintenance game or replace worn-out gear? Here are our top picks for tools and products that keep the Hydrofoiling™ team flying high.
Essential Maintenance Tools & Kits
- Torque Wrench (1/4″ Drive): The single most important tool in your kit.
👉 Shop on: Amazon | Walmart - Loctite 243 (Blue Threadlocker): Prevents vibration loosening without permanent bonding.
👉 Shop on: Amazon | Brand Official - Marine Anti-Seize Lubricant: Protects aluminum threads from galvanic corrosion.
👉 Shop on: Amazon | Walmart - Hydrofoil Wing Covers (Neoprene): Essential for protecting carbon wings during transport.
👉 Shop on: Amazon | Slingshot Official
Top Brand Gear & Accessories
- Axis Foils: Renowned for durability and performance.
👉 Shop on: Amazon | Axis Official - Slingshot Sports: Innovative designs and excellent support gear.
👉 Shop on: Amazon | Slingshot Official - Fliteboard: The leader in electric foiling (requires specific battery care).
👉 Shop on: Fliteboard Official - Zeko Foils: High-performance aluminum and carbon options.
👉 Shop on: Amazon | Zeko Official
Educational Resources & Books
- “The Complete Guide to Wing Foiling” by various authors: A deep dive into theory and practice.
👉 Shop on: Amazon - “Hydrodynamics for Surfers”: Understanding the physics behind the lift.
👉 Shop on: Amazon
FAQ: Your Hydrofoil Care Questions Answered

What safety tips should I follow when maintaining my hydrofoil?
Always wear safety glasses when applying thread locker or epoxy, as splashes can cause serious eye damage. When using a torque wrench, ensure the board is stable and the foil is disasembled to prevent accidental tightening of a component that could snap back. Never work on your foil in a wet environment; moisture can cause electrical shorts if you have an e-foil, and it makes tools slippery.
How do I repair minor damages on my hydrofoil board?
For small dings in the board’s deck or tail, clean the area with alcohol, sand it lightly, and fill with a two-part epoxy resin or a dedicated surfboard repair kit. For carbon foils, if the damage is superficial (no structural crack), you can sand and repaint. However, if you see delamination (layers separating) or a deep crack, stop using the foil immediately and consult a professional composite repair shop.
What materials are most durable for hydrofoil board maintenance?
Stainless steel (316 grade) bolts and anodized aluminum components are the most durable for marine environments. For the wings, carbon fiber offers the best strength-to-weight ratio but requires careful handling to avoid impact damage. Titanium is the gold standard for bolts but is significantly more expensive.
How can I prevent corrosion on my hydrofoil components?
The primary method is imediate rinsing with fresh water after every session. Follow this with a thorough drying using a microfiber towel. Apply a thin layer of anti-seize lubricant to all metal threads before reassembly. For aluminum parts, a coat of marine wax or a specialized corosion inhibitor spray adds an extra layer of protection.
What type of storage is ideal for a hydrofoil board?
Store your board and foil in a cool, dry, and climate-controlled environment. Avoid attics or garages where temperatures fluctuate wildly, as this can weaken resins and warp components. If you must store it outside, use a UV-resistant, padded board bag and ensure the foil is disasembled to relieve stress on the mast and fuselage.
How often should I check the screws and bolts on my hydrofoil?
You should check the torque of all bolts before every single session. Vibration from riding can loosen them quickly. Additionally, perform a more thorough inspection of the threads and condition of the bolts monthly if you ride frequently, or at the start of every season if you ride seasonally.
What are the best cleaning methods for a hydrofoil board?
Use fresh water and a soft brush or sponge with mild soap. Avoid harsh chemicals, abrasive scrubers, or high-pressure washers, which can damage the resin and carbon fibers. For stubborn salt buildup, a mixture of vinegar and water can help dissolve the crystals, but rinse thoroughly afterward.
How often should I inspect my hydrofoil mast for cracks?
Inspect the mast before every ride for visible cracks, especially near the base and the fuselage connection. Perform a more detailed inspection (including checking for “soft spots” in carbon masts) monthly or after any significant impact. If you suspect a crack, do not use the foil.
What is the best way to store a hydrofoil board in humid climates?
In humid climates, moisture control is key. Use a dehumidifier in your storage area or place silica gel packets inside your board bag. Ensure the foil is completely dry before storage. Consider using a breathable board bag rather than a sealed plastic one to prevent condensation buildup.
How do I remove salt buildup from my hydrofoil components?
Soak the affected parts in a solution of warm fresh water and white vinegar (1:1 ratio) for 15-30 minutes. The acid in the vinegar helps dissolve the salt crystals. Scrub gently with a soft brush, rinse thoroughly with fresh water, and dry immediately.
Can I use regular surf wax on a hydrofoil board deck?
No. Regular surf wax is designed to stick to the board and can attract dirt and sand, which may scratch the deck or interfere with your foot placement. Use a specialized hydrofoil deck pad or a non-slip traction tape instead. If you must use wax, choose a hard, low-temp wax and apply it sparingly, but traction pads are generally preferred for the consistent grip needed in foiling.
What are the signs that my hydrofoil wing needs replacing?
Look for cracks in the leading or trailing edge, delamination (bubbles or soft spots), and permanent deformation (bent shape). If the wing is vibrating excessively even when tightened, or if it has lost its hydrodynamic shape, it’s time to replace it. A damaged wing can cause instability and reduce lift efficiency.
How do I properly tighten the bolts on my hydrofoil assembly?
Use a torque wrench set to the manufacturer’s specifications (typically 15-20 Nm for mast bolts and 10-15 Nm for wing bolts). Apply Loctite 243 to the threads before tightening. Tighten in a star pattern if there are multiple bolts to ensure even pressure. Do not overtighten, as this can strip the threads.
Is it safe to leave my hydrofoil board in direct sunlight for long periods?
No. Prolonged exposure to UV radiation can degrade the resin in carbon fiber and foam cores, leading to delamination and loss of structural integrity. Always store your board in the shade or use a UV-protective board bag if you must leave it outside.
Reference Links
- National Association of Corosion Engineers (NACE): Corosion Basics – Validating the impact of saltwater on metals.
- Progression Sports: 3 Tips for Your First Day on a Kite Hydrofoil Board – Essential learning mechanics for new riders.
- Fliteboard: Official Website – Innovation in electric foiling.
- Slingshot Sports: Official Website – Leading brand in wing and foil gear.
- Axis Foils: Official Website – High-performance foil designs.
- Loctite: Threadlocker Guide – Technical data on thread locking compounds.
- Hydrofoiling.org: Hydrofoil Basics – Comprehensive guides for beginners.