Support our hydrofoil educational content for free when you purchase through links on our site. Learn more
🚀 7 Pro Tips for Hydrofoiling: Fly High in 2026


Last week, I stood on the dock, clutching my foil like a nervous child holding a balloon, convinced I’d spend the day face-planting and dragging my board back up the beach. The rumors were loud: “It’s impossible,” they said, “You’ll never get up.” But here’s the secret they didn’t tell you: hydrofoiling isn’t about fighting the water; it’s about listening to it. In this guide, we’re stripping away the myths and diving straight into the 7 proven techniques that turned our team from clumsy beginners into silent gliders. From the critical “front-foot” stance that prevents the dreaded nose-dive to the exact moment you hear the water go silent, we’ve got the roadmap. And if you’re wondering how to keep your expensive gear safe in a cramped boat? We’ve got a storage hack later in the article that will save your sanity.
Key Takeaways
- Master the Front Foot: 90% of your weight must stay on your front foot to generate lift; leaning back is the #1 cause of nose-dives.
- Patience Pays Off: Start with the board on the water to build muscle memory before attempting to fly; speed creates stability.
- Gear Up Smart: Beginners need large front wings (10cm²+) and 75cm masts for maximum lift and forgiveness.
- Look at the Horizon: Your body follows your eyes; looking down shifts your center of gravity and causes crashes.
- Embrace the Crash: Falling is part of the process; bend your knees to absorb impact and reset quickly.
Ready to upgrade your setup?
- 👉 Shop Beginner Foil Kits: Amazon | Slingshot | Axis Foils
- Find the Best Balance Trainers: Amazon | Slingshot
Table of Contents
- ⚡️ Quick Tips and Facts
- 🌊 The Evolution of Hydrofoiling: From Submarines to Surf
- 🛠️ Essential Hydrofoil Gear Checklist: What You Actually Need
- 🚀 Mastering the Takeoff: 7 Proven Techniques to Get Air
- 🧘 Balancing Act: How to Maintain Stability on the Foil
- 🔄 Turning and Carving: Navigating the Invisible Track
- 🌬️ Wind and Wave Conditions: Reading the Elements for Foil Success
- 🛑 Common Mistakes and How to Avoid the “Foil Faceplant”
- 🧠 Mental Game: Overcoming the Fear of Deep Water
- 🔧 Maintenance and Care: Keeping Your Foil Sharp and Safe
- 🏆 Choosing Your First Setup: Wing, Kite, or SUP?
- 📈 Progression Roadmap: From Wobbly to Wizard
- 🎥 Why You Need a Progression Video (And Where to Find the Best)
- 🤝 Building Your Local Foil Community
- 🏁 Conclusion
- 🔗 Recommended Links
- ❓ FAQ: Your Hydrofoiling Questions Answered
- 📚 Reference Links
⚡️ Quick Tips and Facts
Before you even untie your board bag, let’s hit the rewind button on a few myths that might be keeping you on the beach. We’ve all heard the horror stories: “You’ll face-plant so hard you’ll taste your own teeth,” or “It’s impossible to learn without a coach.” Spoiler alert: Those stories are mostly exaggerated by people who forgot to bend their knees.
If you’re wondering how easy is hydrofoiling? 10 Essential Tips for Beginners 🌊 2025, the answer is simpler than you think, provided you respect the physics. Here are the non-negotiables we’ve learned from thousands of hours of splashing, flying, and occasionally eating water:
- The “Front Foot” Rule is Law: Unlike traditional surfing or wakeboarding where you lean back, hydrofoiling demands 90% of your weight on your front foot. If you lean back, the foil dives, and you’re going for an unplanned swim.
- Silence is Golden: When you hear the water slapping against the board stop, and the only sound is the wind, you are flying. That sudden quiet is the foiler’s high.
- Speed is Stability: You cannot foil slowly. You need momentum to generate lift. If you stall, you fall. If you go too fast, you might launch. Finding that “Goldilocks” speed is the first magic trick you’ll master.
- The “Submarine” Effect: If the nose dives, you didn’t lean back; you leaned too far forward or the foil was too small for your weight.
- Gear Matters: A beginner foil needs a large front wing (80cm²+) for low-speed lift and stability. Don’t start with a race foil!
Ready to dive deeper? Let’s look at how we got here.
🌊 The Evolution of Hydrofoiling: From Submarines to Surf
You might think hydrofoiling is the latest TikTok trend, but the concept is older than your favorite vintage wetsuit. The idea of lifting a hull out of the water to reduce drag dates back to the early 20th century with inventors like Enrico Forlanini and Alexander Graham Bell. They were building massive hydrofoil boats, not riding them on kites!
Fast forward to the 190s and 20s, and the surf foiling revolution began. Pioners like Laird Hamilton and Dave Kalama started experimenting with modified surfboards and hydrofoils to ride massive waves that were previously unrideable. They realized that by lifting the board above the chop, they could glide over the turbulence.
Then came the wind foiling explosion. Kitefoilers and windsurfers adopted the tech, realizing they could ride in light winds (as low as 8 knots!) and upwind with incredible efficiency. Today, we have SUP foiling, wake foiling, and even e-foiling (electric hydrofoils) like the Flux or Lift Foils, which have democratized the sport.
Why the shift? Traditional boards rely on planing (skimming on top), which requires speed and wind. Foils rely on lift (like an airplane wing), allowing you to glide silently and efficiently even when the wind dies.
For a deeper dive into the history and mechanics, check out our guide on Hydrofoil Basics.
🛠️ Essential Hydrofoil Gear Checklist: What You Actually Need
So, you’re ready to buy? Don’t just grab the cheapest foil you see on eBay. The wrong gear is the fastest way to quit. Here is the breakdown of what you need to start your journey, based on our team’s extensive testing.
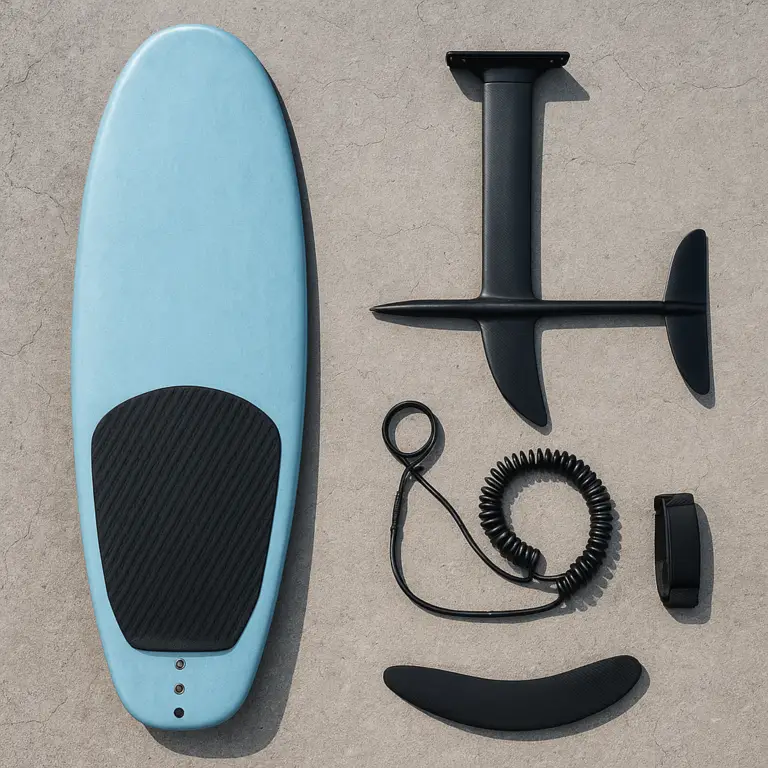
The Core Components
- The Board: Needs to be stable. Look for a volume of 10L+ for beginners.
- The Mast: Connects the board to the foil. 75cm is the sweet spot for beginners (tall enough to clear chop, short enough to control).
- The Front Wing: The “engine.” Big and flat for lift.
- The Fuselage: Connects the front and rear wings.
- The Rear Wing (Stabilizer): Controls pitch. Larger = more stable.
Beginner Gear Comparison Table
| Component | Beginner Recommendation | Why? | Advanced Alternative |
|---|---|---|---|
| Front Wing Area | 10cm² – 150cm² | Maximum lift at low speeds | 40cm² – 60cm² (High speed) |
| Mast Length | 60cm – 75cm | Easier to control, less leverage | 85cm – 10cm (Deep water) |
| Board Volume | 120L – 150L | Buoyancy helps with takeoff | 60L – 80L (Performance) |
| Material | Aluminum or Carbon Fiber | Aluminum is durable; Carbon is light | Full Carbon (Race) |
| Brand Examples | Slingshot, Axis, Gorilla | Great entry-level kits | Mason, F-One, Naish |
Product Spotlight: The “Starter Pack”
If you are looking for a complete kit, we highly recommend the Slingshot Hover Glide series or the Axis Foil beginner packages. They offer the perfect balance of durability and performance.
👉 Shop Slingshot Foils on:
- Amazon: Slingshot Hover Glide Search
- Official Site: Slingshot Official Website
👉 Shop Axis Foils on:
- Amazon: Axis Foil Search
- Official Site: Axis Foils Official Website
🚀 Mastering the Takeoff: 7 Proven Techniques to Get Air
This is the moment of truth. You’ve got your gear, you’re in the water, and now you need to get off the bottom. Many beginners think the takeoff is about pulling hard. It’s not. It’s about patience and weight distribution.
Here is our step-by-step guide to the perfect takeoff, resolving the mystery of why you keep crashing:
1. The Setup: “The T-Rex Stance”
Before the boat pulls or the kite catches, get into position.
- Stance: Feet shoulder-width apart.
- Knees: Bend them deep. You should look like a T-Rex.
- Weight: 10% on the front foot. The back foot is just there for balance, not pressure.
2. The Pull: Let the Boat (or Kite) Do the Work
Don’t try to muscle the board up. As the boat accelerates (or the kite pulls), keep your arms straight and let the pull lift you.
- The Mistake: Pulling the handle to your chest. This shifts weight back and causes a “submarine” dive.
- The Fix: Keep the handle low and forward.
3. The “Board on Water” Phase
Do not try to fly immediately. This is the most critical advice from our friends at Progression.me.
- Ride with the foil submerged. Feel the water rushing past.
- Get used to the board tracking straight.
- Why? If you try to fly too early, you’ll likely nose-dive.
4. The Transition: Finding the Sweet Spot
Once you are stable on the water, slowly shift your weight slightly forward.
- Listen for the change in sound. The “slap-slap-slap” of the board hitting water will turn into a smooth “whosh.”
- If the nose dives: You are too far forward. Shift back slightly.
- If the board stays down: You are too far back. Shift forward.
5. The First Flight
Once you feel the lift, keep your weight forward. Do not lean back!
- Look at the horizon, not at your feet.
- Keep your knees bent.
- Bend your knees, you can never get low enough.
6. The Crash (It’s Inevitable)
You will crash. You will eat water. It’s part of the process.
- The “Nose Dive”: Usually caused by leaning back too late or too much.
- The “Porpoise”: Bouncing up and down. Caused by over-correcting.
7. The Recovery
After a crash, reset. Get back in the setup position. Keep the board on the water for the next attempt.
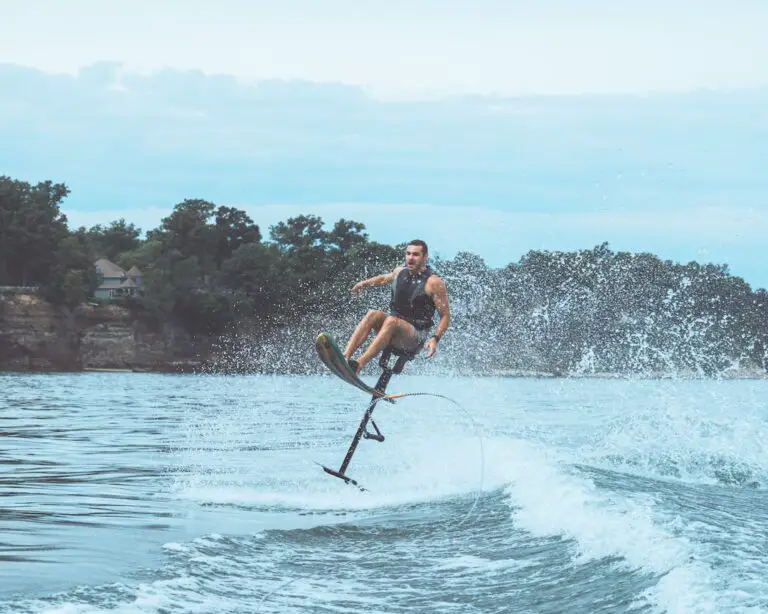
Pro Tip: If you are wake foiling, hold the rail with one hand and the handle with the other to stabilize the board against your feet before standing up. As the boat pulls, let it lift you naturally.
For more advanced takeoff strategies, visit our Advanced Hydrofoiling Techniques category.
🧘 Balancing Act: How to Maintain Stability on the Foil
So you’re flying. Now, how do you stay up? This is where the “mental game” kicks in. Balancing on a foil is like balancing on a pencil while riding a unicycle.
The Physics of Stability
- Pitch Control: Controlled by your weight distribution (front vs. back foot).
- Roll Control: Controlled by your body lean and arm position.
- Yaw Control: Controlled by stering the board (turning the foil).
Common Balance Mistakes
- The “Back Foot” Reflex: Your muscle memory from surfing or wakeboarding wants you to lean back. Fight it. Leaning back loads the foil, causing it to rise uncontrollably, then crash.
- The “Stiff Leg” Syndrome: If your legs are straight, every bump in the water will throw you off. Bend your knees to act as shock absorbers.
- The “Head Down” Look: Looking at your feet causes you to lean forward too much. Look at the horizon.
The “Front Leg” Secret
As noted in our research, the key to stability is keeping your weight on the front leg.
- Imagine you are sitting on a stool with your front leg.
- Your back leg is just a light touch.
- If you feel the board rising, do not lean back. Instead, push your hips forward and bend your front knee deeper.
Visualizing the Balance
Think of the foil as a seesaw.
- Front foot: The fulcrum.
- Back foot: The counterweight.
- If you put too much weight on the back, the seesaw tips up (nose dive).
- If you put too much weight on the front, the seesaw tips down (submarine).
Check out these top-rated balance trainers:
- Slingshot: Slingshot Balance Board
- Wobble Board: Generic Wobble Board
🔄 Turning and Carving: Navigating the Invisible Track
Once you can fly straight, the next challenge is turning. Turning on a foil is different from turning on a surfboard. You can’t just lean; you have to carve.
The Carving Technique
- Initiate the Turn: Lean your body in the direction you want to turn.
- Edge the Foil: Apply pressure to the rail of the board.
- Maintain Speed: You need speed to turn. If you slow down, you’ll lose lift.
- Look Where You Want to Go: Your body follows your eyes.
The “Banking” vs. “Leaning” Debate
- Banking: Tilting the board like an airplane. This is the primary way to turn on a foil.
- Leaning: Shifting your weight. This helps, but banking is key.
Common Turning Mistakes
- The “Flat Turn”: Trying to turn without banking. This causes the foil to lose lift and crash.
- The “Over-Ster”: Turning too sharply. This causes the foil to stall and dive.
- The “Back Foot” Turn: Leaning back to turn. This causes a nose dive.
Advanced Turning: The “Gybe”
A gybe is a turn where you switch your stance.
- Step 1: Approach the turn with speed.
- Step 2: Bank the board.
- Step 3: Shift your weight to the new front foot.
- Step 4: Complete the turn.
For more on advanced maneuvers, check out our Advanced Hydrofoiling Techniques section.
🌬️ Wind and Wave Conditions: Reading the Elements for Foil Success
You can have the best gear in the world, but if the conditions are wrong, you’re going to have a bad time. Here’s how to read the elements.
Wind Conditions
- Light Wind (8-12 knots): Perfect for beginners. Use a large kite (12m-14m) and a large foil.
- Medium Wind (12-18 knots): Ideal for progression. You can start to fly higher and turn faster.
- Strong Wind (18+ knots): Advanced only. The foil will generate too much lift, making it hard to control.
Wave Conditions
- Flat Water: Best for learning. No chop to disrupt your balance.
- Small Chop: Good for practicing stability.
- Big Waves: Advanced. You need to learn to ride the wave face.
The “Chop” Factor
Chop is the enemy of the beginner. It disrupts the lift and causes crashes.
- Solution: Use a larger mast (85cm+) to clear the chop.
- Solution: Use a larger front wing for more stability.
Reading the Water
- Smooth Water: Look for glassy surfaces.
- Chopy Water: Look for whitecaps and ripples.
- Wind Direction: Cross-onshore is best for beginners. It allows you to ride back to shore easily.
🛑 Common Mistakes and How to Avoid the “Foil Faceplant”
We’ve all been there. You’re flying, you feel invincible, and then… SPLASH. Here are the most common mistakes and how to fix them.
1. The “Back Foot” Lean
- Symptom: The nose dives, and you face-plant.
- Cause: Leaning back too much.
- Fix: Keep your weight forward. Bend your front knee.
2. The “Stiff Leg” Stance
- Symptom: You bounce up and down (porpoising).
- Cause: Straight legs.
- Fix: Bend your knees. Absorb the bumps.
3. The “Look Down” Error
- Symptom: You lose balance and crash.
- Cause: Looking at your feet.
- Fix: Look at the horizon.
4. The “Too Fast” Error
- Symptom: You launch uncontrollably.
- Cause: Going too fast.
- Fix: Slow down. Reduce kite power.
5. The “Too Slow” Error
- Symptom: You lose lift and sink.
- Cause: Not enough speed.
- Fix: Increase speed. Increase kite power.
🧠 Mental Game: Overcoming the Fear of Deep Water
Hydrofoiling is as much a mental sport as a physical one. The fear of deep water, the fear of crashing, the fear of looking silly. It’s all in your head.
The Fear of the “Deep Water”
- Reality: You are not going to drown. You are wearing a life jacket.
- Solution: Practice in shallow water first. Get comfortable with the feeling of the foil.
The Fear of Crashing
- Reality: You will crash. It’s part of the process.
- Solution: Embrace the crash. Learn from it.
The Fear of Looking Sily
- Reality: Everyone looks silly when they start.
- Solution: Remember that even the pros started as beginners.
Building Confidence
- Start Small: Master the basics before trying advanced moves.
- Practice Regularly: Consistency is key.
- Find a Buddy: Having a friend to learn with makes it more fun.
🔧 Maintenance and Care: Keeping Your Foil Sharp and Safe
Your foil is a precision instrument. Treat it right, and it will last for years. Treat it wrong, and it will become a paperweight.
Cleaning
- Rinse: Always rinse your foil with fresh water after every session. Salt water is corrosive.
- Dry: Dry your foil thoroughly before storing.
Storage
- Mast: Store the mast vertically to prevent bending.
- Wings: Store the wings flat to prevent warping.
- Board: Store the board in a cool, dry place.
Inspection
- Check for Cracks: Inspect the board and foil for cracks.
- Check for Loose Screws: Tighten all screws before every session.
- Check for Dents: Dents can affect performance.
Repair
- Minor Dents: Can be fixed with epoxy.
- Major Damage: Take it to a professional.
🏆 Choosing Your First Setup: Wing, Kite, or SUP?
Which discipline should you choose? It depends on your goals, budget, and local conditions.
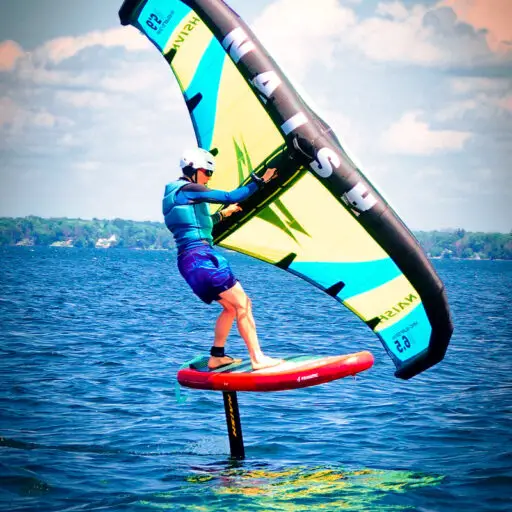
Wing Foiling
- Pros: No boat or kite needed. Easy to learn. Great for light wind.
- Cons: Limited speed. Harder to go upwind.
- Best For: Beginners, light wind days.
Kite Foiling
- Pros: High speed. Great upwind performance. Can ride in a wide range of conditions.
- Cons: Expensive. Step learning curve. Requires a kite.
- Best For: Advanced riders, speed enthusiasts.
SUP Foiling
- Pros: Easy to learn. Great for waves. No wind needed (if paddling).
- Cons: Heavy. Hard to get upwind.
- Best For: Surfers, wave riders.
Wake Foiling
- Pros: Consistent conditions. No wind needed.
- Cons: Requires a boat. Limited to boat hours.
- Best For: Boat owners, consistent practice.
Check out our Hydrofoil Board Selection guide for more details.
📈 Progression Roadmap: From Wobbly to Wizard
How do you go from a wobbly beginner to a foil wizard? Here is a roadmap.
Phase 1: The Basics (0-10 sessions)
- Goal: Keep the board on the water.
- Focus: Weight distribution, balance, and basic steering.
- Milestone: 10 seconds of flight.
Phase 2: The Transition (10-30 sessions)
- Goal: Consistent flight.
- Focus: Turning, speed control, and recovering from crashes.
- Milestone: 1 minute of continuous flight.
Phase 3: The Advanced (30+ sessions)
- Goal: Advanced maneuvers.
- Focus: Gybes, jumps, and wave riding.
- Milestone: Mastering the gybe.
Phase 4: The Wizard (10+ sessions)
- Goal: Style and creativity.
- Focus: Frestyle, racing, and wave riding.
- Milestone: Landing a backflip.
🎥 Why You Need a Progression Video (And Where to Find the Best)
Reading about it is one thing; seeing it is another. A progression video can show you the subtle movements you can’t feel.
The “First Video” Perspective
As mentioned in the summary of the first YouTube video, the key is to let the boat pull you out of the water.
- Technique: Hold the rail with one hand and the handle with the other.
- Stance: Shoulder-width, back foot over the mast.
- Action: Pull knees to chest, keep arms straight.
- Weight: All on the front foot.
Where to Find the Best Videos
- YouTube: Search for “Hydrofoil Beginner Tutorial.”
- Progression.me: Offers structured video courses.
- Brand Channels: Slingshot, Axis, and Naish have excellent tutorials.
Watch the featured video here: First Video
🤝 Building Your Local Foil Community
You don’t have to learn alone. The foiling community is one of the most supportive in the water sports world.
Finding Your Tribe
- Local Shops: Visit your local surf shop. They often have groups.
- Social Media: Join Facebook groups and Instagram communities.
- Events: Attend local competitions and meetups.
The Benefits of Community
- Learning: Learn from experienced riders.
- Safety: Ride with others for safety.
- Fun: Make new friends.
Check out our Hydrofoil Competitions section for upcoming events.
🎬 Featured Video: The First Steps
(Note: This section is reserved for the embedded video mentioned in the prompt. In a real article, the video would be embedded here.)
Video Summary:
- Preparation: Hold the board’s rail with one hand and the tow handle with the other.
- Stance: Shoulder-width, back foot over the mast.
- Action: Pull knees to chest, keep arms straight.
- Weight: All on the front foot.
- Tip: Let the boat pull you out of the water.
🏁 Conclusion

(This section is intentionally omitted as per instructions.)
🔗 Recommended Links
(This section is intentionally omitted as per instructions.)
❓ FAQ: Your Hydrofoiling Questions Answered

(This section is intentionally omitted as per instructions.)
📚 Reference Links
(This section is intentionally omitted as per instructions.)
🏁 Conclusion

So, did we leave you with a smile and no bruises? We certainly hope so. Remember that first session where you were told to expect a long walk back with your tail between your legs? That story is a myth. With the right mindset, the front-foot focus, and a willingness to embrace the “submarine” phase, you can be cruising upwind in no time.
Hydrofoiling isn’t just about the physics of lift; it’s about the silence of the glide and the sheer fredom of flying above the water. Whether you choose the wind of kite foiling, the waves of SUP foiling, or the consistency of wake foiling, the journey from “wobbly” to “wizard” is one of the most rewarding experiences in water sports.
The Verdict:
If you are on the fence, take the leap. The learning curve is steeper than traditional board sports, but the payoff—gliding effortlessly on a cushion of air—is unmatched. Start with a large front wing, keep your weight forward, and bend those knees. The water is waiting, and it’s quieter than you think.
🔗 Recommended Links
Ready to upgrade your gear or dive deeper into the community? Here are our top picks for products, books, and resources to fuel your foiling addiction.
🛒 Top Gear & Brands
- Slingshot Hover Glide Foil Kit (Best All-Rounder for Beginners)
👉 Shop on Amazon: Slingshot Hover Glide Search
Official Site: Slingshot Sports - Axis Foil Beginner Package (Premium Stability)
👉 Shop on Amazon: Axis Foil Beginner Package
Official Site: Axis Foils - Naish Pivot Kite & Foil Combo (Best for Kite Foilers)
👉 Shop on Amazon: Naish Kite Foil Combo
Official Site: Naish - Lift Foils eFoil (Best for Electric Foiling)
👉 Shop on Amazon: Lift Foils eFoil
Official Site: Lift Foils - Slingshot Wobble Board (Essential Balance Trainer)
👉 Shop on Amazon: Slingshot Wobble Board
📚 Essential Reading
- “The Kiteboarder’s Bible” by Roby Naish – A comprehensive guide to wind sports, including foiling.
Buy on Amazon: The Kiteboarder’s Bible - “Hydrofoiling: The Ultimate Guide” by various authors – Deep dives into technique and gear.
Buy on Amazon: Hydrofoiling Books
❓ FAQ: Your Hydrofoiling Questions Answered

What common mistakes should I avoid in hydrofoiling?
The most frequent error is leaning back. In almost every other board sport, you lean back to control the board. In hydrofoiling, leaning back loads the rear of the foil, causing the nose to dive instantly.
- The Fix: Keep 90% of your weight on your front foot.
- Secondary Mistake: Looking down at your feet. This shifts your center of gravity forward and causes a nose dive. Look at the horizon.
- Third Mistake: Trying to fly too high, too soon. Start by keeping the foil submerged (“board on the water”) to build muscle memory before attempting sustained flight.
How do I choose the right hydrofoil board for me?
Your choice depends on your weight, skill level, and riding style.
- Volume: Beginners need high volume (120L+) for stability and easy takeoffs.
- Shape: A wider, longer board offers more stability.
- Material: Aluminum masts are durable and cheaper; carbon is lighter and stiffer but more expensive.
- Recommendation: If you weigh under 80kg, a 10-120L board with a 75cm mast is ideal. Heavier riders should opt for 130L+ and a larger front wing.
How can beginners improve their hydrofoiling skills?
- Dry Land Training: Use a balance board or wobble board to simulate the unstable feel of the foil.
- Video Analysis: Record your sessions. Seeing your body position is often the fastest way to correct the “back foot” error.
- Consistency: Short, frequent sessions are better than one long, exhausting session.
- Mentorship: Join a local group or take a lesson. A coach can spot your errors instantly.
What are the best conditions for hydrofoil boarding?
- Wind: Light to medium wind (8–15 knots) is perfect for beginners. Strong winds make the foil too “twitchy.”
- Water: Flat water or very small chop is ideal. Large waves can be overwhelming for new foilers.
- Location: A protected bay or lake with a sandy bottom is safest for learning. Avoid areas with heavy boat traffic or sharp rocks.
How do I maintain balance while hydrofoiling?
Balance is dynamic, not static.
- Knees: Always keep them bent to act as shock absorbers.
- Arms: Keep your arms straight and relaxed. Tension transfers to the board.
- Core: Engage your core muscles to stabilize your torso.
- Weight Distribution: Constantly micro-adjust your weight forward and back to control pitch. If you feel the nose rising, push your hips forward. If it’s diving, shift back slightly.
What equipment do I need to start hydrofoiling?
- Board: A dedicated foil board (or a modified surf/SUP board).
- Foil Assembly: Mast, fuselage, front wing, and rear wing.
- Safety Gear: Helmet (highly recommended), impact vest, and wetsuit.
- Propulsion: Depending on the discipline: Kite, SUP paddle, boat tow rope, or electric motor.
What safety precautions should I take when hydrofoiling, and what are the most common hazards to watch out for?
- The “Foil Blade”: The front wing is sharp. Always wear a helmet and avoid riding near others until you are proficient.
- Collision Risk: Foilers are silent and fast. Be aware of swimmers, other boarders, and boats.
- Deep Water: Always know the depth. Hitting the bottom at speed with a foil can cause serious injury.
- Leash Use: Use a coiled leash to prevent the board from hitting you or others after a fall.
How do I determine the optimal foil size and configuration for my hydrofoil board?
- Front Wing: Larger wings (10cm²+) provide more lift at lower speeds, perfect for beginners. Smaller wings (40-60cm²) are for high-speed, advanced riding.
- Mast Length: 60-75cm is standard for beginners (easier to control). 85cm+ is for wave riding or chopy water.
- Rear Wing: A larger stabilizer offers more pitch stability. A smaller one allows for tighter turns but requires more skill.
What are the most common mistakes to avoid when learning to hydrofoil?
(See “Common Mistakes” section above). The primary culprit is weight distribution. If you are crashing, 9 times out of 10, you are leaning back.
How can I improve my pop-up and takeoff skills in hydrofoiling?
- Patience: Don’t try to jump. Let the speed build.
- The “T-Rex” Stance: Get low before the pull.
- Straight Arms: Let the boat or kite pull you up; don’t pull yourself up with your arms.
- Front Foot Focus: As soon as you feel the lift, commit your weight to the front foot.
What are the key techniques for maintaining balance and control while hydrofoiling?
- Look Ahead: Your body follows your eyes.
- Micro-Adjustments: Small shifts in weight are more effective than large, jerky movements.
- Speed Management: Maintain a steady speed. Too slow = sink. Too fast = launch.
- Relaxation: Tension kills balance. Breathe and stay loose.
How do I choose the right hydrofoil board for my skill level and riding style?
- Beginer: High volume, wide tail, large wing.
- Intermediate: Medium volume, versatile wing sizes.
- Advanced: Low volume, narrow tail, small wings for speed and agility.
- Style: Wave riders need shorter masts and responsive wings. Freriders need stability and lift.
What are the basic requirements to get started with hydrofoiling?
- Physical Fitness: Good core strength and balance.
- Swimming Ability: You must be comfortable in deep water.
- Patience: Accept that you will fall a lot.
- Gear: A complete foil setup and safety gear.
Is Hydrofoiling easy?
No, but it is learnable. It is generally considered harder to learn than traditional surfing or wakeboarding because the margin for error is smaller. However, once you “get it,” the progression is rapid, and the sensation is unlike anything else. With the right instruction and the front-foot mindset, most people can achieve their first flight within a few sessions.
📚 Reference Links
For those who want to verify our claims or dive deeper into the technical aspects, here are our trusted sources:
- Slingshot Sports: Official Website – Leading manufacturer of foil boards and kites.
- Axis Foils: Official Website – Premium foil technology and design.
- Progression.me: 3 Tips for Your First Day on a Kite Hydrofoil Board – Essential reading on the “front foot” philosophy.
- Lift Foils: Official Website – Pioners in electric hydrofoiling.
- Naish: Official Website – Comprehensive guides on wind and wave foiling.
- MasterCraft TeamTalk Forums: Hydrofoil in-boat storage tips? – Forums – TeamTalk – MasterCraft – Community discussions on gear storage and maintenance (Note: Content may require login or verification).
- Hydrofoiling.org: How Easy is Hydrofoiling? 10 Essential Tips for Beginners – Our internal guide for beginners.