Support our hydrofoil educational content for free when you purchase through links on our site. Learn more
🚀 Can You Learn to Hydrofoil on Your Own? The Real Answer (2026)

Yes, you absolutely can learn to hydrofoil on your own, but taking just one or two professional lessons will slash your learning curve by 80% and save you from developing bad habits. The question of “Can you learn to hydrofoil on your own, or do you need to take lessons?” isn’t a simple yes or no; it’s a choice between a gritty, trial-and-error journey and a fast-track to flight. While self-teaching builds resilience, the physics of foiling are so unforgiving that a single hour of expert guidance on an e-foil can teach you more than a month of solo flailing.
We remember our first solo attempt vividly: three hours of eating saltwater, a bruised shin, and zero seconds of actual flight. It wasn’t until we watched a pro instructor correct our stance via a Bluetooth helmet that the “lightbulb” moment finally clicked. That instant shift from chaos to controlled flight is the magic we want for you.
Key Takeaways
- Self-teaching is possible but inefficient: You can learn solo, but expect a step learning curve filled with frustration and potential bad habits that are hard to unlearn later.
- Lessons accelerate mastery: A single e-foil lesson can teach you the core mechanics of lift and balance in 60–90 minutes, a process that might take weeks on your own.
- Safety is non-negotiable: Whether learning alone or with a pro, helmets and impact vests are mandatory to prevent serious injury from the sharp foil fins.
- Gear matters for beginners: Starting with a high-volume board and a large, low-aspect foil wing dramatically increases your chances of success compared to pro-level gear.
- The “Tow-In” advantage: Using a boat or e-foil to isolate balance from propulsion is the fastest way to get airborne, regardless of your learning path.
Table of Contents
- ⚡️ Quick Tips and Facts
- 🌊 The Hydrofoil Learning Curve: Self-Taught vs. Guided Lessons
- 📜 A Brief History of Hydrofoiling: From Sailboats to Stand-Up Boards
- 🛠️ Essential Gear for the Aspiring Foiler: Boards, Fins, and Safety
- 🚫 The 5 Most Common Mistakes Self-Taught Foilers Make (And How to Avoid Them)
- 🏄 ♂️ 7 Critical Steps to Mastering Your First Flight Without an Instructor
- 🤔 Why Professional Instruction Might Be Your Fastest Path to the Air
- 🌍 Top Global Destinations to Learn Hydrofoiling: From Maui to the Mediterranean
- 🏝️ Maui Hawaii: The Ultimate Playground for Foil Enthusiasts
- 🚤 Wake Maui | Tubing & Wakeboarding Boat Rentals: A Foiler’s Secret Weapon?
- 🧠 Mental Game: Overcoming the Fear of Falling and the “Shin-Splint” Syndrome
- 📊 Comparison: DIY Learning vs. Structured Coaching Programs
- 🎒 Packing List: What to Bring for Your First Solo Foil Session
- 💡 Quick Tips and Facts
- ✅ Conclusion
- 🔗 Recommended Links
- ❓ FAQ
- 📚 Reference Links
⚡️ Quick
Tips and Facts
Alright, fellow wave-riders and aspiring sky-skimmers! You’re here because the allure of flying above the water on a hydrofoil has grabbed you by the board shorts, right? We get it. There
‘s nothing quite like it. Before we dive deep into whether you can conquer this beast solo or if a guiding hand is essential, let’s hit you with some rapid-fire wisdom from our years out on the water.
- P
atience is Your Paddle: Learning to hydrofoil isn’t like learning to ride a bike; it’s more like learning to ride a unicycle on a tightrope over water. It takes time, persistence, and a healthy dose of humility
. Don’t expect to be carving like Kai Lenny on your first day! - Safety First, Always: This isn’t just a cliché; it’s gospel. Helmets, impact vests, and proper leashes are non-
negotiable. We’ve all had our share of tumbles, and trust us, a foil fin is not something you want to get acquainted with without protection. - The E-Foil Advantage: If you’re serious
about getting airborne quickly, an e-foil (electric hydrofoil) is a fantastic stepping stone. It removes the need for wind or waves, allowing you to focus purely on balance and foil control. Think of it as your personal hydrofoil simulator
on the water. You can get a quick understanding of how a hydrofoil works by booking an e-foil lesson. - Location, Location, Location: Flat, calm water is your best friend when starting
. Choppy conditions will make your learning curve feel like a vertical climb up a slippery rock face. Look for sheltered bays or lakes. - Gear Matters (But Doesn’t Have to Break the Bank): While high-end gear is
sweet, a stable, high-volume board and a larger, lower-aspect foil wing will be far more forgiving for beginners. Don’t go for the Ferrari when you’re still learning to drive! - Community is Key: Even
if you’re attempting to self-teach, connect with other foil enthusiasts. The hydrofoiling community is generally super supportive, and a little local knowledge or a helping hand with launching can make all the difference.
🌊 The Hydrofoil Learning Curve: Self-Taught vs. Guided Lessons
Ah, the age-old question that sparks many a debate around
the campfire after a long day on the water: “Can I just figure this out myself, or do I really need someone to show me the ropes?” It’s a valid question, and one we’ve seen countless aspiring
foilers grapple with. Let’s break down the realities of the hydrofoil learning curve, shall we?
First, let’s get one thing straight: hydrofoiling, at its core, is about achieving lift and maintaining balance on
a board that’s literally flying above the water. It’s a delicate dance of weight distribution, speed management, and subtle adjustments. If you’re wondering what exactly we’re talking about, check out our deep dive into What is hydrofoiling and how does it work?.
Many of us at Hydrofoiling™
started our journey with a healthy dose of trial and error. We spent hours in the water, eating humble pie (and a lot of saltwater!), figuring out the nuances through sheer persistence. It’s certainly possible to teach yourself. We’ve seen it
happen, and frankly, there’s a certain gritty satisfaction that comes from conquering something entirely on your own terms. You’ll develop an intuitive understanding of the foil and its behavior, born from countless crashes and minor victories.
However, let
‘s not sugarcoat it: self-teaching hydrofoiling is often a longer, more frustrating, and potentially less safe path. You’re essentially reinventing the wheel with every session. You might develop bad habits that are hard
to unlearn, and you’ll likely spend a lot more time in the water than on the foil. Plus, there’s the gear aspect – making sure you have the right setup for a beginner is crucial, and that’s where
our Hydrofoil Board Selection guides come in handy.
On the flip side, professional instruction can dramatically accelerate your learning process and
enhance your safety. Imagine having someone in your ear, via a Bluetooth radio helmet, giving you real-time feedback on your stance, your pressure, your speed. That’s exactly what places like SoCal K
itesurfing offer, and it’s a huge advantage. They claim you can learn the “foil part” in “one session”, and while individual results vary, the principle holds true: expert guidance cuts
down on wasted effort and builds confidence faster.
Think of it this way: would you rather spend 20 hours flailing around, trying to figure out how to balance, or spend 2-3 hours with an expert who can guide you
through the critical steps, help you understand the physics, and correct your mistakes before they become ingrained? For many, the latter is a no-brainer. Especially for those planning to eventually use a kite, wing, or surfboard,
getting the core foiling mechanics down with an e-foil lesson is incredibly efficient.
Ultimately, the choice is yours. Are you a lone wolf who thrives on independent challenge, or do you prefer a structured approach
that maximizes efficiency and safety? We’ll explore both paths in detail, but keep this in mind: the goal isn’t just to get up, it’s to stay up and truly fly.
📜 A Brief History of Hydrofoiling: From Sailboats to Stand-Up Boards

You
might think hydrofoiling is a relatively new phenomenon, a flashy extreme sport born from the digital age. But hold onto your helmets, because the concept of lifting a vessel out of the water to reduce drag is actually over a century old
! It’s a fascinating journey from rudimentary designs to the sleek, high-performance setups we shred on today.
The genesis of hydrofoiling can be traced back to the late 19th and early 20th centuries.
Visionaries like Italian inventor Enrico Forlanini and American engineer Alexander Graham Bell (yes, that Bell, of telephone fame!) were among the pioneers. Bell, in particular, was obsessed with hydrofoils, conducting extensive research and developing
the HD-4 hydrofoil boat in 1919, which set a world marine speed record of 70.86 mph (114.04 km/h). Imagine
that – flying across the water before most cars could even hit those speeds on land!
For decades, hydrofoils remained largely within the realm of military applications and specialized high-speed ferries. The technology was complex, expensive, and primarily focused on larger
vessels. It wasn’t until the latter half of the 20th century that smaller, recreational applications began to emerge. Think of the early “foilboards” attached to waterskis or surfboards, often towed behind boats. These were cl
unky, challenging to ride, and a far cry from the refined systems we use today.
The real explosion in popularity for personal hydrofoiling began in the early 2000s, driven largely by the **kitesurfing community
**. Innovators started adapting foil designs to kitesurfing boards, realizing the incredible potential for light-wind riding and a completely new sensation of flight. Brands like Slingshot, which we’ll talk about more later, were instrumental in pushing
this evolution. This era saw rapid advancements in foil design, materials, and board shapes, making the sport more accessible, albeit still challenging.
Then came the e-foil revolution. The introduction of electric motors
and batteries directly integrated into the hydrofoil system, pioneered by brands like Lift Foils and Fliteboard, democratized the learning process. Suddenly, you didn’t need wind, waves, or a towboat. You could simply press
a button, stand up, and fly. This innovation has been a true game-changer, allowing more people than ever to experience the magic of hydrofoiling and understand the core principles of lift and balance.
From
Bell’s experimental boats to today’s high-tech e-foils and wing-foils, the journey of hydrofoiling is a testament to human ingenuity and our endless quest to defy gravity. It’s a rich history that continues to evolve
, and we’re stoked to be a part of it!
🛠️ Essential Gear for the Asp
iring Foiler: Boards, Fins, and Safety
Alright, let’s talk toys! Or, as we like to call them, essential tools for flight. You can’t just jump on any old board and expect to fly.
Hydrofoiling requires specific equipment, and choosing the right gear, especially when you’re starting out, can make the difference between an exhilarating first flight and a frustrating flop. This is where our Hydrofoil Equipment Reviews come in handy!
The Board: Your Launchpad to the Sky
The board is your connection to the foil. For beginners, volume and stability are your best friends. Forget
those sleek, low-volume boards the pros are riding; you need something that’s forgiving and easy to get up on.
| Feature | Beginner-Friendly Board | Advanced Board | Why it Matters for You |
|---|---|---|---|
| Volume | High (e.g., 80-120+ L) | Low (e.g., 20-60 L) | More float, easier to paddle/stand on. Stability is key for learning balance. |
| Length | Longer (e.g., 5’0″-6’0″) | Shorter (e.g., 3’0″-4’6″) | More stable platform, easier to manage initial pop-ups. |
| Width | Wider | Narrower | Increased stability, easier to find your footing. |
| Construction | Durable (e.g., composite, soft-top) | Lightweight (e.g., carbon) | You’re going to fall. A lot. Durability is paramount. |
Brands like Fanatic,
Naish, and Slingshot (which is also known for its full kite gear rentals) offer excellent beginner-specific foil boards. They’re designed with stability and ease of use in mind,
often featuring wider noses and tails, and sometimes even soft tops for a gentler learning experience.
👉 Shop Hydrofoil Boards on:
- Fanatic Boards: Amazon | Official Website
- Naish Boards: Amazon | Official Website
- Slingshot Boards: Amazon | Official Website
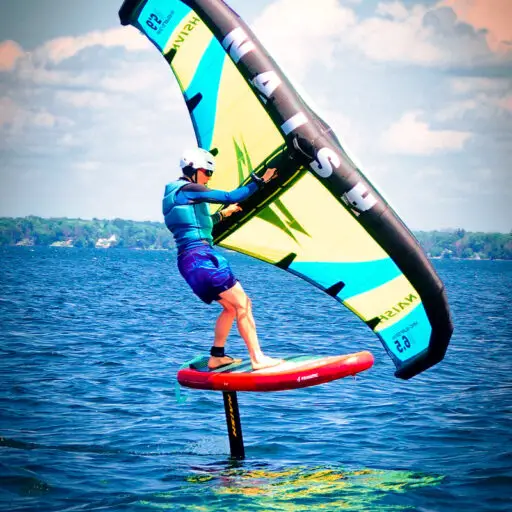
The Foil: Your Wings Beneath the Waves
This is the magic part! The foil itself consists of a mast
, fuselage, and front and rear wings. For beginners, the key is to choose a foil that provides maximum lift at slower speeds and offers stability.
| Component | Beginner-Friendly Choice | Advanced Choice | Why it Matters |
|---|---|---|---|
| for You | |||
| Front Wing | Large surface area, low aspect ratio | Smaller surface area, high aspect ratio | More lift at lower speeds |
| , more stable ride. Easier to get up and maintain flight. | |||
| Mast Length | Shorter (e.g., 60-75 cm) | Longer (e.g., 85-100 cm) | Easier to recover from touchdowns, less leverage for mistakes. |
| Fuselage | Longer | Shorter | More stable, less twitchy. Helps with directional stability. |
Brands like Armstrong
Foils, Axis Foils, and GoFoil are renowned for their quality and offer excellent beginner-friendly setups. Look for their larger front wings (often labeled “surf” or “beginner” wings).
👉 Shop Hydro
foil Wings on:
- Armstrong Foils: Amazon | Official Website
- Axis Foils: Amazon | Official Website
GoFoil: Amazon | Official Website
Safety Gear: Don’t Sk
imp Here!
We’ve seen it all, from minor scrapes to stitches, and we can’t stress this enough: safety gear is non-negotiable.
- Helmet: ✅ Protects your most important asset
from impacts with the board, foil, or water. Get a good watersports helmet like those from Pro-Tec or Gath. - 👉 CHECK PRICE on: Pro-Tec Helmets | Gath Helmets
Impact Vest: ✅ Provides buoyancy and protects your torso from impacts. It’s a lifesaver (literally!) when you fall onto the board or foil. Brands like Mystic and O’Neill make excellent vests.
-
👉 CHECK PRICE on: Mystic Impact Vests | O%27Neill Impact Vests
-
Leash: ✅ Essential for keeping your board close after a fall. A coiled leash is generally preferred for foiling to keep it from
dragging and getting tangled in the foil. -
👉 CHECK PRICE on: Coiled Board Leash
-
W
etsuit/Rashguard: ✅ Depending on water temperature, a wetsuit offers warmth and protection from abrasions. Even in warm water, a rashguard protects against sun and board rash. SoCal Kitesurfing even offers wetsuit rentals
as an add-on. -
👉 CHECK PRICE on: O’Neill Wetsuits |
Hurley Rashguards -
Booties: ✅ Protect your feet from sharp objects on the bottom or accidental contact with the foil.
-
👉 CHECK PRICE on: Neoprene Booties
Choosing the right gear is an investment in your learning and enjoyment. Don’t
cheap out on safety, and remember that a well-matched setup will make your journey to flight much smoother. For more in-depth comparisons, check out our Hydrofoil Brands Comparison section.
🚫
The 5 Most Common Mistakes Self-Taught Foilers Make (And How to Avoid Them)
We’ve all been there. That moment of pure stoke, thinking “I’ve got this!” only to be humbled by the unforgiving
laws of physics (and gravity). When you’re trying to learn hydrofoiling on your own, without the watchful eye of an instructor, it’s incredibly easy to fall into common traps. Our team at Hydrofoiling™ has made
every single one of these mistakes, so learn from our bumps and bruises!
1. ❌ Looking Down at Your Feet (The “Periscope” Problem)
This is perhaps the most universal beginner mistake across all board sports,
but it’s particularly detrimental in foiling. When you look down, your body naturally follows, shifting your weight forward and often leading to a spectacular “nose dive” or “pearl.”
- Why it’s a problem
: Your balance is intrinsically linked to your gaze. If your eyes are glued to your feet, your head is down, throwing off your center of gravity and making it impossible to anticipate the water’s surface or the foil’s behavior.
How to avoid it: ✅ Keep your eyes up and focused on the horizon. Pick a point about 10-20 feet ahead of you. This helps keep your head up, your shoulders back, and your weight centered
over the foil. Trust your feet to do their job; they’ll feel the board. It’s a mental shift, but a crucial one!
2. ❌ Over-Correcting (The “Wobble Monster”)
Once you feel the board lift, it’s natural to panic a little and make big, jerky movements to try and regain control. This is the “wobble monster” – small imbalances are met with huge, exaggerated corrections, which only
amplify the instability.
- Why it’s a problem: Hydrofoils are incredibly sensitive. A tiny shift in weight or ankle pressure translates into a significant change in the foil’s angle of attack. Over-correcting leads to
a vicious cycle of instability and inevitable crashes. - How to avoid it: ✅ Think small, subtle movements. Imagine you’re balancing a tray of drinks. Your adjustments should be gentle and continuous, not sudden and dramatic
. Focus on using your ankles and knees, not your whole body. Start by trying to maintain a consistent height just a few inches above the water.
3. ❌ Riding with Too Much (or Too Little) Speed
Finding
that sweet spot for speed is like Goldilocks finding the perfect porridge. Too slow, and you won’t generate enough lift to get on foil. Too fast, and you’ll shoot out of the water like a rocket, lose
control, and slam down.
-
Why it’s a problem: The entire principle of hydrofoiling relies on generating enough speed to create lift, but not so much that you lose control. Beginners often struggle to find this equilibrium.
-
How to avoid it: ✅ Start with just enough speed to feel the lift, then feather it. If you’re learning behind a boat, communicate clearly with the driver to maintain a consistent, manageable speed. If you
‘re on an e-foil, use the remote with gentle, incremental presses. The goal is to feel the foil engage and lift smoothly, not to launch violently. Remember the e-foil lesson perspective: “Usually by the end of
say an hour, an hour and a half, most people will achieve lift and control”.
4. ❌ Improper Foot Placement (The “Stuck in Mud” Stance)
Where you put
your feet on the board dramatically impacts your balance and control. Many beginners place their feet too far forward or too far back, or too close together, making it incredibly difficult to control the pitch (up and down movement) of the foil.
Why it’s a problem: Incorrect foot placement means you can’t effectively transfer your weight to control the foil. Too far forward, and you’ll nose dive; too far back, and you’ll breach the wing.
*
How to avoid it: ✅ Start with your front foot directly over the mast, and your back foot slightly behind it, centered on the board. Experiment with small adjustments. Your stance should feel balanced and athletic, knees slightly bent, ready to
absorb bumps. As you progress, you’ll find your ideal sweet spot, but this is a solid starting point.
5. ❌ Giving Up Too Soon (The “One-and-Done” Mentality)
This
isn’t a mistake in technique, but a mistake in mindset. Hydrofoiling has a steep initial learning curve. You will fall. A lot. It can be frustrating, cold, and tiring. If you expect instant gratification
, you’ll be sorely disappointed.
- Why it’s a problem: The mental game is huge in foiling. If you let frustration get the better of you, you’ll quit before you experience the magic.
How to avoid it: ✅ Embrace the process and celebrate small victories. Did you get a few inches of flight? Awesome! Did you stay up for three seconds longer than last time? Fantastic! Set realistic expectations, take breaks when
you’re tired, and come back with a fresh mindset. Remember, every fall is a lesson learned. As we often say, “Every crash is a data point!”
By being aware of these common pitfalls, you’
re already one step ahead in your self-taught hydrofoiling journey. Now, let’s talk about how to actually get airborne!
🏄 ♂️ 7 Critical Steps to Mastering Your First Flight Without an Instructor
So, you’re committed to the solo mission, the self-taught path to hydrofoil glory! We
salute your grit. While we often recommend professional guidance (and we’ll get to why in a bit), we also know the thrill of figuring things out for yourself. Here are 7 critical steps, honed from our own experiences and countless hours
on the water, to help you master your first flight without an instructor. This is where the rubber (or rather, the foil) meets the water, so pay attention! For more foundational knowledge, check out our Hydrofoil Basics section.
Step 1: Start with Tow-Ins or an E-Foil (Your Training Wheels)
This is arguably the most important “cheat
code” for self-learners. Trying to learn to foil while simultaneously learning to kitesurf, wing-foil, or paddle into waves is like trying to juggle chainsaws on a unicycle. Don’t do it!
The Goal:** Isolate the foiling sensation.
- How:
- E-Foil: If you have access to an e-foil, this is your golden ticket. It allows you to control
your speed and focus purely on balance and lift. Start lying down, then kneeling, then standing, just as they teach in e-foil lessons. - Tow-In: Get towed behind a boat or
jet ski. Start on a larger, stable board. The consistent pull allows you to concentrate solely on getting the board to lift and maintaining balance.
- Why it works: It removes the variable of propulsion, allowing you to build
muscle memory for the unique balance required for foiling.
Step 2: Master the “Pop-Up” and Board Control on the Surface
Before you even think about flying, you need to be comfortable getting up and riding the board *
on the water* without the foil engaging too much.
- The Goal: Smooth transitions from lying/kneeling to standing, and maintaining control at speed.
- How: Practice getting up on the board (whether towed or on an e-foil) and riding it like a regular surfboard or wakeboard. Keep the foil submerged. Focus on your stance, keeping your knees bent, and looking forward.
- Key Tip: Your front foot should be
roughly over the mast, and your back foot should be further back, allowing you to press down to keep the foil from breaching.
Step 3: Gentle Lift-Offs (The “Baby Steps” Approach)
This is
where the magic begins! You’ll start to feel the foil wanting to lift. Resist the urge to yank it up aggressively.
- The Goal: Achieve sustained flight just a few inches above the water.
- How
: Once you’re up and riding on the surface, very subtly shift your weight backwards towards your back foot. This will slightly angle the front wing upwards, generating lift. As soon as you feel the board lift, shift
your weight back to neutral, or even slightly forward, to prevent it from shooting too high. - Analogy: Think of it like a seesaw. A little weight back lifts the nose; a little weight forward brings it down. You
want to find the perfect balance point.
Step 4: Maintaining Flight (The “Hovercraft” Phase)
This is the hardest part for most self-learners. You’ll get short bursts of flight, followed by dramatic
touchdowns. Don’t get discouraged!
- The Goal: Extend your flight time, maintaining a consistent height.
- How:
- Eyes on the Horizon: As we mentioned, look forward
, not down! Your body follows your eyes. - Ankle and Knee Control: This is where the subtle adjustments come in. Use small movements of your ankles and knees to control the pitch. If you start
to rise too high, gently push your front foot down. If you start to sink, gently lift your front foot. - Consistent Speed: Maintain a steady speed. Too slow, you’ll drop. Too fast, you
‘ll breach.
- Personal Anecdote: Our team rider, Maya, spent an entire afternoon just trying to stay up for more than 5 seconds. She finally cracked it by focusing on keeping her gaze steady and making
minuscule adjustments. “It felt like I was trying to balance a feather on my nose,” she laughed, “but then, suddenly, it clicked!”
Step 5: Touchdowns and Recoveries (Embrace the Fall!)
You
‘re going to fall. A lot. Learning how to fall safely and recover efficiently is a crucial skill.
- The Goal: Minimize injury and get back on the board quickly.
- How:
Fall Away from the Foil: When you feel yourself losing control, try to push the board away from you and fall to the side, away from the sharp edges of the foil.
2. Practice Water Starts: Get comfortable getting
back on your board and starting again. This conserves energy and builds confidence.
- Safety Reminder: Always wear your helmet and impact vest!
Step 6: Gentle Carving (The “S-Turns” Initiation)
Once you can maintain straight-line flight, it’s time to introduce turning. Start small!
- The Goal: Initiate gentle, controlled turns while on foil.
- How:
Heel and Toe Pressure: To turn, apply subtle pressure to your heels or toes. To turn right, apply pressure to your heels (right foot heel, left foot toe). To turn left, apply pressure to your toes (left foot toe, right foot heel).
2. Look Where You Want to Go: Again, your body follows your gaze. Look into the turn.
- Avoid: Leaning excessively or trying to carve too hard
too soon. This will lead to immediate breaches or nose dives.
Step 7: Consistency and Stamina (The Long Game)
Hydrofoiling is physically demanding, especially when you’re learning. Building endurance is key to
longer, more successful sessions.
- The Goal: Increase your session time and reduce fatigue.
- How:
- Short Sessions: Don’t try to go for hours on end initially. Sh
orter, focused sessions are more productive. - Core Strength: Work on your core strength and leg endurance off the water. This will pay dividends in your ability to maintain balance and control.
- **
Listen to Your Body:** If you’re getting tired, take a break. Pushing through exhaustion often leads to more mistakes and injuries.
Mastering these steps takes time, dedication, and a willingness to learn from every splash. But the
reward? Pure, unadulterated flight. For those looking to refine their skills, our Advanced Hydrofoiling Techniques section offers
even more insights.
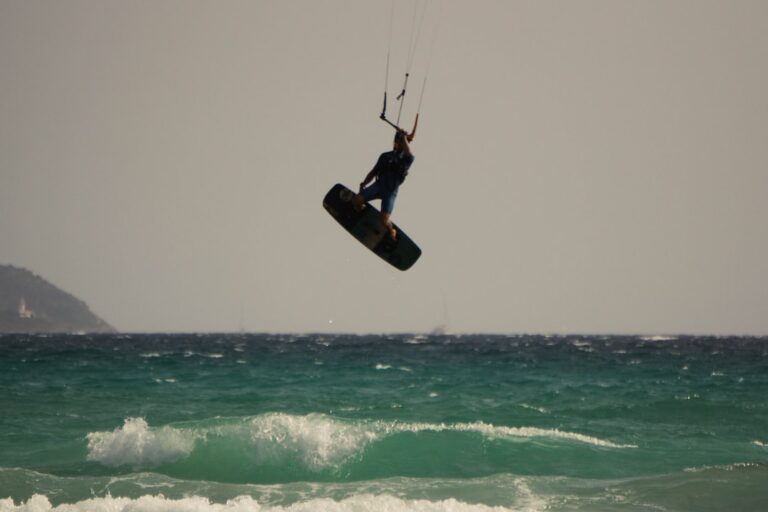
🤔 Why Professional Instruction Might Be Your Fastest Path to the Air
We’ve just laid out a pretty comprehensive guide for the self-taught warrior, and we truly believe in the power of personal determination. However, let’s be real for a moment. While you can learn to hydrofoil on
your own, the question isn’t always “can I?”, but “should I, and how quickly do I want to be flying?” This is where professional instruction shines, often becoming your express lane to airborne mastery.
Think of it like
learning to drive. You could theoretically teach yourself by reading a manual and hopping in a car, but a driving instructor not only teaches you the rules but also provides immediate feedback, corrects bad habits before they form, and guides you through complex
maneuvers. Hydrofoiling is no different.
The E-Foil Advantage in Lessons
One of the biggest reasons lessons are so effective, especially for complete beginners, is the use of e-foils (electric hydrofoils)
. As the first YouTube video highlighted, an e-foil lesson is the best way to get a quick understanding of how a hydrofoil works. Why? Because it eliminates external variables like wind or waves, allowing you to
focus 100% on the core mechanics of foiling: balance, pitch, roll, and yaw.
- Controlled Environment: E-foils provide consistent, controllable speed. This means you’
re not fighting gusts of wind or the unpredictability of waves. - Structured Progression: Instructors guide you through a proven progression: starting by lying down, moving to kneeling, and then standing, applying the principles of speed and
lift at each stage. This systematic approach builds confidence and skill incrementally. - Immediate Feedback: This is the gold standard. Places like SoCal Kitesurfing utilize Bluetooth radio helmets, allowing instructors to provide
real-time input directly into your ear. Imagine someone telling you, “Shift your weight slightly forward,” or “Gentle on the back foot,” as you’re doing it. This kind of immediate correction
is invaluable and something you simply can’t replicate when learning alone. - Faster Progression: The consensus is clear: with professional instruction, the learning curve is significantly shortened. SoCal Kitesurfing boldly states, “You
can learn this in one session”. While “competent riding level” might be a better description than full mastery in 60-90 minutes, achieving lift and control within an hour to an hour and a
half is a very common outcome with e-foil lessons. Compare that to potentially dozens of hours of trial and error when self-teaching! - Safety First: Instructors are trained to spot potential hazards and teach
you safe falling techniques. They’ll ensure you’re wearing the right safety gear and are aware of your surroundings, including local wildlife (though perhaps don’t feed the dolphins, as SoCal Kitesurfing advises!).
Beyond the E-Foil: Transitioning to Other Disciplines
Even if your ultimate goal is to kite foil, wing foil, or surf foil, starting with an e-foil lesson provides an unparalleled foundation. Once
you’ve mastered the feeling of flight and the subtle balance adjustments, transitioning to external propulsion becomes much, much easier. You’ve already conquered the hardest part – understanding how to fly.
If you’re in the UK, for
instance, Foil Surf UK offers electric hydrofoil lessons in Swansea Bay and around Mumbles, specifically designed to help people learn to fly above the water. These dedicated schools exist because they provide a superior, accelerated
learning experience.
So, while the DIY route offers a certain rugged charm, if you’re looking for the fastest, safest, and most efficient way to get airborne and truly enjoy the sensation of hydrofoiling, investing in a professional lesson
is a recommendation we confidently stand by. It’s not just about learning; it’s about learning smarter.
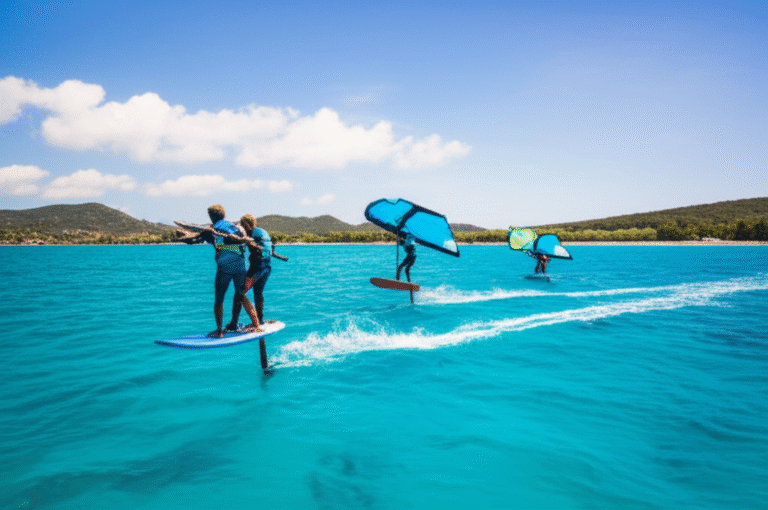
🌍 Top Global Destinations to Learn Hydrofoiling: From Maui to the Mediterranean
Okay, you’re stoked, you’re geared up, and you’re ready to
fly! But where in the world should you embark on this incredible journey? While you can learn anywhere with calm, flat water, some spots are simply legendary for their ideal conditions, vibrant foiling communities, and excellent schools. We’ve traveled
the globe chasing the perfect foil session, and these are some of our top picks for learning to hydrofoil.
1. Maui, Hawaii, USA 🏝️
Of course, Maui had to be number one! We’ll dive deeper
into this paradise shortly, but its consistent trade winds, warm waters, and a plethora of sheltered bays make it a hydrofoiler’s dream. It’s a hub for innovation and home to some of the world’s best riders
and instructors.
2. El Cuyo, Yucatan, Mexico 🇲🇽
If you’re looking for a true kitesurfing and foiling paradise, El Cuyo is it! Described as having “excellent winds”
and an “infinite beach”, it’s explicitly stated as “perfect to learn” due to its shallow waters, lack of beach clubs, and a dedicated kite zone. The flat, expansive
waters are ideal for beginners to get comfortable on the foil without the added challenge of waves or crowds.
3. Tulum, Q. Roo, Mexico 🇲🇽
While El Cuyo might be the “paradise,” Tulum offers
a different kind of charm. It’s “not the windiest nor the easiest kitesurfing spot,” but it’s undeniably “one of the most beautiful and coolest beaches ever”. If you can learn to kite (and by extension, foil) in Tulum, you can kite anywhere. The challenge here builds resilience, and the stunning backdrop is a bonus. Just remember to keep swimmers and walkers safe, as there’s no specific kites
urfing zone.
4. Tarifa, Spain 🇪🇸
Known as the “wind capital of Europe,” Tarifa is a mecca for wind sports. While it can get very windy,
there are sheltered spots and times of day that offer perfect conditions for learning. The sheer number of schools and the vibrant, international community make it an exciting place to learn and progress. Plus, the tapas are incredible!
5. Hood
River, Oregon, USA 🏞️
For those in North America looking for freshwater foiling, Hood River on the Columbia River Gorge is legendary. Consistent winds, a strong current that flattens the water, and a huge community of wind
surfers, kitesurfers, and now wing-foilers make it an incredible learning ground. The scenery isn’t bad either!
6. Le Morne, Mauritius 🇲🇺
A tropical paradise in the Indian Ocean,
Le Morne offers stunning turquoise lagoons protected by a reef. This creates incredibly flat, shallow water perfect for learning to foil, especially for kitesurfing and wing-foiling. The backdrop of Le Morne Brabant mountain is simply breathtaking.
- Swansea Bay / Mumbles, Wales, UK 🏴
Don’t underestimate the UK! As mentioned earlier, Foil Surf UK offers electric hydrofoil lessons in Swansea Bay and around Mumbles. These sheltered coastal areas can provide surprisingly good conditions for e-foiling and learning the basics, proving that you don’t always need tropical temperatures to get airborne.
No matter where you choose to learn, remember
that the right conditions (flat water, consistent propulsion) and proper instruction will dramatically improve your experience. So, pick your paradise, pack your bags, and get ready to fly!
🏝️ Maui Hawaii: The Ultimate Playground for Foil Enthusiasts
If you’ve ever dreamt of hydrofoiling, chances are a picture of Maui has floated through your mind.
For us at Hydrofoiling™, Maui isn’t just a destination; it’s a spiritual home for foiling. It’s where legends are born, techniques are refined, and the sheer joy of flying over water is palpable in
every gust of wind and every rolling swell.
What makes Maui such an ultimate playground for foil enthusiasts, especially for those looking to learn or progress? It’s a perfect storm of geographical blessings and a thriving watersports culture.
Consistent
Conditions, Diverse Spots
Maui benefits from the reliable Hawaiian trade winds, which blow consistently throughout much of the year. This means more days on the water, and more opportunities to learn and practice. But it’s not just about the wind
; it’s about the variety of spots.
- Spreckelsville (Sprecks): Often considered the birthplace of modern hydrofoiling, Sprecks offers a mix of flat water, small waves, and consistent
wind. It’s a fantastic spot for intermediate to advanced riders, but its outer reaches can be calmer for those progressing. - Kanaha Beach Park (Kite Beach): This is a hub of activity for kitesurfers,
windsurfers, and now wing-foilers. The protected bay offers flatter water closer to shore, ideal for getting comfortable on the foil. Further out, small rollers provide a gentle introduction to wave foiling. The sheer number of experienced
riders here means you’re always learning just by watching. - Maliko Gulch: For the truly adventurous, Maliko is famous for its downwind runs. Imagine catching a swell and riding it for miles, powered by the wind and
the ocean’s energy. While not a beginner spot, it’s the ultimate goal for many foil enthusiasts and a testament to what’s possible on a hydrofoil.
A Culture of Innovation and Expertise
Maui isn’t just beautiful
; it’s a hotbed of watersports innovation. Many of the world’s top hydrofoil designers, shapers, and athletes live and train here. This means:
- Cutting-Edge Gear: You’ll see
the latest and greatest gear being tested and refined daily. Many local shops offer rentals and demos of top brands, allowing you to try before you buy. - World-Class Instruction: With so many pros and experienced instructors, finding
quality lessons is easy. Whether you’re looking for e-foil lessons to get the basics down or advanced coaching for wave foiling, Maui has it. The instructors here aren’t just teaching; they’re living and breathing fo
iling. - Inspiration Everywhere: Just watching the local legends like Kai Lenny, Zane Schweitzer, or the countless other incredible riders will push your own limits and inspire you to try new things. The energy on the water is infectious!
Beyond the Foil: The Maui Vibe
Learning to hydrofoil in Maui isn’t just about the sport; it’s about the entire experience. The warm aloha spirit, the stunning volcanic landscapes, the incredible marine life (remember, don’t feed the dolphins!), and the delicious local food all combine to create an unforgettable adventure.
One of our team members, Alex, recounts his first time foiling in Maui: “I’
d been struggling with my transitions back home, but after just a few days at Kanaha, watching the locals and getting a tip from a guy on the beach, something just clicked. The consistent wind and the forgiving water made all the difference. Plus
, ending the day with a plate of fresh poke and watching the sunset? Pure bliss.”
So, if you’re dreaming of a hydrofoiling adventure that combines world-class conditions with unparalleled expertise and an incredible atmosphere, set your sights on Maui
. It truly is the ultimate playground.
🚤 Wake Maui | Tubing & Wakeboarding
Boat Rentals: A Foiler’s Secret Weapon?
Now, this might seem a little off-piste for a hydrofoiling article, but hear us out. While most people associate “Wake Maui | Tubing & Wakeboarding Boat Rentals”
with, well, tubing and wakeboarding, these services can actually be a foiler’s secret weapon, especially for those looking to learn or refine their skills.
Remember how we stressed the importance of starting with tow-ins or an e-
foil to isolate the foiling sensation? A boat rental service like Wake Maui can provide exactly that consistent, reliable pull you need.
Why a Boat Rental for Foiling?
- Consistent Tow: Unlike relying on wind or waves
, a boat provides a steady, controllable speed. This is crucial for beginners who need to find that precise speed to generate lift without being overpowered or underpowered. You can communicate directly with the boat driver to adjust speed incrementally.
Flat Water Access: Boat operators often know the calmest, most sheltered spots on the water, away from chop and crowds. These glassy conditions are ideal for learning and practicing the delicate balance required for foiling.
3. Dedicated
Practice: You can book a boat specifically for foiling. This means no waiting for wind, no battling currents, just pure, focused practice time. You can spend an entire session working on pop-ups, sustained flight, or even gentle carving,
without external distractions.
4. Versatility for Progression: Once you’re comfortable with basic tow-foiling, you can experiment with wake foiling – riding the boat’s wake without being directly towed. This is a fantastic stepping
stone to surf foiling or downwind foiling, teaching you how to pump and generate speed from the water’s energy.
5. Group Learning: If you’re learning with friends, a boat rental can be a
cost-effective way for multiple people to get tow-in time. While one person foils, others can observe, rest, and cheer each other on.
Our Experience with Tow-Foiling
Many of us at Hydrofoiling™
actually started our foiling journey behind a boat. Before e-foils became widely accessible, a good tow-in session was the fastest way to understand the feeling of flight. Our team rider, Chloe, recalls, “I spent hours trying
to get up on a kite foil, but it wasn’t until I got a few solid tow-in sessions behind a boat that the lightbulb really went off. The consistent pull allowed me to focus purely on my body position and how
the foil reacted. It was a total game-changer for my progression.”
While Wake Maui specifically mentions tubing and wakeboarding, it’s highly probable they can accommodate hydrofoiling if you inquire. Many boat rental services are flexible and happy
to help watersports enthusiasts. Just be sure to communicate your intentions clearly when booking.
So, if you’re in Maui (or anywhere with boat rentals!) and looking for a controlled, efficient way to fast-track your hydrofoiling skills
, don’t overlook the humble wake boat. It might just be the secret weapon you need to get airborne faster than you thought possible!
Explore Wake Maui Rentals: Wake Maui Official Website
🧠 Mental Game: Overcoming the Fear of Falling and the
“Shin-Splint” Syndrome
Let’s be honest: hydrofoiling looks intimidating. You’re flying on a thin mast, often at speed, and the falls can be spectacular. The mental game is just as crucial as your
physical prowess, especially when you’re self-teaching. We’ve all battled the fear of falling and the dreaded “shin-splint” syndrome. Let’s tackle these head-on!
The Fear of Falling:
Your Brain’s Self-Preservation Mode
Your brain is wired for survival, and when you’re teetering precariously above the water, it’s screaming “DANGER!” This fear is natural, but it can paraly
ze your progress.
- Acknowledge, Don’t Suppress: Don’t pretend you’re not scared. Acknowledge the fear, but then remind yourself why you’re doing this – for the incredible
thrill of flight! - Visualize Success (and Safe Falls): Before you even get in the water, close your eyes and visualize yourself successfully flying. But also, visualize falling safely. See yourself pushing the board away, tuck
ing your head, and coming up smiling. This prepares your mind for the inevitable. - Start Small, Build Confidence: Don’t try to fly 5 feet high on your first attempt. Aim for inches. Get comfortable with tiny
lifts, then gradually increase your height. Each successful small flight builds confidence and chips away at the fear. - Gear Up for Confidence: This is huge. Knowing you’re wearing a good helmet and impact vest significantly reduces anxiety
. It’s like having a safety net. You’re protected, so you can push your limits a little more. - Focus on the Process, Not Just the Outcome: Instead of “I must fly today
,” think “I’m going to focus on smooth pop-ups” or “I’m going to try to maintain flight for 5 seconds.” Celebrating these process-oriented goals keeps you motivated. - The “What
‘s the Worst That Can Happen?” Exercise: Realistically, if you fall safely, the worst is usually a splash, a little saltwater up the nose, and a bruised ego. It’s rarely life-threatening, especially in controlled
learning environments. This rational perspective can help calm your primal fear.
The “Shin-Splint” Syndrome: More Than Just Leg Pain
This isn’t a medical diagnosis, but a common experience among new foilers. It’
s that intense burning sensation in your shins and calves, often accompanied by cramping, after just a few minutes on the board. It’s a sign of muscles working in ways they’re not used to, constantly trying to stabilize and micro
-adjust.
- Why it Happens: When you’re learning, your lower legs are constantly engaged in tiny, rapid movements to maintain balance and control the foil’s pitch. This isometric contraction and constant adjustment quickly fatigues muscles
that aren’t conditioned for it. - Prevention is Key:
- Warm-Up Properly: Don’t just jump in cold. Do some dynamic stretches for your ankles, calves, and shins
before your session. - Strengthen Your Calves and Ankles: Incorporate exercises like calf raises (single and double leg), ankle rotations, and balance board training into your routine. This builds the specific strength and proprio
ception needed for foiling. - Take Breaks: Don’t push through intense pain. When your shins start screaming, take a break. Rest, stretch, and rehydrate. Short, focused sessions are better than one
long, painful one. - Hydration and Electrolytes: Dehydration and electrolyte imbalance can contribute to cramping. Drink plenty of water and consider electrolyte supplements, especially in warm climates.
- Relax
Your Stance: Often, beginners tense up their entire body. Try to relax your ankles and knees, allowing them to act as natural shock absorbers. A slightly bent-knee, athletic stance is key.
- Our Anecdote: Our
founder, Mark, vividly remembers his early days: “My shins would feel like they were on fire after 15 minutes! I thought I was doing something terribly wrong. It wasn’t until an experienced foiler told me to
‘relax my ankles and let the board do the work’ that it started to get better. It’s counter-intuitive, but less tension often means more control.”
Overcoming the mental hurdles and physical discomfort is part of the fo
iling journey. With persistence, proper preparation, and a positive mindset, you’ll soon be soaring above the water, leaving those fears (and shin splints) in your wake!
📊 Comparison: DIY Learning vs. Structured Coaching Programs
So, you’ve heard the arguments for both sides. The rugged individualism of self-teaching versus the guided efficiency of professional instruction. Which
path is right for you? To help you make an informed decision, let’s lay out a clear comparison, weighing the pros and cons across several key aspects.
| Feature / Aspect | DIY Learning (Self-Taught) |
|---|---|
| Structured Coaching Program (Lessons) | Hydrofoiling™ Recommendation |
| Initial Cost | Lower (gear purchase only, no lesson fees) |
| Total Cost (Long-Term) | Potentially higher (more broken gear, longer learning curve = more time/fuel) |
| Learning Speed | Slower, often inconsistent, trial-and-error |
| based | Faster, accelerated progression, systematic approach |
| Safety | Higher risk of injury (lack of immediate feedback, bad habits) |
| (instructor guidance, proper gear, safe falling techniques) | Lessons for Safety |
| Equipment Access | Must purchase all gear upfront |
| Feedback & Correction | Self-assessment, often delayed or incorrect |
| Skill Development | Can develop unique style, but may ingrain bad habits |
| Motivation | Requires high self-discipline, can lead to frustration | Instructor support, structured goals, community aspect | Lessons for Motivation |
| Time Commitment | Longer overall time to reach
competence | Shorter, more efficient sessions to reach competence | Lessons for Time-Saving |
| Location Flexibility | Can learn anywhere with suitable conditions | Limited to locations
with schools/instructors | DIY for Flexibility |
| Overall Experience | Gritty, self-reliant, potentially frustrating | Guided, supportive, often more enjoyable and less stressful | Lessons for Enjoyment
|
Balancing Perspectives: Our Take
From our years of experience, we’ve seen both paths lead to successful foilers. However, if we’re being completely honest and prioritizing efficiency, safety, and a solid foundation, **
structured coaching programs almost always come out on top for beginners.**
- The “One Session” Advantage: The fact that many can achieve lift and control within an hour or two of an e-foil lesson is a
testament to the power of guided instruction. This kind of rapid progress is incredibly motivating and builds confidence far more quickly than struggling alone. - Avoiding Bad Habits: This is huge. When you’re learning solo, you might develop
compensatory movements or incorrect techniques that are incredibly hard to unlearn later. An instructor can nip these in the bud. - The “Cost” of Frustration: While the upfront cost of lessons might seem higher, consider the ”
cost” of frustration, wasted time, potential gear damage from repeated crashes, and the possibility of giving up entirely. Many find that lessons are a worthwhile investment that pays dividends in accelerated learning and sustained enjoyment.
Our Confident Recommendation: If
you have the means, invest in at least a foundational lesson or two, preferably on an e-foil. This will give you the core understanding of balance and foil control in a safe, controlled environment. You can then take those fundamental
skills and apply them to your self-taught journey in other disciplines (kite, wing, surf foil). It’s the best of both worlds: you get the accelerated learning, and you still get the satisfaction of progressing on your own terms
afterward.
🎒 Packing List: What to Bring for Your First Solo Foil Session
Alright
, you’ve weighed your options, and you’re ready to hit the water for your first solo hydrofoil session. Good on you! But before you rush out the door, let’s make sure you’ve got everything you need
. A well-prepared foiler is a happy (and safer) foiler. This isn’t just a list; it’s a blueprint for a successful session.
Here’s our comprehensive packing list for your inaugural solo flight
:
Essential Gear (Non-Negotiable!)
-
1. Hydrofoil Board & Foil: ✅ (Obviously!) Ensure it’s assembled correctly and all bolts are tightened. Double-check everything.
-
2.
Helmet: ✅ For head protection. Don’t even think about getting in the water without it. -
👉 CHECK PRICE on: Pro-Tec Helmets | Gath Helmets
-
3. Impact Vest: ✅ For buoyancy and torso
protection. -
👉 CHECK PRICE on: Mystic Impact Vests | O%27Neill Impact Vests
-
4. Leash: ✅ A coiled leash is best to keep your board from getting tangled in the foil.
-
👉 CHECK PRICE on: Coiled Board Leash
-
5. Wetsuit/Rashguard:
✅ Depending on water temperature, for warmth and skin protection. -
👉 CHECK PRICE on: O’Neill Wetsuits
| Hurley Rashguards -
6. Booties: ✅ Protect your feet from sharp objects and the foil.
-
CHECK
PRICE on: Neoprene Booties -
7. Propulsion Method:
-
E-Foil: Charged battery
, remote control, and charger. -
Kite: Kite, bar, lines, pump, harness.
-
Wing: Wing, pump, leash.
-
Paddle: Paddle (for SUP foiling).
-
Boat: (If doing tow-ins) Ensure the boat is ready and you have a driver!
Safety & Support Essentials
- 8. Communication Device: 📞 A waterproof phone case
for your phone, or a VHF radio, especially if you’re going out alone or in a less populated area. Let someone know where you’re going and when you expect to be back. - 9. Water Bottle: 💧
Stay hydrated! Foiling is a workout. - 10. Sunscreen: ☀️ Protect yourself from the sun, even on cloudy days. Water reflection amplifies UV rays.
- 11. First-Aid Kit:
🩹 For minor cuts and scrapes. Foil fins are sharp! - 12. Repair Kit / Tools: 🔧 A small kit with a screwdriver (for foil bolts), duct tape, and any specific tools for your gear
. - 13. Whistle: 🗣️ For attracting attention in an emergency.
Comfort & Convenience Items
- 14. Towel: 🧖 ♀️ Obvious, but easily forgotten.
15. Change of Clothes: 👕 For after your session.
- 16. Snacks: 🍎🍌 Something quick and energizing for after your session.
- 17. Dry Bag: 🎒
To keep your valuables safe and dry on the beach. - 18. Beach Chair/Mat: 🏖️ For comfortable rigging and de-rigging.
- 19. Camera/GoPro: 📸
To capture those epic (or hilariously epic fail) moments!
Pre-Session Checklist (Before You Even Leave Home)
-
Check Weather & Conditions: Wind, swell, tides, currents. Is it suitable for your
skill level? -
Inspect Your Gear: Look for any damage, loose bolts, or worn lines. A pre-flight check is crucial.
-
Charge Everything: Batteries for e-foils, phones, GoPros.
-
Tell Someone Your Plan: Seriously, this is important for your safety.
Remember, preparation is key to a successful and enjoyable solo session. Don’t rush, double-check everything, and most importantly, have fun out
there! The water is waiting.
💡 Quick Tips and Facts
We’ve covered a lot of ground, from the history of hydrofoiling
to the nitty-gritty of gear and self-teaching. But before we wrap things up, let’s hit you with a few more quick-fire tips and fascinating facts that every aspiring foiler should know. Consider these your bonus
nuggets of wisdom from the Hydrofoiling™ team!
- The “Sweet Spot” is Real: Once you find the perfect balance of speed and weight distribution, the foil will feel incredibly stable and effortless. It’s like hitting
a groove, and it’s pure magic! - Smallest Movements, Biggest Impact: Remember, hydrofoils are incredibly sensitive. Think of controlling it with your ankles and subtle shifts in your core, not big, dramatic body
movements. Less is often more. - Wind Direction Matters (for kite/wing/sail foiling): For disciplines relying on wind, understanding wind window and direction is paramount. Cross-shore wind is often ideal for learning as
it allows you to ride out and back without getting stranded. - Water Depth: While e-foiling can be done in relatively shallow water, be mindful of your foil’s mast length. Hitting the bottom can cause
serious damage to your gear (and yourself!). Always check the depth. - The Power of Pumping: As you progress, you’ll learn to “pump” the foil – using your body weight to generate speed and lift without external
propulsion. It’s a key skill for connecting waves and extending rides. For more on this, dive into our Advanced Hydrofoiling Techniques! - Foiling is a Full-Body Workout: Don’t underestimate the physical demands. Your core, legs, and even your arms (depending on the discipline) will get a serious workout. It’s a fantastic
way to stay fit! - The Community is Your Friend: Seriously, the hydrofoiling community is generally very welcoming. Don’t be shy to ask for tips at the beach or join online forums. Local knowledge is invaluable.
Hydrofoiling is Quiet (mostly): One of the most beautiful aspects of foiling, especially e-foiling or surf foiling, is the almost silent glide above the water. It’s an incredibly peaceful and immersive experience.
- Don’t Forget to Look Around: While focusing on your balance is crucial, remember to take in the views! You’re literally flying over the water, seeing things from a unique perspective. It’s an experience
unlike any other.