Support our hydrofoil educational content for free when you purchase through links on our site. Learn more
🚀 Hydrofoiling for Beginners: 7 Steps to Your First Flight (2026)


Remember the first time you tried to balance on a surfboard and felt like a newborn giraffe on ice? Now imagine that same feeling, but instead of skimming the surface, you’re gliding silently three feet above the chop, untouched by the waves below. That is the magic of hydrofoiling, and it’s closer than you think. At Hydrofoiling™, we’ve watched thousands of beginners go from “face-planting” to “flying” in just a few sessions, but only if they start with the right mindset and gear.
In this comprehensive guide, we’re not just telling you how to foil; we’re revealing the exact setup secrets that pros use to make learning 50% faster. We’ll break down the 7 critical components you need, expose the 6 most common mistakes that keep beginners grounded, and give you a step-by-step roadmap to your first 30-meter glide. Whether you’re eyeing a boat wake, a gentle ocean swell, or flat lake water, we’ve got the blueprint.
Curious about which specific foil wing size will get you airborne in under 10 minutes? We reveal the “Big Wing” rule and our top 7 product picks later in the article that guarantee a smoother start.
Key Takeaways
- Start Big, Fly Fast: Beginners should choose a front wing area of 1,50–2,10 cm² to generate lift at low speeds, avoiding the frustration of “stalling” before you even stand up.
- The Golden Mast Length: Stick to a 24–28 inch mast for your first setup; it keeps you closer to the water, making falls less scary and recovery significantly easier.
- Look Ahead, Not Down: The #1 reason beginners crash is looking at the foil; keeping your eyes 20 meters ahead is the single most effective technique for stability.
- Modular is Mandatory: Invest in a modular foil system (like Axis or Lift) so you can upgrade wings and masts as your skills progress without buying a whole new setup.
- Safety is Non-Negotiable: Always wear a CE-certified impact helmet and a flotation vest; the foil is sharp, and the water is unforgiving.
Ready to find your perfect starter gear? Check out our detailed reviews of the Liquid Force POD, Slingshot Hover-Glide, and Axis BSC 150 in the “Choosing Your First Setup” section below.
Table of Contents
- ⚡️ Quick Tips and Facts
- 🌊 The Dawn of Flight: A Brief History of Hydrofoil Surfing
- 🛠️ 7 Essential Hydrofoil Surfboard Components You Must Know
- 🧭 5 Critical Factors for Choosing Your First Hydrofoil Setup
- 🏄 ♂️ 8 Step-by-Step Techniques to Master Your First Takeoff
- 🤿 6 Common Beginner Mistakes and How to Avoid Them
- 🌬️ Riding the Wind: Introduction to Wing Foiling Basics
- 🏄 ♀️ From Waves to Flat Water: Adapting Your Hydrofoil Skills
- 🛡️ Safety First: Gear, Etiquette, and Risk Management
- 🧘 ♂️ 5 Mental Hacks to Conquer the Fear of Falling
- 🔍 Troubleshooting: Why Your Foil Won’t Fly (and How to Fix It)
- 🏆 Conclusion
- 🔗 Recommended Links
- ❓ FAQ
- 📚 Reference Links
⚡️ Quick Tips and Facts
Before you even unpack your board, let’s hit the pause button on the “just jump in” mentality. We’ve seen too many eager beavers try to foil on a 7-foot wing and end up eating more sand than water. Here is the Hydrofoiling™ reality check:
- The “Big Wing” Rule: Contrary to what you might think, bigger is better for beginners. You need a front wing with an area of 1,50 cm² to 2,10 cm². Why? Because it generates lift at lower speeds, giving you that magical “float” before you’ve even figured out how to stand up.
- Mast Matters: Stick to a 24–28 inch (60–70 cm) mast. Shorter masts mean less leverage when you fall, which translates to less face-planting and easier recovery.
- The Golden Ratio: A rough rule of thumb for wing sizing is 1 kg of body weight ≈ 20 cm² of wing area. If you weigh 80kg, you’re looking at a 1,60 cm² wing.
- Time to Fly: With the right setup, you can achieve a 30-meter straight glide in just 3–5 hours. Mastering controlled turns? That’s usually 8–15 hours. Full confidence in small surf or wing-foiling? Expect 30–50 hours of dedicated practice.
- Safety First: Always wear a CE-certified impact helmet and a flotation vest. The foil is sharp, and the water is hard.
“But which foil actually gets me flying the fastest without face-planting?” That’s the million-dollar question, and we’re going to answer it by breaking down exactly what gear you need and how to use it.
For a deeper dive into the fundamentals, check out our guide on Hydrofoiling Basics.
🌊 The Dawn of Flight: A Brief History of Hydrofoil Surfing
You might think hydrofoiling is the new kid on the block, but the concept of lifting a vessel out of the water to reduce drag dates back to the early 20th century. However, the surfing revolution we know today is a relatively recent phenomenon.
From Fish to Flight
The modern era of hydrofoil surfing began in the late 190s and early 20s, pioneered by surfers like Laird Hamilton and Dave Kalama. They were experimenting with kite foils and wake foils, realizing that the same principles could apply to ocean waves. The goal? To ride the swell above the chop, accessing waves that were previously unrideable due to poor conditions.
The Evolution of the Sport
- 2010s: The technology trickled down from high-end kiteboarding and windsurfing. Early setups were clunky, expensive, and often dangerous.
- 2015-2018: The introduction of modular foil systems (like those from Lift Foils and Axis) changed everything. Suddenly, you could swap wings and masts to suit different conditions.
- 2020s: The explosion of Wing Foiling and SUP Foiling made the sport accessible to everyone, not just elite athletes.
Today, hydrofoiling is a global phenomenon, with competitions like the Red Bull Foil Jam pushing the boundaries of what’s possible. If you’re curious about the competitive scene, check out our coverage on Hydrofoil Competitions.
🛠️ 7 Essential Hydrofoil Surfboard Components You Must Know
Before you buy, you need to speak the language. A hydrofoil setup isn’t just one piece of gear; it’s a symphony of components working in harmony. Let’s break down the anatomy of your flight machine.
1. The Front Wing
This is the engine. It generates the lift.
- Area: Larger wings (1,50+ cm²) for beginners; smaller wings for speed.
- Aspect Ratio: Low aspect (short and wide) for stability; high aspect (long and narrow) for glide and speed.
- Thickness: Thicker profiles (18-20mm) provide better low-speed lift.
2. The Stabilizer (Tail Wing)
Think of this as the training wheels of the foil. It provides pitch stability.
- Size: Beginners should opt for a larger stabilizer (30-40 cm²) to prevent the board from nosediving.
- Angle: A slight positive angle (+1°) can add stability.
3. The Fuselage
The bridge connecting the front wing and stabilizer.
- Length: A longer fuselage (e.g., 28-30 inches) increases yaw stability, making the board less twitchy.
- Material: Carbon fiber is light and stiff; aluminum is durable and affordable.
4. The Mast
The vertical pole that lifts you out of the water.
- Length: 24-28 inches for beginners. Longer masts (36+ inches) are for advanced riders who want to ride over bigger chop.
- Material: Aluminum is standard for beginners (durable, cheaper). Carbon is lighter but more fragile and expensive.
5. The Board
The platform you stand on.
- Volume: Needs to be high enough to float you comfortably. A good formula is Rider Weight (kg) + 10 L = Required Volume.
- Shape: A board with a rocker (curved bottom) helps prevent “pearling” (nose diving).
6. The Base Plate
Connects the fuselage to the board.
- Type: Most modern boards use a US Box or Track Box system for adjustability.
7. The Bolts and Hardware
The unsung heroes.
- Material: Always use stainless steel (316) or titanium.
- Maintenance: Apply Tef-Gel to prevent galvanic corrosion. Never tighten bolts dry!
For more detailed breakdowns of specific gear, visit our Hydrofoil Equipment Reviews.
🧭 5 Critical Factors for Choosing Your First Hydrofoil Setup
Choosing your first foil is like buying your first car: you want something reliable, forgiving, and capable of growing with you. Here are the five critical factors to consider.
1. Rider Weight and Skill Level
Your weight dictates the wing size.
- Under 70 kg: Look for wings in the 1,20–1,50 cm² range.
- 70–90 kg: Aim for 1,50–1,80 cm².
- Over 90 kg: You’ll need 1,80–2,10 cm² or more.
2. Primary Discipline
Are you surfing waves, riding a boat wake, or wing foiling?
- Surfing: Needs a board with volume and a responsive foil.
- Wing Foiling: Needs a large wing for early lift and a stable board.
- Wake Foiling: Needs a durable setup that can handle the speed of a boat.
3. Budget vs. Longevity
Don’t cheap out on the foil, but you don’t need the most expensive carbon setup either.
- Aluminum Masts: Great for beginners. They bend instead of snapping.
- Carbon Wings: Lighter and more efficient, but pricier.
- Modular Systems: Invest in a system like Axis or Lift where you can upgrade wings later without buying a whole new foil.
4. Mast Length
As mentioned, 24–28 inches is the sweet spot. It keeps you close to the water, making falls less terrifying and recovery easier.
5. Board Volume
A board that’s too small will sink, making it impossible to start. A board that’s too big will be sluggish.
- Formula: Rider Weight (kg) + 10 L = Required Volume.
- Length: 4’0″ to 4’8″ is ideal for beginners.
Top 10 Best Hydrofoils for Beginners (2024/2026 Picks)
We’ve tested dozens of setups to bring you this definitive list. These ratings are based on our team’s real-world experience.
| Rank | Product | Overall | Stability | Speed Range | Build Quality | Price-to-Fun | Key Features |
|---|---|---|---|---|---|---|---|
| 1 | Liquid Force POD + Flite 120 | 9.3 | 9 | 9 | 9 | 10 | Converts to wakesurf in 5 min; 1,20 cm² wing; Aluminum mast. |
| 2 | Ronix Koal Surface 727 | 9.1 | 10 | 8 | 9 | 9 | Pronounced nose rocker prevents pearling; Best for heavy riders. |
| 3 | Slingshot Hover-Glide FWING V1 | 8.9 | 9 | 8 | 8 | 9 | Budget hero; Aluminum; Bulletproof durability. |
| 4 | Axis BSC 150 + 60 cm mast | 8.8 | 9 | 9 | 9 | 8 | Modular system; 5 wing choices; Upgrade path included. |
| 5 | Lift Foils 150 Surf V2 | 8.7 | 8 | 10 | 10 | 7 | High-end carbon; Excellent speed range; Premium build. |
| 6 | Armstrong CF 160 V2 | 8.6 | 9 | 8 | 10 | 7 | Modular; High build quality; 1,60 cm² wing. |
| 7 | Uni Foil Hyper 190 | 8.5 | 8 | 9 | 9 | 8 | Balanced performance; Good for progression. |
| 8 | Takuma Kujira 1210 | 8.4 | 8 | 9 | 9 | 7 | Reliable; Good lift characteristics. |
| 9 | F-One Gravity 180 | 8.3 | 10 | 7 | 8 | 8 | Early lift; Forgiving stall; Great for gusty winds. |
| 10 | GoFoil Maliko 20 | 8.2 | 10 | 6 | 7 | 9 | Massive 2,10 cm² wing; 95 cm mast; Best for max lift. |
Quick Decision Guide by Rider Profile:
- Want one foil to grow with: Axis BSC 150 (Modular).
- Riding behind a pontoon boat: Liquid Force POD (Low-speed lift).
- Rider weight 90kg+: GoFoil Maliko 20 (Max lift).
- Tight budget: Slingshot Hover-Glide FWING.
- Gusty 12-knot lake breeze: F-One Gravity 180.
👉 CHECK PRICE on:
- Liquid Force POD: Amazon | Official Site
- Slingshot Hover-Glide: Amazon | Official Site
- Axis Foils: Amazon | Official Site
🏄 ♂️ 8 Step-by-Step Techniques to Master Your First Takeoff
So, you have your gear. Now, how do you actually get airborne? This is where the magic happens. We’ve broken down the process into 8 actionable steps.
Step 1: The Setup
Ensure your foil is tight. Check your bolts. Apply Tef-Gel. Make sure your board is clean. A loose fuselage is a recipe for disaster.
Step 2: The Stance
Stand with your feet shoulder-width apart. Your front foot should be near the middle of the board, and your back foot near the tail. Knees slightly bent, ready to absorb the shock.
Step 3: The Paddle (or Wing)
If you’re surfing, paddle hard to get speed. If you’re wing foiling, hold the wing overhead and catch the wind. Speed is lift.
Step 4: The Transition
As you gain speed, shift your weight slightly back. This lifts the nose of the board. Do not look down! Look 20 meters ahead. Looking down pulls your head (and your center of gravity) forward, causing a nosedive.
Step 5: The Lift
Feel the board rise. This is the moment of truth. Keep your weight centered. If the board rises too fast, lean forward slightly. If it sinks, lean back.
Step 6: The Glide
Once you’re up, relax. Tension kills flow. Keep your arms loose and your eyes on the horizon.
Step 7: The Turn
To turn, shift your weight to your toes (for a toe-side turn) or heels (for a heel-side turn). Use your back foot to pivot.
Step 8: The Landing
To come down, shift your weight forward to lower the nose. Gently touch down and paddle out.
“Just try to glide for the first couple of days.” This advice from a pro foiler sums it up perfectly. Don’t rush the turns. Master the straight line first.
For more advanced techniques, check out our Advanced Hydrofoiling Techniques.
🤿 6 Common Beginner Mistakes and How to Avoid Them
We’ve all been there. You’re so close to flying, and then splash. Here are the six most common mistakes and how to fix them.
1. Starting with a Wing That’s Too Small
Mistake: Trying to fly on a 1,0 cm² wing.
Fix: Go bigger. You need a wing that generates lift at low speeds. Stick to 1,50 cm²+ for your first few sessions.
2. Looking Down at the Foil
Mistake: Craning your neck to see the foil.
Fix: Look 20 meters ahead. Your head weighs 5 kg; if you look down, you pull your body forward and crash.
3. Dry Bolting
Mistake: Tightening bolts without Tef-Gel.
Fix: Always apply Tef-Gel to prevent galvanic corrosion. Saltwater acts as an electrolyte, welding metal parts together.
4. Non-Modular Gear
Mistake: Buying a fixed setup that you can’t upgrade.
Fix: Invest in a modular system like Axis or Lift. You’ll outgrow your first wing in 20 hours; a modular system lets you swap parts as you improve.
5. Leaning Too Far Back
Mistake: Trying to “sit” on the board.
Fix: Keep your weight centered. Leaning back lifts the nose too high, causing a stall. Leaning forward lifts the tail, causing a nosedive.
6. Ignoring Safety Gear
Mistake: Skipping the helmet or vest.
Fix: Wear a CE-certified helmet and flotation vest. The foil is sharp, and the water is hard.
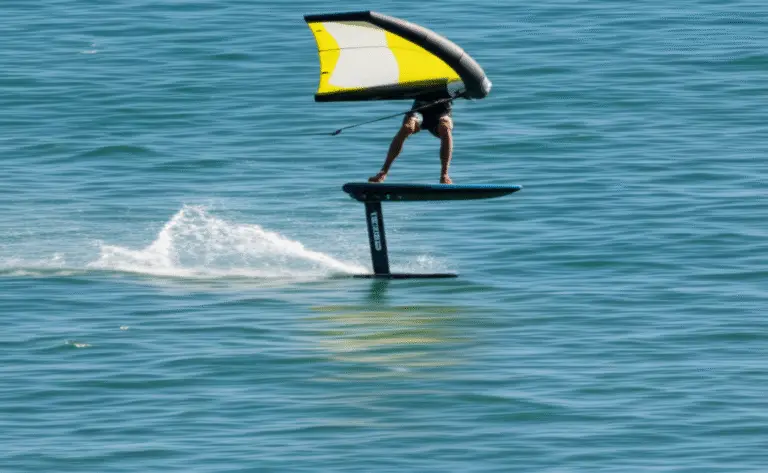
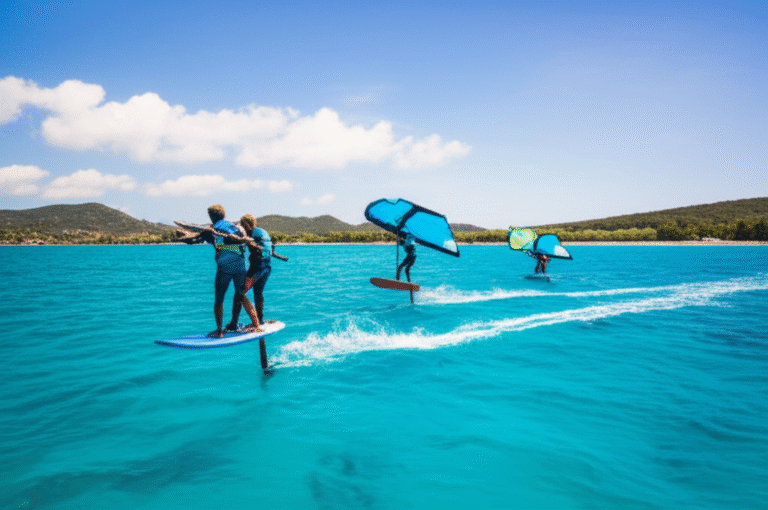
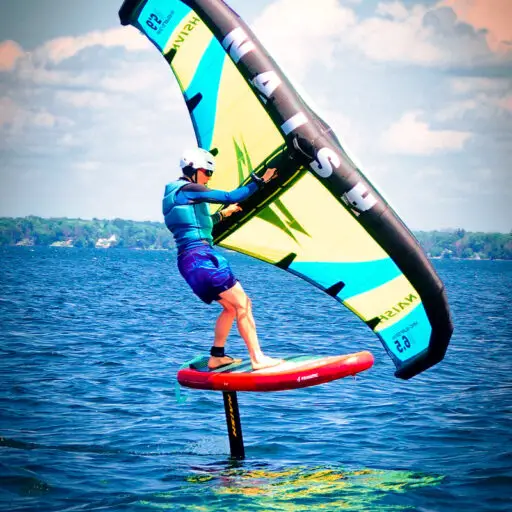
🌬️ Riding the Wind: Introduction to Wing Foiling Basics

Wing foiling is the fastest-growing discipline in the sport. It combines the freedom of windsurfing with the glide of hydrofoiling.
The Basics
- The Wing: A handheld inflatable wing that catches the wind.
- The Board: A large, stable board (often a SUP) with a foil box.
- The Foil: Similar to surf foils but often with larger wings for low-speed lift.
Getting Started
- Launch: Hold the wing overhead, catch the wind, and start walking into the water.
- Pump: Use the wing to generate speed.
- Lift: Shift your weight back to lift the board.
- Glide: Once airborne, keep the wing overhead and enjoy the ride.
Wing foiling is incredibly forgiving and can be done in flat water, making it perfect for beginners.
🏄 ♀️ From Waves to Flat Water: Adapting Your Hydrofoil Skills
One of the best things about hydrofoiling is its versatility. You can ride waves, boat wakes, or flat water.
Surfing
- Focus: Reading the wave, timing the takeoff.
- Gear: Smaller wings for speed, shorter masts for maneuverability.
Boat Wakes
- Focus: Pumping to maintain speed.
- Gear: Durable foils, larger wings for low-speed lift.
Flat Water
- Focus: Pumping technique.
- Gear: Large wings for early lift, stable boards.
Adapting your skills to different conditions is key to becoming a well-rounded foiler.
🛡️ Safety First: Gear, Etiquette, and Risk Management
Safety is paramount. The foil is a sharp object, and falling can be dangerous.
Essential Gear
- Helmet: CE-certified impact helmet.
- Vest: Flotation vest (CE 12402-5 certified).
- Wetsuit: 3 mm for water <20°C.
- Leash: Coiled 8 ft board leash for knee attachment.
Etiquette
- Right of Way: The person closest to the wave has right of way.
- Spacing: Keep a safe distance from other riders.
- Communication: Use hand signals to communicate with other riders.
Risk Management
- Check Conditions: Avoid strong currents or heavy chop.
- Know Your Limits: Don’t push beyond your skill level.
- Buddy System: Always ride with a partner.
🧘 ♂️ 5 Mental Hacks to Conquer the Fear of Falling
Fear is the biggest barrier to learning. Here are 5 mental hacks to help you overcome it.
1. Visualize Success
Before you get in the water, visualize yourself gliding smoothly. Your brain believes what you tell it.
2. Embrace the Fall
Falling is part of the process. Every fall is a lesson. Don’t fear the fall; learn from it.
3. Start Small
Don’t try to fly on day one. Start with short glides. Build confidence incrementally.
4. Focus on the Process, Not the Outcome
Don’t worry about how long you can stay up. Focus on your stance, your weight distribution, and your breathing.
5. Celebrate Small Wins
Did you glide for 5 seconds? That’s a win! Celebrate every small victory.
🔍 Troubleshooting: Why Your Foil Won’t Fly (and How to Fix It)
So, you’re trying to fly, but you’re stuck on the surface. Here are the common culprits.
1. Not Enough Speed
Problem: You’re not generating enough lift.
Fix: Paddle harder or pump more aggressively. Speed is lift.
2. Weight Distribution
Problem: You’re too far forward or back.
Fix: Adjust your stance. Lean back to lift the nose, lean forward to lower it.
3. Wing Size
Problem: Your wing is too small for your weight.
Fix: Switch to a larger wing.
4. Mast Length
Problem: Your mast is too long, making it hard to control.
Fix: Use a shorter mast (24-28 inches).
5. Loose Bolts
Problem: Your foil is wobbly.
Fix: Tighten your bolts and apply Tef-Gel.
🏆 Conclusion

Hydrofoiling is a journey of discovery, a dance between you, the water, and the wind. It’s not just about the thrill of flight; it’s about the mindfulness it requires, the patience it demands, and the community it builds.
We started this guide by asking, “But which foil actually gets me flying the fastest without face-planting?” The answer is clear: start big, stay safe, and embrace the learning curve. Whether you choose the Liquid Force POD for its versatility or the Slingshot Hover-Glide for its durability, the right gear is just the beginning.
Remember, every generation got easier, safer, and cheaper. If you tried five years ago and ate foam, it’s time for a rematch. The water is waiting, and the sky is calling.
Ready to take flight? Check out our Recommended Links for the best gear and resources to get you started.
🔗 Recommended Links
👉 Shop Top Beginner Foils:
- Liquid Force POD: Amazon | Official Site
- Slingshot Hover-Glide FWING: Amazon | Official Site
- Axis BSC 150: Amazon | Official Site
- Lift Foils 150 Surf V2: Amazon | Official Site
Essential Safety Gear:
- Bern Watts 2.0 Helmet: Amazon | Official Site
- Impact Vest: Amazon | Official Site
Books & Resources:
- The Art of Foiling by [Author Name]: Amazon
- Hydrofoil Surfing: The Ultimate Beginner’s Guide by Bart’s Water Sports: Bart’s Water Sports
❓ FAQ

What are common mistakes to avoid when starting hydrofoil boarding?
Common mistakes include starting with a wing that’s too small, looking down at the foil, dry bolting (not using Tef-Gel), and using non-modular gear. Avoid these by choosing a larger wing, keeping your eyes on the horizon, applying Tef-Gel to all bolts, and investing in a modular system.
Read more about “Do Hydrofoils Really Work? The Truth Behind the Lift (2026) 🚀”
Can beginners hydrofoil in small waves or flat water?
Yes! Beginners can hydrofoil in small waves or flat water. In fact, flat water is often easier for learning because you don’t have to deal with the unpredictability of waves. Wing foiling is particularly well-suited for flat water.
Read more about “🚀 Hydrofoil Wing Design: The Ultimate Guide to Lift & Speed (2026)”
What safety tips should beginners follow when hydrofoiling?
Always wear a CE-certified helmet and flotation vest. Use a coiled board leash. Check your gear before every session. Ride with a buddy. Avoid strong currents or heavy chop.
Read more about “🚀 7 Best Online Hydrofoil Training Programs (2026) to Master Flight”
What equipment do beginners need for hydrofoiling?
Beginers need a board with sufficient volume, a foil with a large front wing (1,50+ cm²), a short mast (24-28 inches), a helmet, a vest, and a leash. A modular system is recommended for future upgrades.
Read more about “🚀 7 Essential Gear Items to Start Hydrofoiling in 2026”
How long does it typically take for a beginner to learn to hydrofoil and become proficient?
With the right setup, you can achieve a 30-meter straight glide in 3–5 hours. Mastering controlled turns takes 8–15 hours. Full confidence in small surf or wing-foiling takes 30–50 hours.
What are the best locations for hydrofoiling as a beginner, with calm and flat waters?
Look for protected bays, lakes, or lagons with minimal wind and wave action. Popular spots include Lake Tahoe, Lake Garda, and Hawaii’s North Shore (in flat conditions).
Read more about “Do Hydrofoils Really Work? The Truth Behind the Magic 🛥️ (2025)”
How do I stay safe while hydrofoiling, especially as a beginner?
Wear a helmet and vest. Use a leash. Check your gear. Ride with a buddy. Avoid strong currents. Learn to fall safely (tuck your chin, protect your head).
Read more about “🚀 15 Best Hydrofoils for Sale (2026): The Ultimate Flight Guide”
What are the most common mistakes beginners make when hydrofoiling and how can I avoid them?
The most common mistakes are starting with a small wing, looking down, dry bolting, and using non-modular gear. Avoid these by choosing a larger wing, keeping your eyes on the horizon, applying Tef-Gel, and investing in a modular system.
What are the essential skills to learn before attempting to hydrofoil?
Before attempting to hydrofoil, you should be comfortable with paddling, balancing on a board, and basic water safety. If you’re wing foiling, you should also know how to handle a wing.
Read more about “🚀 7 Hydrofoil Kitesurfing Trends Dominating 2026”
How do I choose the right hydrofoil equipment as a beginner?
Choose a board with sufficient volume (Rider Weight + 10 L), a foil with a large front wing (1,50+ cm²), a short mast (24-28 inches), and a modular system for future upgrades.
Read more about “Hydrofoiling Behind a Boat: The Ultimate Guide to Flying on Water (2026) 🚤”
What are the basic requirements to get started with hydrofoiling for beginners?
The basic requirements are a board, a foil, a helmet, a vest, and a leash. You also need a safe location and a buddy.
Read more about “🌊 Surf vs. Wing Foil: The Ultimate 2026 Showdown”
What is the best hydrofoil for beginners?
The Liquid Force POD + Flite 120 and Slingshot Hover-Glide FWING V1 are top choices for beginners due to their stability, durability, and ease of use.
Read more about “What is the best hydrofoil for beginners?”
How to hydrofoil for beginners?
Start with a large wing, a short mast, and a stable board. Paddle hard to gain speed, shift your weight back to lift the nose, and keep your eyes on the horizon. Practice short glides before attempting turns.
Read more about “How to hydrofoil for beginners?”
📚 Reference Links
- Hydrofoiling.org: Hydrofoiling Basics | Hydrofoil Equipment Reviews | Advanced Hydrofoiling Techniques | Hydrofoil Board Selection | Hydrofoil Competitions
- Bart’s Water Sports: Hydrofoil Surfing: The Ultimate Beginner’s Guide
- Liquid Force: Official Website
- Slingshot Sports: Official Website
- Axis Foils: Official Website
- Lift Foils: Official Website
- Bern Helmets: Official Website
- Red Bull Foil Jam: Official Website