Support our hydrofoil educational content for free when you purchase through links on our site. Learn more
How to Maintain Your Hydrofoil for Peak Performance 🏄 ♂️

To answer “How do I properly maintain and care for my hydrofoil equipment to ensure it lasts and performs well?”: rinse it with fresh water after every session, inspect the mast, wings, fuselage, board tracks, and hardware, then dry and store everything properly. That simple routine prevents corrosion, catches impact damage early, and keeps your foil feeling fast and predictable.
Saltwater is especially unforgiving. Dissolved salts make water more electrically conductive, accelerating corrosion where aluminum, stainless-stel bolts, sand, and moisture meet. A few minutes of cleaning can protect a precision foil from the kind of seized screw that turns a perfect wind day into an awkward hardware-removal workshop.
We learned this the mildly annoying way after a session where a tiny grain of sand stopped a stabilizer from seating flush. The foil still looked fine, but it hummed, felt twitchy, and tracked poorly. Once cleaned and correctly assembled, the “mystery problem” disappeared.
Key Takeaways
- Rinse after every session: Freshwater removes salt, sand, algae, and sediment before they damage threads and interfaces.
- Inspect before every launch: Check the mast, fuselage, wings, board tracks, inserts, bolts, and washers for cracks, corrosion, looseness, or distortion.
- Protect aluminum and stainless-stel connections: Use manufacturer-approved marine grease or anti-seize, such as Tef-Gel, where appropriate.
- Treat carbon components carefully: Never drag carbon wings or masts across sand, concrete, or rocks, and stop riding after suspected structural damage.
- Use correct torque: A quality metric torque wrench helps prevent stripped screws, crushed composite parts, and loose connections.
- Dry before storage: Keep foil components separated, ventilated, shaded, and protected from heat and direct sunlight.
- Replace damaged hardware promptly: Rounded, bent, deeply coroded, or seized bolts are failure risks, not souvenirs.
- Keep a maintenance log: Recording inspections and repairs makes recurring wear easier to spot before it affects safety or performance.
Table of Contents
- ⚡ Quick Tips and Facts for Longer-Lasting Hydrofoil Equipment
- 🧭 Hydrofoil Equipment Care: Materials, Components, and Performance Basics
- How Saltwater, Sand, UV Exposure, and Impact Damage Affect Foils
- Aluminum, Carbon Fiber, Stainless Steel, and Titanium: Key Material Differences
- ✅ Why Regular Foil Maintenance Matters for Safety and Speed
- How Clean Hardware and Smooth Foil Surfaces Improve Performance
- Warning Signs That Your Hydrofoil Needs Immediate Attention
- 1. Build a Post-Session Freshwater Rinse Routine
- How Often Should I Rinse My Foil?
- The Correct Order for Rinsing a Mast, Front Wing, Stabilizer, and Fuselage
- Removing Salt, Sand, Mud, and Algae Without Scratching the Finish
- 2. Follow a Detailed Weekly Hydrofoil Inspection Checklist
- Mast and Fuselage Inspection
- Front Wing and Stabilizer Inspection
- Board Mount, Tracks, Screws, and Inserts Inspection
- Checking Foil Alignment, Play, Woble, and Unusual Noise
- 3. Clean and Dry Every Foil Component Correctly
- Safe Brushes, Cloths, Cleaners, and Rinsing Equipment
- Why You Should Avoid Abrasive Pads, Solvents, and Pressure-Washer Damage
- Drying Threaded Holes, Hardware, Tracks, and Hidden Crevices
- 4. Prevent Aluminum Foil Corosion and Galvanic Corosion
- How to Stop Aluminum Corosion on a Hydrofoil
- Understanding Saltwater Corosion Between Aluminum and Stainless Steel
- Using Tef-Gel, Duralac, Anti-Seize, and Corosion Inhibitors Safely
- White Powder, Pitting, Discoloration, and Coroded Threads: What They Mean
- 5. Care for Carbon Fiber Foil Wings and Masts
- Carbon Foil Care After Saltwater Sessions
- Preventing Carbon Fiber Delamination, Cracks, and UV Damage
- Why Carbon and Aluminum Components Need Different Maintenance
- What If My Carbon Wing Gets Chipped?
- 6. Maintain Hydrofoil Screws, Bolts, Threads, and Mounting Hardware
- Hardware Tightening and Thread Care
- How to Use a Torque Wrench Without Stripping Foil Screws
- Choosing the Correct Torx, Hex, and Phillips Tools
- Can I Use WD-40 on Foil Hardware?
- When to Replace Rusted, Bent, Rounded, or Stretched Hardware
- 7. Protect Foil Threads, Mast Tracks, and Board Inserts
- Cleaning and Lubricating Foil Tracks
- Preventing Cross-Threading and Seized Screws
- Detecting Loose or Damaged Board Inserts Before They Fail
- 8. Repair Surface Damage and Inspect Impact Zones
- Surface Damage and Repair Basics
- Distinguishing Cosmetic Scratches From Structural Damage
- Repairing Small Nicks on Leading Edges and Trailing Edges
- When a Damaged Mast, Wing, or Fuselage Requires Professional Repair
- Why You Should Never Sand a Hydrofoil Profile Without a Plan
- 9. Store Hydrofoil Equipment the Right Way
- Proper Storage Between Sessions
- Should You Store Your Foil Asembled or Disassembled?
- Protecting Wings and Masts From Heat, Moisture, and Sunlight
- Using Wing Bags, Mast Bags, Board Bags, and Protective Covers
- Off-Season Hydrofoil Storage and Long-Term Preparation
- 10. Pack and Transport Your Foil Without Damage
- Travel Care Tips for Cars, Roof Racks, Boats, and Airplanes
- Separating Carbon Wings From Metal Hardware During Transport
- Protecting Leading Edges, Fuselages, and Mast Bases
- Pre- and Post-Travel Inspection Checklist
- 11. Tune Your Hydrofoil Setup for Reliable Performance
- Checking Mast-to-Fuselage and Wing-to-Fuselage Alignment
- Inspecting Shims, Spacers, Washers, and Hardware Stack-Up
- How Maintenance Affects Lift, Stability, Tracking, and Stall Behavior
- 12. Assemble and Disassemble Hydrofoil Equipment Safely
- A Damage-Free Assembly Sequence
- Safe Disassembly After a Saltwater Session
- Avoiding Dropped Wings, Sand Contamination, and Pinched Fingers
- 🧰 Essential Hydrofoil Maintenance Tools and Supplies
- Recommended Cleaning and Corosion-Prevention Products
- The Compact Foil-Repair Kit We Keep in the Van
- Tool and Product Compatibility by Foil Material
- 📅 Hydrofoil Maintenance Schedule: After Every Session, Monthly, and Annually
- After-Every-Session Care
- Monthly Deep Inspection
- Annual Servicing and Professional Inspection
- Maintenance Log Template for Tracking Wear and Repairs
- ❌ Common Beginner Hydrofoil Maintenance Mistakes
- Leaving Saltwater to Dry on the Foil
- Overtightening Screws and Crushing Composite Parts
- Dragging Wings Across Sand, Concrete, or Rocks
- Using the Wrong Grease, Oil, or Cleaning Chemical
- Ignoring Small Chips, Corosion Spots, and Strange Movement
- 🛡️ Hydrofoil Safety Checks Before Every Launch
- Quick Mast, Wing, Hardware, and Board Connection Check
- When Not to Ride Damaged Foil Equipment
- ❓ FAQs: Hydrofoil Maintenance and Equipment Care
- How Often Should I Rinse My Foil?
- Can I Leave My Foil Asembled?
- How Do I Stop Aluminum Corosion?
- What If My Carbon Wing Gets Chipped?
- Can I Use WD-40 on Foil Hardware?
- Should I Wax or Polish My Hydrofoil Wings?
- How Do I Remove a Seized Hydrofoil Screw?
- How Can I Tell If a Carbon Mast Is Delaminated?
- How Long Should a Well-Maintained Hydrofoil Last?
- 🔗 Recommended Links
- 📚 Reference Links
- 🏁 Conclusion
Quick Tips and Facts for Longer-Lasting Hydrofoil Equipment
If you’re just getting started, our guide on how to get started with hydrofoiling covers the basics. Once you’re foiling, maintenance becomes the difference between a crisp, quiet ride and a noisy session spent wondering why the mast suddenly feels like a shopping trolley with one bad wheel.
At Hydrofoiling™, our practical rule is simple:
Rinse, inspect, dry, protect, and store your foil properly after every session.
Salt, sand, heat, UV light, and hard impacts are relentless. A foil does not need dramatic neglect to deteriorate. A little salt trapped under a screw head, a grain of sand in a board track, or a tiny carbon chip can quietly become a much larger problem.
The five-minute post-session routine
- Rinse the complete foil system with fresh water.
- Flush sand from the mast track, fuselage joint, wing mounts, and screw holes.
- Inspect the leading edges, trailing edges, mast base, and hardware.
- Dry every component completely, especially threaded interfaces.
- Store the gear in a cool, shaded, ventilated place.
The National Ocean Service explains that saltwater accelerates corrosion because dissolved salts make water more electrically conductive. That is why “it looked clean when I packed it” is not a reliable test.
Fast maintenance facts
| Maintenance fact | Why it matters | Our recommendation |
|---|---|---|
| Salt crystals can remain after water evaporates | Residual salt attracts moisture and promotes corrosion | Rinse after every saltwater session |
| Sand damages threads and board tracks | Abrasive particles can prevent proper seating | Flush, don’t grind sand deeper into the joint |
| Carbon damage may be internal | A cosmetic-looking impact can hide delamination | Stop riding after suspicious impacts |
| Loose hardware changes foil alignment | Misalignment can create vibration, drag, and instability | Check fasteners before every launch |
| Heat harms boards, bags, adhesives, and finishes | Hot vehicles can become extreme heat chambers | Never store assembled gear in a hot car |
| WD-40 is not a substitute for anti-seize | Water displacement is not the same as thread protection | Use a manufacturer-approved marine grease or anti-seize |
Our “never skip” checklist ✅
- ✅ Freshwater rinse
- ✅ Sand removal
- ✅ Visual inspection
- ✅ Drying before storage
- ✅ Hardware check
- ✅ Padded protection for carbon wings and masts
- ❌ No dragging wings across concrete
- ❌ No overtightening carbon interfaces
- ❌ No riding with a loose fuselage
- ❌ No storing wet equipment in a sealed bag
A maintenance guide from Windance puts it neatly: “A few minutes of care after each session saves you from expensive repairs.” We agree, although we’d add one more benefit: those few minutes also save you from discovering a stripped screw at the beach with the wind building beautifully offshore.
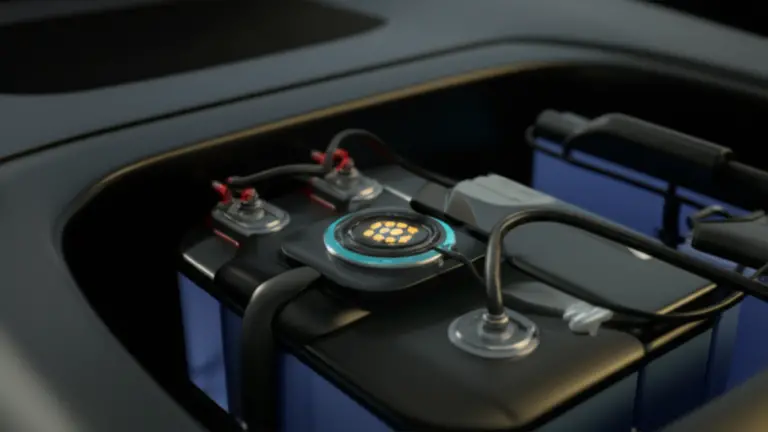
The featured maintenance video takes a similar schedule-based approach for powered foil-drive equipment, including freshwater rinsing after every use, periodic rust protection, bearing lubrication, and separate battery storage. The details differ from a purely mechanical foil, but the principle is identical: clean components individually rather than sealing contamination inside the system.
Hydrofoil Equipment Care: Materials, Components, and Performance Basics
A hydrofoil is not one object. It is a connected system made from materials that react differently to salt, moisture, abrasion, heat, and impact.
Typical components include:
- Mast
- Fuselage
- Front wing
- Rear stabilizer
- Board mounting plate or track hardware
- Bolts, washers, shims, and spacers
- Board inserts and tracks
- Protective bags and covers
- Foil-drive motor, battery, and electronics, if applicable
Brands such as Armstrong, Lift Foils, Axis Foils, Slingshot Sports, F-One, Takuma, Mikes Lab, and GoFoil use different construction methods and hardware standards. Their maintenance principles overlap, but their torque values, thread sizes, compatible mast-and-fuselage combinations, and approved products may not.
Always consult the instructions for your exact system before applying torque or modifying a component. The U.S. Consumer Product Safety Commission also recommends following manufacturer instructions for sports equipment rather than relying on generic adjustments.
What needs attention most often?
| Component | Common materials | Main threats | What to inspect |
|---|---|---|---|
| Mast | Aluminum or carbon fiber | Impacts, corrosion, UV, loose plate | Straightness, cracks, base damage, fasteners |
| Fuselage | Aluminum or carbon composite | Galvanic corrosion, sand, impact | Joint fit, bolt holes, alignment, pitting |
| Front wing | Carbon composite, fiberglass, aluminum | Leading-edge impact, chips, delamination | Cracks, dents, burrs, profile damage |
| Stabilizer | Carbon composite or aluminum | Trailing-edge damage, loose screws | Cracks, sharp burrs, movement |
| Board tracks | Reinforced composite, aluminum, stainless inserts | Sand, overloading, stripped inserts | Movement, cracks, blocked channels |
| Bolts | Stainless steel or titanium | Corosion, rounding, seizure | Head condition, threads, straightness |
| Foil-drive unit | Aluminum, stainless steel, electronics | Saltwater, sand, heat, moisture | Seals, terminals, bearings, motor housing |
How saltwater, sand, UV exposure, and impact damage affect foils
Saltwater and corrosion
Saltwater encourages galvanic corrosion when disimilar metals contact each other in the presence of an electrolyte. Aluminum paired with stainless-stel hardware is common and practical, but the interface needs cleaning and protection. The National Association of Corosion Engineers provides extensive technical resources on corrosion control and material compatibility.
White powder around aluminum is an early warning sign. It is usually corrosion product, not harmless beach dust.
Sand and abrasion
Sand is a mechanical contaminant. It gets into:
- Track channels
- Fuselage sockets
- Bolt holes
- Washers
- Wing interfaces
- Mast plates
- Protective bags
Never force a bolt through a sand-filled hole. Rinse or blow the area clean first. A bolt that feels “tight” while grinding against sand is not doing its job; it is simply turning your precision hardware into a tiny abrasive mill.
UV exposure and heat
Carbon composites can tolerate plenty of normal outdoor use, but unnecessary UV exposure and extreme heat are poor storage habits. Heat can also soften board materials, affect adhesives, and deform protective equipment.
The Federal Emergency Management Agency warns that enclosed vehicles can reach dangerous temperatures quickly. We’ve seen board bags left in vans become hot enough to make every metal screw feel freshly baked. Store foil gear indoors or in a shaded, ventilated area instead.
Impact damage
A hard strike against rocks, docks, or shallow water may create:
- A visible chip
- A dented leading edge
- A hairline crack
- A loose fuselage joint
- Internal carbon damage
- A change in stiffness or handling
A foil can look acceptable and still be structurally compromised. If the ride changes immediately after impact, stop and inspect it.
How Saltwater, Sand, UV Exposure, and Impact Damage Affect Foils
Aluminum, carbon fiber, stainless steel, and titanium: key differences
| Material | Advantages | Typical weaknesses | Care priority |
|---|---|---|---|
| Aluminum | Durable, affordable to replace, easy to inspect | Pitting, galvanic corrosion, surface oxidation | Rinse threads and interfaces; prevent trapped salt |
| Carbon fiber | Light, stiff, efficient, excellent torsional response | Delamination, hidden impact damage, edge chips | Prevent impacts; inspect carefully; avoid crushing |
| Stainless steel | Strong, corrosion-resistant hardware | Can still seize, pit, or promote galvanic corrosion near aluminum | Clean, lubricate, replace rounded fasteners |
| Titanium | Lightweight and highly corrosion-resistant | Expensive, prone to galling if installed dry | Use suitable anti-seize and avoid cross-threading |
| Fiberglass composite | Tough and economical | Can chip, crack, or absorb damage after impact | Inspect edges and mounting zones |
Carbon fiber is electrically conductive, while aluminum is highly reactive. That combination deserves particular care at interfaces. A clean, protected joint is far less troublesome than a neglected one.
Aluminum foil care
Aluminum parts often show corrosion as:
- White powder
- Pitting
- Bubling finish
- Discoloration around bolts
- Roughness near wing or mast connections
- Threads that become difficult to start
Remove contamination with fresh water, dry thoroughly, and use a compatible corrosion-prevention compound. Do not aggressively sand away corrosion without understanding how much material is being removed. A mast base or fuselage is not the place for enthusiastic “while I’m here” shaping.
Carbon fiber care
Carbon wings and masts deserve a gentler inspection routine:
- Look for impact marks and changes in gloss.
- Check for cracks radiating from holes.
- Press gently around suspicious areas for soft spots.
- Listen for unusual buzzing, clicking, or vibration.
- Compare the component with its normal stiffness.
- Stop using it if the shape, sound, or handling changes.
A used Armstrong Performance Mk II carbon mast, 935 mm is described as having “no structural cracks, repairs, delamination, or soft spots,” while minor scuffs are described as cosmetic. That distinction is crucial: scratches are not automatically dangerous, but structural uncertainty is.
✅ Why Regular Foil Maintenance Matters for Safety and Speed
Hydrofoil maintenance is not just cosmetic housekeeping. It protects:
- Structural integrity
- Hydrodynamic efficiency
- Hardware reliability
- Predictable handling
- Board and mast connections
- Your feet, legs, and confidence
A rough leading edge or damaged trailing edge can disturb water flow. A loose stabilizer can alter pitch response. A coroded bolt may look fine until its head rounds off during disassembly. By then, the beach day has transformed into an improvised mechanical workshop.
How clean hardware and smooth foil surfaces improve performance
A foil works by managing water flow over carefully shaped surfaces. Damage, burrs, contamination, or misalignment can cause:
- Extra drag
- Ventilation
- Humming or whistling
- Unwanted vibration
- Less efficient pumping
- Slower acceleration
- Inconsistent lift
- Strange pitch or yaw behavior
The International Maritime Organization discusses how surface condition and marine fouling affect underwater performance. Your foil is not a ship’s hull, of course, but the underlying lesson applies: clean, smooth underwater surfaces reduce unwanted resistance.
Warning signs that your hydrofoil needs immediate attention
Stop riding and inspect the system if you notice:
- New clicking, popping, humming, or vibration
- A wing that no longer sits flush
- Visible cracking
- A soft or flexible section in carbon
- White corrosion powder around hardware
- A bolt that will not tighten or loosen normally
- Side-to-side movement at a wing or fuselage joint
- A mast that appears bent
- Suden changes in pitch, yaw, or roll control
- Water intrusion into a sealed powered unit
The correct response is not “I’ll keep going for one more run.” That final run is often where a minor repair becomes a major one.
1. Build a Post-Session Freshwater Rinse Routine
How often should I rinse my foil?
After every session. Saltwater deserves immediate attention, but even freshwater sessions can leave behind mud, algae, minerals, and fine sediment.
Windance’s guide recommends rinsing the entire foil after each session and concentrating on the fuselage, mast base, stabilizer bolts, wing connections, and board tracks. We consider that sound advice. Freshwater is cheap; replacement hardware and carbon repairs are not.
Step-by-step freshwater rinse
Step 1: Remove the board from the water
Do not rinse a fully assembled system while it is lying on a sandy beach. Carry it to a clean area or place it on a padded mat.
Step 2: Separate components when practical
For a routine rinse, you may not need complete disassembly. However, after saltwater use, periodically separate:
- Mast and board
- Mast and fuselage
- Front wing and fuselage
- Stabilizer and fuselage
- Foil-drive motor components, if applicable
Water trapped between tightly fitted components can keep salt active long after the outside appears dry.
Step 3: Flush from multiple angles
Use a gentle hose flow or clean water container. Focus on:
- Mast plate and track hardware
- Fuselage sockets
- Wing mounting holes
- Stabilizer bolts
- Mast-to-fuselage joint
- Washers and shims
- Board inserts and tracks
Avoid blasting directly into electronic seals or bearings unless the manufacturer approves that method.
Step 4: Remove sand without grinding it in
Hold the component so water carries sand away from the joint. A soft nylon brush can help around track channels, but never scrub carbon or polished foil surfaces with an abrasive pad.
Step 5: Dry completely
Use a clean microfiber cloth, then allow parts to air-dry in shade. Compressed air can help remove water from threaded holes, but keep pressure moderate and avoid forcing contaminants into seals.
Powered foil-drive maintenance
Powered systems require an additional routine. The featured video’s maintenance schedule recommends:
- Rinsing the complete drive unit after every session
- Removing the motor hub after saltwater use so the stator and hub exterior can be rinsed
- Applying a rust inhibitor approximately every three sessions
- Applying marine grease to the bearing and spindle approximately every ten sessions
- Disassembling, cleaning, and drying the drive approximately every twenty sessions
- Storing the battery near 50% charge for long-term storage
Follow your drive manufacturer’s instructions first. Battery systems are not generic accessories. For lithium-ion battery safety, consult guidance from the U.S. Fire Administration.
The Correct Order for Rinsing a Mast, Front Wing, Stabilizer, and Fuselage
Our preferred order reduces missed areas:
- Board tracks and mast plate
- Mast base
- Fuselage and mast joint
- Front wing connection
- Stabilizer connection
- All bolts, washers, shims, and screw heads
- Front wing and stabilizer surfaces
- Mast surface
- Board underside and inserts
Why start with the joints? That is where salt and sand create the most expensive surprises.
What not to do ❌
- Do not leave a wet foil sealed inside a plastic bag.
- Do not rinse over loose sand and then place the wet parts back on it.
- Do not use a stiff wire brush on aluminum threads.
- Do not polish away foil-profile material casually.
- Do not spray solvents into bearings, seals, or electronics.
Removing Salt, Sand, Mud, and Algae Without Scratching the Finish
For stubborn contamination:
- Soak the area briefly with clean water.
- Wipe with a soft microfiber cloth.
- Use a soft nylon brush around hardware.
- Rinse again.
- Dry fully.
- Inspect under bright light.
If algae or marine growth has dried onto a wing, patience beats force. Let freshwater soften it before wiping. A plastic scraper may be suitable for a board track, but it should not be used aggressively on a foil’s hydrodynamic profile.
3M offers general guidance on using non-abrasive cleaning materials for finished surfaces, but always verify compatibility with your foil’s coating and composite construction.
2. Follow a Detailed Weekly Hydrofoil Inspection Checklist
A weekly inspection does not mean every seven days on the calendar. It means after roughly a handful of sessions, after heavy impacts, or before an important trip.
Weekly inspection table
| Inspection area | What to look for | Action |
|---|---|---|
| Front wing | Chips, cracks, dents, burrs | Stop if structural damage is suspected |
| Stabilizer | Loose bolts, edge damage, movement | Clean, retighten to specification, or replace |
| Mast | Straightness, cracks, base damage | Remove from service if bent or cracked |
| Fuselage | Pitting, joint wear, distortion | Clean and seek service if fit changes |
| Board tracks | Sand, cracks, insert movement | Flush and inspect board structure |
| Bolts | Rounding, corrosion, bent shafts | Replace damaged hardware |
| Washers and shims | Deformation, missing pieces | Reinstall correct components |
| Carbon surfaces | Soft spots, delamination, impact marks | Seek professional inspection |
| Foil alignment | Gaps, uneven seating, twist | Disassemble and clean interfaces |
Mast and fuselage inspection
Place the mast on a clean, flat surface and compare it visually from several angles. You are looking for:
- A bend or twist
- Damage around the base
- Cracks near mounting holes
- Excessive wear in the fuselage socket
- Corosion around contact surfaces
- A gap where the mast should seat flush
Do not try to “test” a suspected carbon crack by loading it harder. Structural inspection is a professional task when the damage is uncertain.
Front wing and stabilizer inspection
Run a clean fingertip carefully along the edges. We are not searching for sharpness by sacrificing a finger; we are feeling for:
- Burrs
- Raised fibers
- Chips
- Uneven repairs
- A sudden change in edge thickness
- Damage concentrated near mounting holes
A tiny nick can often be repaired, but a crack that travels from a bolt hole or leading edge deserves expert attention.
Board mount, tracks, screws, and inserts inspection
Check whether:
- Track hardware slides smoothly
- The mast plate sits flat
- Inserts remain fixed
- The board skin shows cracks
- Screws start by hand
- Washers sit evenly
- The mast moves under gentle hand pressure
If the board insert moves, stop tightening. More torque will not magically turn damaged structure into sound structure.
3. Clean and Dry Every Foil Component Correctly
Safe brushes, cloths, cleaners, and rinsing equipment
A useful maintenance kit includes:
- Freshwater container or gentle hose
- Microfiber cloths
- Soft nylon brush
- Plastic pick for debris
- Manufacturer-approved marine grease
- Suitable anti-seize compound
- Torque wrench
- Correct Torx or hex bits
- Padded work mat
- Labeled hardware containers
- Protective bags
Products from Star brite, CRC Marine, and McLube may be useful for marine applications, but compatibility matters more than brand recognition. Check the label and your foil manufacturer’s recommendations before using any chemical on carbon, rubber seals, coatings, or electronics.
Why you should avoid abrasive pads, solvents, and pressure-washer damage
Avoid:
- Steel wool
- Wire brushes on finished surfaces
- Harsh paint strippers
- Acetone near seals or adhesives
- Strong alkaline cleaners
- High-pressure jets aimed at bearings or electronics
- Household scouring powders
A pressure washer can force water and grit into places that were previously dry. Your foil is a precision underwater component, not a muddy tractor tire.
Drying threaded holes, hardware, tracks, and hidden crevices
After rinsing:
- Shake water from the part away from electronics.
- Wipe flat surfaces.
- Use a soft cloth around bolt holes.
- Blow gently across, not aggressively into, sealed joints.
- Leave components separated in shade.
- Recheck hidden cavities before storage.
Never pack a damp carbon wing in an airtight bag. Trapped moisture and abrasion make an unpleasant partnership.
4. Prevent Aluminum Foil Corosion and Galvanic Corosion
How to stop aluminum corrosion on a hydrofoil
The best corrosion strategy is prevention:
- Rinse after every session.
- Remove trapped salt from joints.
- Dry completely.
- Inspect for white powder or pitting.
- Protect compatible threads with suitable marine grease or anti-seize.
- Replace contaminated or damaged fasteners.
- Separate components for long-term storage.
The U.S. Department of Transportation Federal Highway Administration explains how environmental exposure and disimilar-metal interactions contribute to corrosion in metal structures. Hydrofoils operate in a smaller but highly aggressive environment, especially in warm saltwater.
Understanding saltwater corrosion between aluminum and stainless steel
When disimilar metals are connected in an electrolyte such as saltwater, galvanic corrosion can occur. The less noble metal, often aluminum, may corode preferentialy.
| Situation | Risk level | Better practice |
|---|---|---|
| Dry stainless bolt in clean aluminum | Medium | Use suitable thread protection |
| Wet, salty bolt left installed for weeks | High | Rinse, dry, and remove periodically |
| Sand trapped beneath a washer | High | Flush before tightening |
| Correctly lubricated, clean interface | Lower | Inspect regularly |
| Coroded bolt forced into a clean thread | Very high | Replace bolt and clean thread first |
Using Tef-Gel, Duralac, anti-seize, and corrosion inhibitors safely
Products commonly used in marine hardware include:
- Tef-Gel
- Duralac
- Lanocote
- Fluid Film
- Marine grease from brands such as Yamaha, Mercury Marine, or Lucas Oil
Use only a thin film on the intended threaded area. Too much compound can migrate onto surfaces where friction is needed or alter torque behavior.
Do not apply lubricant blindly to:
- Threadlocker-required connections
- Brake-like friction surfaces
- Rubber seals unless compatible
- Electrical contacts
- Battery terminals unless the manufacturer specifies it
- Carbon bonding surfaces
What white powder, pitting, and discolored threads mean
- Light white powder: early aluminum corrosion; clean promptly.
- Deep pits: material loss; consider professional inspection.
- Bubling finish: corrosion beneath a coating.
- Dark staining: possible galvanic reaction or contamination.
- Rounded threads: hardware failure risk.
- Frozen bolt: possible seizure or corrosion bonding.
If the bolt will not move with normal hand-tool force, stop before rounding the head. Heat, penetrating products, extraction tools, or professional removal may be necessary, but carbon parts and adhesives can be damaged by improvised heating.
5. Care for Carbon Fiber Foil Wings and Masts
Carbon foil care after saltwater sessions
Carbon fiber does not rust like aluminum, but the surrounding hardware can corode, and carbon components can suffer from impact damage, UV exposure, and delamination.
After each session:
- Rinse the wing, mast, and hardware.
- Inspect the leading and trailing edges.
- Dry away from direct sun.
- Store in padded covers.
- Keep heavy objects away.
- Avoid dragging the component.
- Check mounting holes for cracks or crushed laminate.
Preventing carbon fiber delamination, cracks, and UV damage
Carbon care is mostly impact prevention:
- Use wing bags.
- Keep wings off concrete.
- Do not lean a mast against sharp corners.
- Avoid clamping carbon tightly in roof-rack hardware.
- Do not leave carbon parts in a hot vehicle.
- Never assume a light-looking impact is harmless.
Carbon Fiber Gear provides general information about carbon-fiber properties, while Gurit publishes composite-material resources relevant to resin systems and structural repairs.
Why carbon and aluminum components need different maintenance
| Care task | Aluminum | Carbon fiber |
|---|---|---|
| Rinse after saltwater | Essential | Essential for hardware and contamination |
| Watch for white powder | Yes | Usually indicates nearby metal, not carbon itself |
| Sanding | Limited and controlled | Only for approved repairs; never alter profile casually |
| Impact inspection | Look for dents and bends | Look for cracks, soft spots, delamination |
| Heat protection | Important | Very important for resin and bonding systems |
| Hardware torque | Prevent stripping | Prevent crushing laminate |
| Professional repair | For major distortion or pitting | Strongly recommended for structural damage |
What if my carbon wing gets chipped?
A small superficial chip may be repairable, but do not immediately sand it into a larger flat spot. First determine whether:
- The damage is only in the finish.
- Fibers are exposed.
- The edge has changed shape.
- The chip reaches a mounting area.
- There is a crack extending beyond the visible chip.
- The wing makes a new sound or vibration.
If fibers are broken, the foil feels soft, or the damage reaches the spar or mounting structure, do not ride it. A composite specialist should assess it.
Windance recommends 600-grit or finer wet sandpaper for carefully smoothing minor burrs. We agree only for clearly superficial edge irregularities where the foil’s designed profile will not be changed. A trailing edge is not a free-form sculpture project.
6. Maintain Hydrofoil Screws, Bolts, Threads, and Mounting Hardware
Hardware tightening and thread care
Good hardware maintenance follows a disciplined sequence:
- Clean the bolt and threaded hole.
- Inspect the head for rounding.
- Check that the bolt is straight.
- Start the bolt by hand.
- Confirm the part is seated correctly.
- Tighten evenly in a cross pattern where applicable.
- Use the manufacturer’s torque specification.
- Wipe away excess compound.
- Recheck after the first short ride if the manufacturer recommends it.
How to use a torque wrench without stripping foil screws
A torque wrench is only useful if:
- It is within its calibration range.
- The correct bit is fully seated.
- The bolt threads are clean.
- The torque specification matches the exact hardware.
- The joint is assembled as instructed.
Torque changes with lubrication. A lubricated thread may generate more clamp load at the same wrench setting than a dry thread. That is why you should not copy a torque value from another brand or online forum.
The U.S. National Institute of Standards and Technology explains the importance of measurement accuracy and calibration. For high-value foil systems, a correctly sized, periodically checked torque wrench is sensible equipment.
Choosing the correct Torx, hex, and Phillips tools
Use high-quality bits that fully engage the fastener:
- Metric hex bits for metric hardware
- Torx bits for Torx heads
- Correct-length drivers for recessed screws
- Ball-end hex tools only where the manufacturer permits
- No adjustable pliers on precision fasteners
A rounded bolt head often begins with the wrong bit, a partially seated bit, or a rushed beach-side adjustment.
Can I use WD-40 on foil hardware?
We do not recommend WD-40 as your primary thread lubricant or anti-seize for hydrofoil hardware.
WD-40’s own product information describes the original formula as a water-displacing spray. It can help displace moisture and loosen some contamination, but that is different from providing the long-term anti-seize properties required at aluminum-and-stainless interfaces.
Use a product specifically approved for your hardware and composite interfaces, such as:
- Tef-Gel
- Duralac
- Marine grease
- Manufacturer-approved anti-seize
Apply sparingly and follow the foil brand’s instructions.
When to replace rusted, bent, rounded, or stretched hardware
Replace hardware if it has:
- A rounded head
- Coroded threads
- Visible bending
- Deep scoring
- Cracks
- Evidence of galling
- A damaged washer seat
- A history of being overtightened
Do not mix random bolt lengths. A bolt that is too long may bottom out before clamping the joint; one that is too short may not engage enough thread.
7. Protect Foil Threads, Mast Tracks, and Board Inserts
Cleaning and lubricating foil tracks
Board tracks are magnets for sand. After each session:
- Rinse the track opening.
- Move the nuts or plate only after debris is softened.
- Flush both ends of the channel.
- Inspect the track walls and surrounding laminate.
- Dry before installing hardware.
- Use only compatible lubricant if the board manufacturer recommends it.
Do not pack grease into a track where it can attract sand. A clean, dry track is often better than a sticky one.
Preventing cross-threading and seized screws
Start every screw by hand. If it does not turn smoothly for several rotations, remove it and inspect:
- Thread pitch
- Dirt
- Cross-threading
- Wrong bolt length
- Misaligned component
- Damaged insert
A screw should never need brute force to start. That is not “tight fit”; that is your equipment asking for help.
Detecting loose or damaged board inserts
Warning signs include:
- Insert movement
- Cracks around the track
- Water or bubbling laminate
- A mast plate that will not sit flat
- Repeated loosening of the same screw
- Board creaking near the mast mount
Board damage is not solved by adding more torque. Consult a qualified board repairer if the insert or surrounding laminate has shifted.
8. Repair Surface Damage and Inspect Impact Zones
Surface damage and repair basics
Separate damage into three categories:
| Damage type | Example | Ride? | Recommended action |
|---|---|---|---|
| Cosmetic finish mark | Light scuff with no shape change | Usually | Clean, monitor |
| Minor edge burr | Small raised irregularity | Maybe, after inspection | Smooth carefully without changing profile |
| Structural damage | Crack, soft spot, delamination, major chip | ❌ No | Professional inspection or repair |
A cosmetic scratch is not automatically harmless, and a tiny chip is not automatically catastrophic. Location, depth, material, and handling changes matter.
Distinguishing cosmetic scratches from structural damage
Use visual, tactile, and functional clues:
- Is the damage only in the clear coat?
- Are carbon fibers visible or broken?
- Is the area soft?
- Does tapping produce a noticeably dull or hollow sound compared with nearby areas?
- Has the wing shape changed?
- Does the foil now vibrate or whistle?
- Is the damage near a mount, spar, mast base, or leading edge?
Tap testing is only a basic screening method and cannot clear a structurally suspect component. Professional composite inspection is the safer route.
Repairing small nicks on leading edges and trailing edges
For a superficial nick:
- Wash and dry the area.
- Photograph it for comparison.
- Confirm there is no crack or soft laminate.
- Protect the surrounding profile with masking tape.
- Use very fine wet sandpaper only if necessary.
- Apply a compatible epoxy repair product.
- Allow full cure.
- Fair the repair carefully.
- Inspect the profile under good light.
Products such as West System epoxy are widely used in marine composite repair, but resin compatibility and structural requirements vary. Do not use a generic hardware-store filler on a load-bearing carbon connection and hope for hydrodynamic magic.
When a damaged mast, wing, or fuselage requires professional repair
Seek professional assessment for:
- Cracks near mounting holes
- Delamination
- Soft spots
- Broken carbon fibers
- A bent mast
- Deep leading-edge damage
- Damage crossing a structural junction
- Water intrusion into a sealed powered component
- Any unexplained change in stiffness or handling
Why you should never sand a hydrofoil profile without a plan
Foil sections are designed shapes. Removing material can change:
- Lift
- Stall behavior
- Pitch stability
- Drag
- Turning response
- Balance between front wing and stabilizer
Smoothing a tiny burr is one thing. Reprofiling a wing with coarse paper because “it looked uneven” is another. The latter can create a performance problem that is much harder to diagnose than the original scratch.
9. Store Hydrofoil Equipment the Right Way
Proper storage between sessions
Before storage:
- Rinse the system.
- Dry every component.
- Remove sand.
- Inspect hardware.
- Separate components when practical.
- Use padded covers.
- Keep everything indoors or under secure shade.
- Allow airflow around damp bags.
Should you store your foil assembled or disassembled?
Short-term assembled storage can be acceptable if the system is clean, dry, supported, and protected.
Long-term storage should be disassembled, especially when:
- The foil was used in saltwater.
- Aluminum and stainless hardware meet.
- The storage area is humid.
- The equipment will sit unused for weeks.
- The foil is transported or stored in a hot vehicle.
Disassembly lets you inspect interfaces where corrosion and trapped moisture hide. Label hardware by component so the “mystery bolt” does not appear six months later.
Protecting wings and masts from heat, moisture, and sunlight
Store gear:
- Away from direct sunlight
- Off concrete floors where moisture can collect
- Away from heaters and radiators
- In a ventilated room
- In padded bags with clean interiors
- Without heavy objects on top
Do not hang a heavy carbon wing from a small unsupported point. Support it broadly and avoid pressure on the tips.
Using wing bags, mast bags, board bags, and protective covers
Protective bags prevent:
- Surface scratches
- Leading-edge chips
- Hardware contact
- Vehicle damage
- Abrasion during transport
Choose bags with adequate padding and compartments. A bag full of loose screws is not protective; it is a traveling hardware blender.
Off-season hydrofoil storage and long-term preparation
For seasonal storage:
- Wash the foil thoroughly.
- Remove all hardware.
- Clean and inspect threads.
- Apply compatible protection where recommended.
- Dry components completely.
- Store carbon away from UV and heat.
- Keep batteries near the manufacturer’s recommended storage charge.
- Record any repairs needed before the next season.
Battery storage varies by system. The Battery University provides general battery-storage guidance, but your foil-drive manufacturer’s instructions take priority.
10. Pack and Transport Your Foil Without Damage
Travel care tips for cars, roof racks, boats, and airplanes
Transport damage often happens before the session begins. Use:
- Padded foil bags
- Separate wing sleeves
- Mast protection
- Board-bag dividers
- Labeled hardware pouches
- Soft straps rather than excessive compression
- Clean surfaces between components
For roof-rack transport, make sure the foil cannot slide, twist, or contact metal edges. Check straps after the first few miles.
Separating carbon wings from metal hardware during transport
Never place loose bolts, tools, or mast plates directly against carbon wings. Even a small amount of vibration can create repeated abrasion.
Wrap or isolate:
- Wing tips
- Leading edges
- Mast bases
- Fuselage ends
- Stabilizer edges
- Hardware bags
Protecting leading edges, fuselages, and mast bases
Leading edges are especially vulnerable because they are often the first part to meet a rack, wall, beach, or careless friend carrying a cooler. Use dedicated padding and avoid resting wings on their edges.
Pre- and post-travel inspection checklist
Before leaving:
- ✅ All bolts and tools packed
- ✅ Correct mast, fuselage, and wing combination
- ✅ Bags dry and grit-free
- ✅ Battery stored according to manufacturer guidance
- ✅ Hardware separated from carbon surfaces
After arrival:
- ✅ Inspect for pressure marks
- ✅ Check wing edges
- ✅ Confirm mast straightness
- ✅ Inspect bags for internal grit
- ✅ Assemble and check all connections before launching
11. Tune Your Hydrofoil Setup for Reliable Performance
Maintenance and tuning overlap. A clean foil that is assembled incorrectly can still ride poorly.
Checking mast-to-fuselage and wing-to-fuselage alignment
When assembling:
- Clean both mating surfaces.
- Confirm no sand or burrs remain.
- Seat the component fully.
- Install bolts finger-tight.
- Check alignment visually.
- Tighten gradually and evenly.
- Confirm there are no gaps.
- Recheck the connection after a short ride.
A small gap can create movement, vibration, and accelerated wear. If a joint no longer seats as it once did, find out why before riding.
Inspecting shims, spacers, washers, and hardware stack-up
Use only the shims and washers specified for that setup. Missing or misplaced parts can alter:
- Stabilizer angle
- Pitch response
- Bolt engagement
- Clamp load
- Alignment
Keep each system’s hardware in labeled bags. Borrowing one bolt from another foil family is how a tidy garage becomes a small engineering mystery.
How maintenance affects lift, stability, tracking, and stall behavior
A damaged or dirty foil may feel:
- Slower to accelerate
- More twitchy
- Less stable in pitch
- Noisier at speed
- Less predictable in turns
- More prone to ventilation
If handling changes after maintenance, check assembly alignment before adjusting technique. Our team once spent half a session blaming “strange wind” for a twitchy stabilizer. The actual culprit was a tiny grain of sand preventing full seating. The wind was innocent.
12. Assemble and Disassemble Hydrofoil Equipment Safely
A damage-free assembly sequence
- Place the foil on a padded mat.
- Confirm the components match.
- Clean the joints.
- Apply approved thread protection sparingly.
- Start all bolts by hand.
- Seat every part evenly.
- Tighten in stages.
- Use the specified torque.
- Inspect the final alignment.
- Pack tools before walking to the water.
Safe disassembly after a saltwater session
If a bolt is difficult to remove:
- Rinse the joint first.
- Let salt residue soften.
- Use the correct bit.
- Apply steady pressure.
- Avoid twisting the tool at angle.
- Stop if the head begins to round.
- Seek professional extraction if needed.
Do not disassemble on loose sand. Put down a clean towel, mat, or board bag.
Avoiding dropped wings, sand contamination, and pinched fingers
Hold wings with two hands, especially larger high-aspect wings. Keep fingers away from pinch points as components slide together. When working with a tall mast, ask for help rather than balancing it against a vehicle while hunting for a screw.
🧰 Essential Hydrofoil Maintenance Tools and Supplies
Recommended cleaning and corrosion-prevention products
| Product or tool | Use | Notes |
|---|---|---|
| Microfiber cloth | Drying and wiping | Keep separate from sandy rags |
| Soft nylon brush | Tracks and hardware | Avoid aggressive scrubbing |
| Tef-Gel | Thread and metal-interface protection | Use a thin film |
| Duralac | Dissimilar-metal protection | Verify compatibility |
| Marine grease | Approved threaded and bearing applications | Do not use universally |
| Fluid Film | Corosion protection for suitable metal parts | Keep off friction surfaces and electronics unless approved |
| Torque wrench | Controlled tightening | Use the correct range |
| Plastic pick | Removing debris | Safer than steel near finishes |
| Padded mat | Assembly protection | Essential on beaches and concrete |
The compact foil-repair kit we keep in the van
- Metric hex set
- Torx set
- Small torque wrench
- Spare manufacturer-specified bolts
- Spare washers
- Microfiber towels
- Freshwater bottle
- Soft brush
- Tef-Gel or approved anti-seize
- Nitrile gloves
- Headlamp
- Tape
- Small parts containers
- Emergency epoxy only for appropriate non-structural situations
Tool and product compatibility by foil material
| Material/interface | Generally suitable approach | Avoid |
|---|---|---|
| Aluminum threads | Clean, dry, thin approved anti-seize | Dry stainless bolts left for months |
| Carbon mounting area | Correct torque and manufacturer guidance | Excessive force, random compounds |
| Stainless hardware | Inspect and replace when damaged | Pliers on bolt heads |
| Carbon wing surface | Water, microfiber, gentle inspection | Abrasive pads and solvents |
| Battery terminals | Manufacturer-approved cleaning | Spraying random lubricant into contacts |
| Bearings | Manufacturer-specified grease | Forcing water or grit into seals |
📅 Hydrofoil Maintenance Schedule: After Every Session, Monthly, and Annually
After-every-session care
- Rinse with fresh water.
- Flush sand from tracks and joints.
- Inspect for obvious damage.
- Dry before baging.
- Store in shade.
- Charge or store batteries according to manufacturer guidance.
Monthly deep inspection
For frequent riders, monthly maintenance should include:
- Removing and inspecting hardware
- Checking corrosion around aluminum interfaces
- Inspecting carbon wings and mast bases
- Cleaning board tracks
- Verifying mast and fuselage alignment
- Checking bags for grit and moisture
- Reviewing spare hardware
Annual servicing and professional inspection
At least annually, or more often for heavy use:
- Have suspicious carbon damage professionally assessed.
- Replace worn bolts and washers.
- Check torque-tool calibration.
- Inspect board inserts and tracks.
- Review manufacturer updates and service bulletins.
- Service powered foil-drive components according to their schedule.
Maintenance log template for tracking wear and repairs
| Date | Location | Session type | Work completed | Damage found | Parts replaced | Next check |
|---|---|---|---|---|---|---|
| Example entry | Coastal saltwater | Wing foil | Rinsed, dried, inspected | Light edge scuff | None | Before next session |
A log sounds wonderfully serious until it saves you from asking, “Was that crack there last time?” Record photos of recurring areas, especially carbon interfaces and board mounts.
❌ Common Beginner Hydrofoil Maintenance Mistakes
Leaving saltwater to dry on the foil
Salt residue does not become harmless because it becomes invisible. Rinse first, then dry.
Overtightening screws and crushing composite parts
More torque is not more security. Excessive clamp load can damage:
- Carbon laminates
- Board inserts
- Track hardware
- Threaded holes
- Washers and mounting plates
Use the manufacturer’s specified torque.
Draging wings across sand, concrete, or rocks
Leading edges and tips are precision surfaces. Carry them or use a padded mat.
Using the wrong grease, oil, or cleaning chemical
A lubricant suitable for a boat trailer may be inappropriate for a carbon interface, bearing, seal, or battery contact. Read the label and manufacturer guidance.
Ignoring small chips, corrosion spots, and strange movement
Small problems are cheapest to address early. As Windance says, “Small problems turn into expensive ones fast—catch them early.”
Using steel tools directly on carbon parts
Tools can chip laminate and damage finishes. Use the correct bit and avoid levering against carbon.
Keeping the foil assembled in a hot car
Heat and trapped moisture create a miserable combination. Transport gear, but store it somewhere cool and dry.
🛡️ Hydrofoil Safety Checks Before Every Launch
Quick mast, wing, hardware, and board connection check
Before entering the water:
- Confirm the mast is fully seated.
- Check every visible fastener.
- Look for gaps at wing and fuselage joints.
- Move the wing gently by hand.
- Inspect leading and trailing edges.
- Check the board mount and tracks.
- Confirm no bolt head is rounded or missing.
- Look for new cracks, powder, or discoloration.
- Verify the foil-drive battery and connectors if applicable.
- Stop if anything feels abnormal.
When not to ride damaged foil equipment
Do not ride if you find:
- A structural crack
- A soft carbon area
- A loose fuselage
- A bent mast
- Severe pitting
- A damaged board insert
- A wing that will not seat correctly
- A powered unit with water intrusion
- Any unexplained vibration or handling change
It is better to miss one session than test a failing connection above shallow water. The ocean will still be there; your replacement hardware budget may not be.
❓ FAQs: Hydrofoil Maintenance and Equipment Care

How often should I inspect and replace hydrofoil equipment components?
Inspect the foil before every session, perform a more detailed inspection every few sessions, and replace components when damage or wear compromises fit, strength, or reliability.
Replace hardware when:
- Threads are coroded or stretched.
- Bolt heads are rounded.
- Washers are bent.
- Bolts have been overloaded.
- The correct engagement cannot be achieved.
- A fastener repeatedly loosens despite correct assembly.
Replace or professionally assess foil components when:
- Carbon fibers are broken.
- Delamination or soft spots appear.
- A mast is bent.
- A fuselage has deep pitting or distortion.
- A wing profile has changed.
- Unusual vibration or handling develops.
There is no universal replacement interval because riding frequency, water chemistry, impacts, and storage conditions differ. A daily saltwater rider should inspect more often than a casual freshwater rider.
Read more about “🌊 How to Maintain & Care for Your Hydrofoil Board: The Ultimate 2026 Guide”
What is the best way to clean and store a hydrofoil board and foil?
Rinse everything with fresh water, remove sand from tracks and joints, dry completely, separate components for long-term storage, and keep the equipment in padded bags away from heat and direct sunlight.
Best-practice sequence
- Rinse immediately after use.
- Clean tracks and threaded holes.
- Wipe dry.
- Air-dry in shade.
- Inspect for damage.
- Apply approved thread protection.
- Store wings and masts separately where practical.
- Keep batteries at the manufacturer’s recommended storage charge.
Do not seal wet equipment in a bag. Moisture trapped with salt residue is a corrosion workshop with excellent ventilation only in theory.
Read more about “🛠️ 7 Best Hydrofoil Foil Repair Kits to Save Your Ride (2026)”
How can I prevent corrosion and damage to my hydrofoil mast and wings?
Rinse after every session, especially in saltwater; dry thoroughly; use compatible anti-seize or marine grease on approved metal interfaces; protect carbon components from impacts and UV; and inspect aluminum for white powder or pitting.
What works best ✅
- Freshwater rinsing
- Clean, dry threads
- Thin approved corrosion protection
- Correct hardware
- Padded storage
- Careful transport
- Regular inspection
What fails ❌
- Leaving saltwater to evaporate
- Using random lubricants
- Mixing unknown hardware
- Overtightening bolts
- Sanding foil profiles
- Riding after a structural impact
What safety checks should I perform before each hydrofoil boarding session?
Check the mast, fuselage, front wing, stabilizer, hardware, board tracks, and powered components before launching.
Pre-launch checklist
- Mast: straight, seated, and free of cracks.
- Fuselage: fully engaged with no visible gap.
- Front wing: no structural chips or movement.
- Stabilizer: secure and correctly aligned.
- Bolts: present, clean, undamaged, and tight to specification.
- Board: no cracked tracks or moving inserts.
- Foil-drive equipment: connectors, seals, battery, and motor checked according to the manufacturer.
- Handling: no unexplained vibration, noise, or looseness.
If one item fails the check, do not launch until it is resolved.
Read more about “🚀 Top 10 Hydrofoil Windsurfing Kits to Fly in 2026”
Can I leave my foil assembled between sessions?
You can leave it assembled briefly if it is clean, dry, protected, and stored in a cool place. For long-term storage, disassemble it.
Disassembly is especially wise after saltwater sessions because it reveals trapped corrosion at interfaces and reduces stress on hardware and board mounts.
Read more about “What Is Hydrofoil Windsurfing? The Ultimate Guide to Flying on Water 🪁”
Is a little carbon scuff dangerous?
Not necessarily. A light surface scuff may be cosmetic, but a scuff near a mounting hole, leading edge, or structural junction requires closer inspection.
Look for broken fibers, cracks, soft spots, changed stiffness, or new vibration. If uncertain, stop riding and seek a qualified composite inspection.
How do I remove a seized hydrofoil screw?
Rinse and dry the joint, use the correct fully seated bit, and apply steady pressure. Stop if the head begins to round.
Do not improvise with excessive heat around carbon, adhesives, seals, or electronics. A professional may need to extract the fastener without damaging the surrounding component.
Should I polish my foil wings?
Avoid aggressive polishing or sanding unless the manufacturer recommends it. Clean surfaces with water and a soft cloth. Foil profiles are engineered shapes, and removing material can affect drag and handling.
Read more about “🛠️ Hydrofoil Board Maintenance & Repair Guide: Fly Longer, Break Less (2026)”
How should I maintain an electric foil-drive battery?
Follow the exact battery and charger instructions from the manufacturer. Keep terminals clean and dry, avoid storing at empty or full charge unless specified otherwise, and store batteries in a cool, dry, safe location.
For long-term storage, the featured video recommends approximately 50% charge. Confirm the correct target for your specific system.
🔗 Recommended Links
-
Hydrofoil equipment care and repair products:
-
Tef-Gel: Amazon | Tef-Gel Official Website
-
Duralac: Amazon | Duralac Official Website
-
Fluid Film: Amazon | Fluid Film Official Website
-
West System Epoxy: Amazon | West System Official Website
-
Microfiber cleaning cloths: Amazon
-
Marine grease: Amazon
-
Torque wrench: Amazon
-
Metric hex and Torx tools: Amazon
-
Foil brands and protective equipment:
-
Armstrong Foils: Armstrong Official Website
-
Lift Foils: Lift Foils Official Website
-
Axis Foils: Axis Official Website
-
Slingshot Sports: Slingshot Official Website
-
F-One: F-One Official Website
-
Takuma: Takuma Official Website
-
GoFoil: GoFoil Official Website
-
Hydrofoil board bags: Amazon
-
Books and technical references:
-
Composite Materials Handbook: Amazon
-
Fiberglass and Composite Materials: Amazon
-
Boatowner’s Mechanical and Electrical Manual: Amazon
-
Hydrofoiling™ internal guides:
Conclusion

Proper hydrofoil maintenance is a repeatable habit, not a heroic rescue mission. Rinse after every session, inspect before every launch, protect threads, respect carbon, and store the system dry and cool.
Our most confident recommendations are:
- Use freshwater after every session.
- Treat white aluminum powder as an early corrosion warning.
- Use manufacturer-approved grease or anti-seize rather than WD-40 as a long-term thread treatment.
- Never ride a foil with suspected structural carbon damage.
- Disassemble the system for long-term storage.
- Use a torque wrench and the exact manufacturer specification.
- Keep sand away from tracks, joints, and hardware.
- Store powered-foil batteries according to their own safety instructions.
The small post-session routine wins every time. That “five-minute rinse” protects your hardware, preserves the foil’s hydrodynamic shape, reduces corrosion, and gives you a chance to spot trouble while it is still a manageable repair.
And the mystery from earlier? The strange vibration, the twitchy pitch, the foil that suddenly felt less efficient? In our experience, it is often not mysterious at all: a loose connection, trapped sand, a damaged edge, or corrosion hiding beneath a bolt. Clean the system, inspect the interfaces, and the foil usually tells you exactly what it needs.
Recommended Links
-
Buy used Armstrong carbon foil equipment:
-
Armstrong Performance Mk II Carbon Mast 935 mm: Armstrong Official Product Page | Amazon Armstrong hydrofoil search
-
Armstrong foil equipment: Armstrong Official Website | Amazon Armstrong hydrofoil search
-
Maintenance essentials:
-
Tef-Gel: Amazon | Tef-Gel Official Website
-
Marine grease: Amazon
-
Fluid Film corrosion inhibitor: Amazon | Fluid Film Official Website
-
West System marine epoxy: Amazon | West System Official Website
-
Hydrofoil wing and mast bags: Amazon
-
Further reading:
-
Composite repair books: Amazon
-
Battery storage and lithium-ion safety books: Amazon
-
Hydrofoil equipment reviews: Hydrofoil Equipment Reviews
FAQs: Hydrofoil Maintenance

How often should I inspect and replace hydrofoil equipment components?
Inspect the system before every session, complete a detailed check every few sessions, and replace hardware as soon as corrosion, rounding, bending, damaged threads, or unreliable clamping appears. Carbon components with cracks, delamination, soft spots, or changed stiffness need professional assessment rather than continued use.
What is the best way to clean and store a hydrofoil board and foil?
Rinse with fresh water, flush sand from tracks and joints, wipe and air-dry fully, then store the components in padded bags away from heat, UV exposure, and moisture. Disassemble the foil for long-term storage.
How can I prevent corrosion and damage to my hydrofoil mast and wings?
Rinse after every use, dry threaded interfaces, use compatible marine anti-seize on approved metal connections, protect carbon from impact and heat, and replace damaged hardware promptly. Avoid dragging wings, storing equipment wet, and using abrasive cleaners.
What safety checks should I perform before each hydrofoil boarding session?
Confirm that the mast, fuselage, front wing, stabilizer, board mount, tracks, and fasteners are correctly seated and secure. Look for cracks, corrosion, gaps, missing hardware, loose movement, unusual sounds, or changes in foil handling. Do not launch if anything feels abnormal.
Can I leave my hydrofoil assembled between sessions?
Yes, for short periods if it is clean, dry, shaded, and protected. For long-term storage, disassemble the foil so you can inspect interfaces and prevent corrosion or stress at the connections.
Is WD-40 suitable for hydrofoil screw threads?
WD-40 can displace moisture, but it is not our preferred long-term anti-seize for hydrofoil hardware. Use Tef-Gel, Duralac, marine grease, or the compound specified by the foil manufacturer.
What should I do after a hard impact?
Exit the water and inspect the mast, fuselage, wing connections, leading edges, board mount, and hardware. Look for cracks, distortion, soft spots, loose joints, or handling changes. Do not resume riding until structural concerns are cleared.
Reference Links
- National Ocean Service: Corosion Education
- Association for Materials Protection and Performance
- U.S. Consumer Product Safety Commission: Sports and Recreation Safety
- U.S. Fire Administration: Lithium-Ion Battery Safety
- Battery University: Battery Storage Guidance
- West System Marine Composite Repair
- Gurit Composite Materials
- Tef-Gel Official Website
- Duralac Official Website
- Fluid Film Official Website
- Windance Hydrofoil Maintenance Guide
- Armstrong Performance Mk II Carbon Mast 935 mm
- Armstrong Wingfoils Official Website
- Lift Foils Official Website
- Axis Foils Official Website
- Slingshot Sports Official Website
- F-One Official Website
- Takuma Official Website
- GoFoil Official Website