Support our hydrofoil educational content for free when you purchase through links on our site. Learn more
Can You Learn to Hydrofoil Alone? 🌊


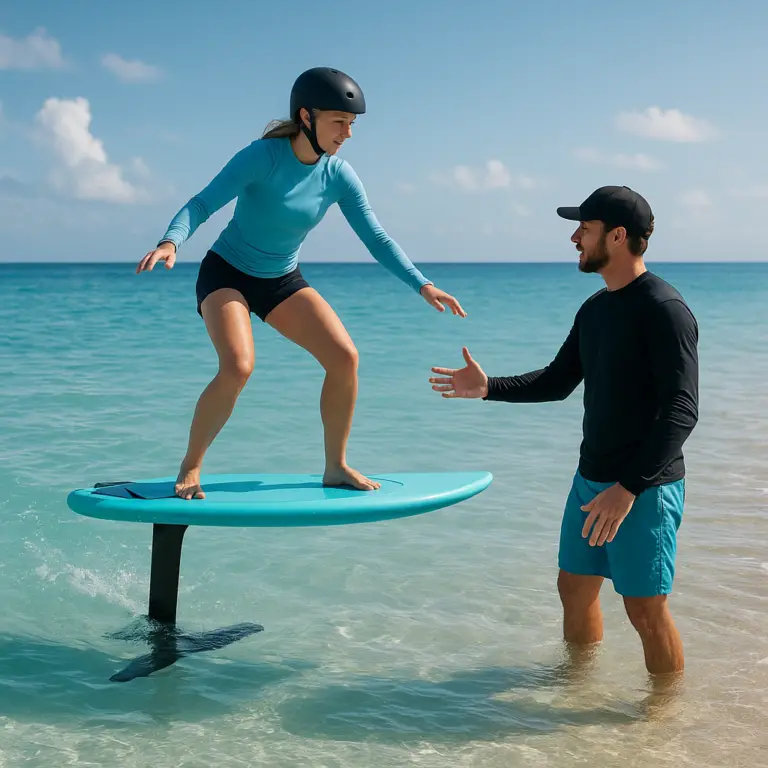
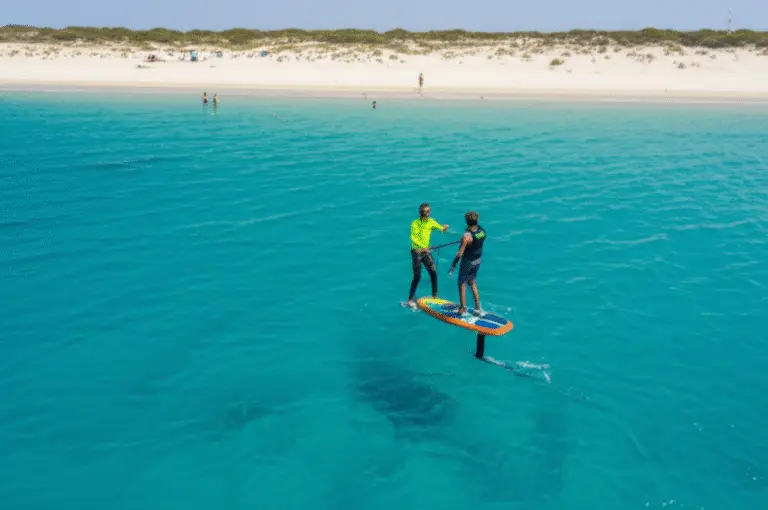
Yes, you can learn to hydrofoil independently, but most beginners should take a lesson from a qualified instructor first, then practice with a responsible hydrofoiling community. The answer to “Can I learn to hydrofoil on my own, or is it recommended to take lessons from a certified instructor or join a hydrofoiling community?” depends on your experience, equipment, water conditions, and ability to self-rescue.
Hydrofoiling looks wonderfully simple from shore: board, foil, glide. Underneath, however, the foil responds to tiny changes in pitch, pressure, and speed. During one of our early sessions, a strong surfer rose beautifully for several seconds, then leaned back by barely an inch and launched into a spectacular splash. The foil had provided the lesson; a coach would have delivered it with fewer bruises.
A certified instructor can help you choose suitable gear, learn how to fall away from the foil, understand water depth and weather risks, and correct bad habits before they become stubborn. A local community then adds practical support: buddy sessions, spot knowledge, equipment advice, and the occasional reassuring reminder that everyone has performed the famous “foil face-plant.”
- Take at least one certified hydrofoil lesson before attempting independent practice, especially if you are new to board sports or wind-powered equipment.
- Use a hybrid learning approach: professional instruction, structured online courses, solo practice, and a safety-minded local community.
- Start with beginner-friendly equipment, including a stable board, large low-aspect front wing, and suitable mast length.
- Practice only in deep, open, uncrowded water with manageable wind, mild surface conditions, and a buddy nearby.
- Learn to fall away from the mast and wings before trying to sustain flight, turn, jump, or ride in surf.
- Join a hydrofoiling community for ongoing support, but treat unverified online advice as opinion rather than a safety standard.
- Solo learning is possible but slower and riskier because no one is there to diagnose poor stance, incorrect equipment setup, or dangerous decisions in real time.
Table of Contents
- ⚡️ Quick Tips and Facts: Can You Learn to Hydrofoil Alone?
- 🌊 Hydrofoiling Fundamentals and How the Sport Evolved
- What Is a Hydrofoil and How Does It Work?
- Wing Foiling, Surf Foiling, Kite Foiling, and E-Foiling Compared
- 🎯 Can You Learn to Hydrofoil Without an Instructor?
- What “Learning on Your Own” Really Involves
- Skills You May Safely Practice Independently
- Why Hydrofoiling Has a Steper Learning Curve Than Traditional Boards
- ✅ 12 Advantages of Taking Certified Hydrofoil Lessons
- 1. Faster Progress With Structured Coaching
- 2. Safer First Flights and Controlled Takeoffs
- 3. Correct Stance, Balance, and Weight Distribution
- 4. Better Understanding of Wind, Waves, and Current
- 5. Immediate Feedback on Common Beginner Mistakes
- 6. Proper Equipment Setup and Foil Tuning
- 7. Reliable Falling and Recovery Techniques
- 8. Safer Turns, Touchdowns, and Rentries
- 9. Video Analysis and Personalized Skill Plans
- 10. Local Spot Knowledge and Environmental Awareness
- 11. Confidence Without Reinforcing Bad Habits
- 12. A Clear Path From Beginner Foiling to Advanced Maneuvers
- 🧑 🏫 How to Choose a Qualified Hydrofoil Instructor
- Certifications, Coaching Experience, and First-Aid Training
- Questions to Ask Before Booking a Lesson
- Private Coaching Versus Small-Group Foiling Lessons
- What a High-Quality Beginner Lesson Should Include
- 👥 Should You Join a Hydrofoiling Community or Club?
- Benefits of Local Foiling Groups and Online Communities
- Finding Experienced Riders, Ride Budies, and Mentors
- Community Etiquette, Right-of-Way Rules, and Spot Respect
- How to Identify Helpful Advice and Avoid Unsafe Tips
- 🛟 Hydrofoil Safety Essentials Before Your First Session
- Helmet, Impact Vest, Leash, and Personal Flotation Equipment
- Why a Hydrofoil Can Cause Serious Injuries
- Safe Falling Techniques and Foil Clearance
- Weather, Water Depth, Current, and Offshore Wind Risks
- Buddy Systems, Emergency Plans, and Self-Rescue
- 🏄 ♂️ Choosing the Best Hydrofoil Discipline for Your Learning Goals
- Beginer Wing Foiling Lessons
- Surf Foiling and Downwind Foiling
- Kite Foiling for Existing Kiteboarders
- E-Foil Training for Flat-Water Beginners
- 🧰 Beginner Hydrofoil Equipment: What You Actually Need
- Stable Boards, Low-Aspect Foils, and Beginner-Friendly Wings
- Mast Length, Front-Wing Size, and Fuselage Selection
- Why Starting With Advanced, High-Aspect Equipment Backfires
- Used Hydrofoil Gear: What to Inspect Before Buying
- 📚 A Step-by-Step Hydrofoiling Learning Plan
- 1. Build Balance and Board-Control Skills
- 2. Practice Kneling, Standing, and Wing Handling
- 3. Learn Controlled Starts and Low-Speed Stability
- 4. Perform Short, Low Flights Above the Water
- 5. Control Pitch, Roll, and Yaw
- 6. Link Flights With Smooth Touchdowns
- 7. Learn Upwind, Downwind, and Crosswind Riding
- 8. Progress to Jibes, Tacks, and Advanced Foil Maneuvers
- ⏱️ How Long Does It Take to Learn Hydrofoiling?
- Factors That Affect Your Progress
- Typical Milestones for First Flights and Consistent Riding
- How Often Should You Practice?
- 🚫 Common Beginner Hydrofoiling Mistakes
- Using Too Much Front-Foot or Back-Foot Pressure
- Trying to Stand Too Early
- Choosing Conditions That Are Too Strong or Too Weak
- Looking Down at the Foil
- Attempting Jibes Before Mastering Straight-Line Control
- Ignoring Equipment Checks and Loose Hardware
- 🧠 Self-Assessment: Is Independent Learning Right for You?
- Prior Board-Sport Experience That Helps
- When Solo Learning Is a Poor Choice
- When a Hybrid Approach Works Best
- 💡 How to Combine Lessons, Solo Practice, and Community Support
- The Most Efficient Beginner Training Schedule
- Using Video, Coaching Apps, and Progress Logs
- Turning Feedback Into Specific Practice Goals
- 🌬️ Selecting a Safe Hydrofoiling Location
- Ideal Water Depth, Launch Areas, and Wind Direction
- Flat Water Versus Open-Ocean Conditions
- Local Regulations, Restricted Areas, and Wildlife
- 📊 Lessons vs. Solo Learning vs. Community Coaching
- Safety, Cost, Speed, and Confidence Comparison
- Best Option for Complete Beginners
- Best Option for Experienced Surfers, Kiters, and Windsurfers
- ❓ Questions to Ask Before Your First Hydrofoil Session
- 🏁 Conclusion
- 🔗 Recommended Links
- 🙋 FAQ
- Can I learn to hydrofoil entirely on my own?
- Do I need lessons to learn wing foiling or e-foiling?
- Are hydrofoil lessons worth the money?
- Is hydrofoiling harder than surfing or paddleboarding?
- What is the safest hydrofoil discipline for beginners?
- Can I learn hydrofoiling from YouTube videos?
- What equipment should a beginner use to learn hydrofoiling?
- How many hydrofoil lessons should I take?
- Can I hydrofoil without joining a local community?
- What should I do if I keep crashing or cannot take off?
- 📖 Reference Links
Quick Tips and Facts: Can You Learn to Hydrofoil Alone? ⚡️
The shortest honest answer: yes, you can learn some hydrofoiling skills independently, but most beginners should take at least one supervised lesson before riding alone. Hydrofoils combine a board, underwater wings, speed, balance, lift, and a surprisingly sharp collection of hardware. That is a lot of moving parts for one enthusiastic human.
If you’re asking how do I get started with hydrofoiling?, begin with a safe progression rather than simply buying a foil and hoping the ocean supplies a tutorial.
| Learning route | Safety | Progress speed | Feedback quality | Best suited to |
|---|---|---|---|---|
| Certified private lesson | 9/10 | 9/10 | 10/10 | Most beginners |
| Small-group lesson | 8/10 | 8/10 | 8/10 | Social learners |
| Experienced community mentor | 7/10 | 7/10 | 7/10 | Riders with basic skills |
| Online course plus buddy practice | 6/10 | 6/10 | 5/10 | Self-directed learners |
| Completely solo learning | 3/10 | 4/10 | 1/10 | Experienced board-sport athletes only |
Our quick recommendation ✅
- New to board sports: Take an in-person lesson.
- Experienced surfer, windsurfer, or kiteboarder: Take a lesson focused on foil-specific safety and equipment.
- Existing e-foil rider moving to wing or kite foiling: Get discipline-specific coaching.
- Determined to learn independently: Use a structured course, start in deep water with a large beginner foil, ride with a buddy, and avoid strong wind or surf.
- Everyone: Wear a helmet and impact vest, inspect your hardware, and learn how to fall away from the foil.
A useful comparison comes from Kite Puerto Rico’s hydrofoil lesson guidance, which describes hydrofoiling as “the most difficult aspect of kiteboarding” and recommends instruction from IKO-certified coaches. That view is cautious, but it makes sense: a foil can punish small mistakes more efficiently than a normal surfboard ever could.
Hydrofoiling Fundamentals and How the Sport Evolved 🌊
Hydrofoiling began as a clever way to reduce drag beneath a moving craft. The modern recreational version borows from aircraft design: underwater wings create lift, raising the board above surface chop so the rider appears to glide over the water.
The International Hydrofoil Society documents the long history of hydrofoil craft, while recreational foil manufacturers such as Slingshot, Naish, Armstrong, and Cabrinha have adapted the concept for surfing, wing foiling, kiteboarding, wake foiling, and electric boards.
What Is a Hydrofoil and How Does It Work?
A hydrofoil usually contains five main components:
- Front wing: Generates most of the lift.
- Rear wing or stabilizer: Helps control pitch and stability.
- Fuselage: Connects the front and rear wings.
- Mast: Joins the fuselage to the board.
- Board: Gives you a platform for starting and standing.
The physics are straightforward in theory. Water flows over the foil wings, creating pressure differences that generate lift. Once the lift exceeds the combined weight of the rider and equipment, the board rises.
The first beginner video featured in this article explains the idea neatly: the foil works similarly to an airplane wing, and the angle of attack and speed determine how much lift is produced. It also emphasizes that “the size of the wing” is one of the most important beginner choices. You can revisit that perspective in the featured video.
Why Larger Front Wings Help Beginners
A larger front wing generally produces more lift at lower speeds. That sounds perfect, and often it is, but there is a trade-off:
| Front-wing choice | Advantages | Drawbacks |
|---|---|---|
| Large, low-aspect wing | Early lift, stable, forgiving | Slower top speed and more drag |
| Medium all-round wing | Balanced lift and maneuverability | Requires better technique |
| Small, high-aspect wing | Efficient, fast, excellent glide | Demands more speed and precision |
A large wing does not make learning automatic. It simply gives you more lift at manageable speeds. Push the nose down too aggressively and the foil can still launch upward like it has received excellent news.
Lift, Pitch, Roll, and Yaw
Hydrofoil control depends on three directions:
- Pitch: Nose up or down.
- Roll: Rail-to-rail tilt.
- Yaw: Turning left or right around a vertical axis.
Beginners typically struggle with pitch first. Lean back and the nose rises; lean too far forward and the board touches down or dives. The trick is to make small, early corrections, not dramatic last-second movements.
The video advice to “lean forward and actually hold the foil down” is useful during an unexpected rise, but don’t interpret it as permission to lunge forward. Use gradual front-foot pressure and keep your eyes on the horizon.
Wing Foiling, Surf Foiling, Kite Foiling, and E-Foiling Compared
“Hydrofoiling” is an umbrella term. Your learning route changes substantially depending on the discipline.
| Discipline | Primary power source | Typical learning challenge | Beginner advantage |
|---|---|---|---|
| Wing foiling | Inflatable handheld wing and wind | Board starts, wing handling, foil pitch | No lines or kite launch |
| Surf foiling | Breaking wave energy | Paddle strength, wave selection, takeoff timing | Quiet equipment and no wind dependency |
| Kite foiling | Kite and wind | Kite control plus foil balance | Efficient upwind performance |
| E-foiling | Electric motor | Throttle control, pitch, charging logistics | Flat-water access and consistent power |
| Wake foiling | Boat wake | Rope release and wake positioning | Predictable pull and clean water |
Read our Hydrofoil Basics for a deeper explanation of foil lift, mast length, wing design, and the differences between disciplines.
Can You Learn to Hydrofoil Without an Instructor? 🎯
You can, but “possible” is not the same as “wise.”
Online education has made self-directed learning more practical. Foil Academy provides free structured courses for wing, wake, wind, and kite foiling. Its course pages report strong learner feedback, including ratings around 4.9 out of 5 across several academy tracks. Riders such as Tom Coyle praised the lessons as “straightforward” and understandable, while Terry McCormick described achieving “a few controlled flights and a few good crashes.”
That last phrase tells the story: self-learning can work, but falling is part of the curriculum.
What “Learning on Your Own” Really Involves
Independent learning still requires a system:
- Study foil setup and safety before entering the water.
- Choose a beginner-friendly board and foil.
- Practice in deep enough water to protect the mast.
- Start in mild, stable conditions.
- Ride with a competent buddy.
- Film short runs for later analysis.
- Stop when fatigue makes your corrections sloppy.
- Seek professional feedback when progress stalls.
The mistake is assuming “on my own” means “without advice, preparation, or supervision.” It should mean self-directed, not safety-abandoned.
Skills You May Safely Practice Independently
Some skills are relatively suitable for solo practice in controlled conditions:
- Carrying and assembling the foil.
- Checking bolts, mast plate, and wing connections.
- Learning wing handling on land.
- Kneling and standing on a stable board.
- Practicing neutral stance.
- Performing controlled taxing without lifting.
- Learning to fall away from the foil.
- Reviewing video of your posture and pitch control.
- Practicing low-speed starts with an instructor-approved setup.
Avoid teaching yourself in conditions involving:
- Offshore wind.
- Strong current.
- Crowded beaches.
- Shallow reefs or rocks.
- Large surf.
- Lightning or rapidly changing weather.
- Long distances from shore.
- High-powered equipment you do not understand.
Why Hydrofoiling Has a Steper Learning Curve Than Traditional Boards
A surfboard gives immediate tactile feedback from the water. A foil removes much of that feedback once the board rises. You are balancing on an underwater aircraft wing that you cannot see.
That produces three common beginner problems:
- Delayed feedback: The foil reacts after you change pressure.
- Amplified mistakes: A tiny pitch error can become a full breach or touchdown.
- Higher consequence falls: The mast and wings are rigid and can move quickly.
Our team has watched capable surfers struggle during their first foil session because surfing instincts encourage aggressive rail engagement and weight shifts. Foiling rewards quieter movements. The rider who looks relaxed is usually making dozens of tiny corrections.
12 Advantages of Taking Certified Hydrofoil Lessons ✅
1. Faster Progress With Structured Coaching
A qualified instructor can identify whether your problem is:
- Too much rear-foot pressure.
- Incorrect mast position.
- Poor board trim.
- Insufficient speed.
- Wrong wing size.
- Mismanaged kite or wing power.
Without feedback, beginners often “solve” the wrong problem. They may buy a smaller foil when the real issue is standing too far back.
2. Safer First Flights and Controlled Takeoffs
A good coach will introduce lift gradually. The first goal is not a heroic 100-yard flight. It is a controlled rise, a calm descent, and a safe recovery.
Schools such as Kite Puerto Rico describe using shorter teaching masts to reduce risk and improve the early learning curve. That is a sensible coaching choice because a shorter mast gives you less height to fall from and makes touchdowns less dramatic.
3. Correct Stance, Balance, and Weight Distribution
A beginner usually needs clear cues:
- Keep your chest tall.
- Look toward the direction of travel.
- Place feet over the board’s centerline.
- Use gentle front-foot pressure to control rise.
- Keep knees soft.
- Avoid locking the back leg.
- Move your hips, not just your shoulders.
The wrong stance can feel stable for several seconds, then suddenly send the foil skyward. An instructor catches that pattern before it becomes a habit.
4. Better Understanding of Wind, Waves, and Current
Hydrofoil lessons should include environmental judgment, not just riding technique. Coaches can help you read:
- Launch and landing zones.
- Wind shadows.
- Tide direction.
- Wave period.
- Current strength.
- Boat traffic.
- Shallow-water hazards.
The National Weather Service explains why currents can carry water users away from shore, while the U.S. Coast Guard provides broader boating safety guidance. Foiling adds another layer: you must also protect the mast and wings from the bottom.
5. Immediate Feedback on Common Beginner Mistakes
Video helps, but it cannot always tell you what happened before the crash. An instructor watching live can say:
- “More speed before you rise.”
- “Keep the wing neutral.”
- “Your front foot is too light.”
- “Do not chase the nose.”
- “Release power before the breach.”
That instant correction can save several frustrating sessions.
6. Proper Equipment Setup and Foil Tuning
Setup affects behavior dramatically. Coaches can adjust:
- Mast position.
- Fuselage length.
- Stabilizer angle.
- Front-wing size.
- Board volume.
- Footstrap position.
- Wing pressure.
- Kite line configuration.
Beginners should be especially cautious with advanced gear from brands such as Armstrong, F-One, and Axis. These brands produce excellent equipment, but high-performance wings may be less forgiving than dedicated learner designs.
7. Reliable Falling and Recovery Techniques
The safest beginner fall is usually away from the foil, not toward it. Coaches teach you to:
- Let go of the wing or control bar when appropriate.
- Push away from the board.
- Protect your head.
- Avoid landing on the mast or wings.
- Resurface before attempting to recover the equipment.
- Keep the foil between you and approaching hazards only when you understand its position.
A helmet and impact vest do not make collisions harmless. They reduce risk; they do not grant invincibility.
8. Safer Turns, Touchdowns, and Rentries
Turning introduces roll, yaw, power changes, and often a loss of speed. A coach can break down the movement:
- Stabilize the foil.
- Build enough speed.
- Look through the turn.
- Shift pressure gradually.
- Keep the foil low.
- Exit with controlled power.
Trying to learn a jibe before you can ride comfortably in both directions is like attempting handwriting before learning to hold a pencil.
9. Video Analysis and Personalized Skill Plans
Some instructors use radios, helmet communication, or shore-based video. IKO provides internationally recognized kiteboarding instructor training and certification pathways, although certification standards vary by discipline and region.
Ask what the instructor’s qualification covers. A certified kite instructor is not automatically an expert wing-foil coach, and a superb surfer may not know how to teach e-foil throttle and pitch control.
10. Local Spot Knowledge and Environmental Awareness
Local coaches know which beach has:
- Hidden rocks.
- Suden shorebreak.
- Dangerous wind shifts.
- Busy launch windows.
- Restricted riding zones.
- Safe deep-water exits.
That knowledge is difficult to obtain from a generic video. It is also why community advice becomes valuable after your first lesson.
11. Confidence Without Reinforcing Bad Habits
Confidence is useful; false confidence is expensive. A coach gives you boundaries:
- This wind is suitable.
- That mast is too long for this water depth.
- Your current control is not ready for the reef.
- You can practice this maneuver, but not near swimmers.
We have seen riders become safer, not more timid, after hearing a firm “not today.” The right instructor turns caution into progress.
12. A Clear Path From Beginner Foiling to Advanced Maneuvers
A structured progression may look like:
- Board control.
- Kneling starts.
- Standing taxi.
- First controlled lift.
- Sustained flights.
- Upwind and downwind riding.
- Touchdown recovery.
- Helside and toeside riding.
- Jibes.
- Tacks.
- Waves, jumps, or downwinders.
Use our Advanced Hydrofoiling Techniques section when you have consistent control, not because a glossy video made a jump look easy.
How to Choose a Qualified Hydrofoil Instructor 🧑 🏫
Certifications, Coaching Experience, and First-Aid Training
Look for an instructor who can demonstrate:
- Relevant certification for your discipline.
- Current first-aid or water-rescue training.
- Several years of active riding.
- Experience with beginners.
- Clear emergency procedures.
- Appropriate insurance.
- A communication method on the water.
- Equipment suitable for your body weight and skill level.
For kite foiling, IKO’s instructor directory can help verify training pathways. For wing and e-foil coaching, certifications are less standardized globally, so practical experience and safety systems matter greatly.
Questions to Ask Before Booking a Lesson
Ask:
- Which discipline do you teach?
- What certification do you hold?
- How many beginners have you taught?
- Do you use shorter masts for first sessions?
- Is safety equipment included?
- Do you provide radio communication?
- What happens if the forecast becomes unsafe?
- What student-to-instructor ratio do you use?
- Is the lesson on flat water or in surf?
- What equipment sizes are available?
- Can you adapt instruction for a surfer, kiter, or windsurfer?
- What skills should I practice after the lesson?
A vague answer to safety questions is a red flag. A good instructor will welcome them.
Private Coaching Versus Small-Group Foiling Lessons
| Format | Strengths | Limitations |
|---|---|---|
| Private lesson | Maximum feedback and flexible pace | Less social |
| Two-person lesson | Shared learning and strong attention | Partner ability may differ |
| Small group | Community feel and lower individual pressure | Less instructor time |
| Clinic | Focused theme and multiple perspectives | Often assumes basic skills |
| Online coaching | Convenient and repeatable | No live safety supervision |
Private instruction is particularly useful for the first session because the coach can respond to every takeoff and fall. Group learning becomes more attractive once you can ride reliably and want practice partners.
What a High-Quality Beginner Lesson Should Include
A strong first lesson normally covers:
- Equipment identification.
- Carrying the board and foil safely.
- Deep-water requirements.
- Falling away from the foil.
- Body position.
- Board control before flight.
- Power management.
- Controlled lift and touchdown.
- Local hazards.
- Post-lesson practice goals.
If the entire session is “stand up and see what happens,” find another instructor. Hydrofoiling is exciting enough without turning your lesson into experimental archaeology.
Should You Join a Hydrofoiling Community or Club? 👥
Yes, if the group is safety-minded. A community cannot replace qualified instruction, but it can make practice more consistent and less lonely.
Foil Academy actively presents learning as part of a wider foiling community and reports that its content has helped tens of thousands of watersports enthusiasts. Its free courses are valuable, especially before purchasing equipment.
Benefits of Local Foiling Groups and Online Communities
A healthy community can provide:
- Local spot recommendations.
- Used-equipment advice.
- Weather updates.
- Buddy sessions.
- Launch assistance.
- Repair knowledge.
- Technique discussions.
- Motivation after a clumsy session.
- Informal mentoring.
Online groups such as The Kiteboarder Facebook communities can be useful, but access and post quality vary. The referenced Facebook post was not publicly viewable without login, so it cannot be treated as evidence for a specific learning recommendation. A locked social post is not a safety source.
Finding Experienced Riders, Ride Budies, and Mentors
Look for riders who:
- Explain why they recommend something.
- Wear safety equipment.
- Respect launch areas.
- Help beginners without showing off.
- Know when to cancel a session.
- Do not pressure you into stronger conditions.
- Can distinguish personal preference from universal advice.
A mentor saying “this is how I do it” is more trustworthy than someone declaring “this is the only way.”
Community Etiquette, Right-of-Way Rules, and Spot Respect
Follow local rules and established water etiquette:
- Give surfers and swimmers generous space.
- Launch only in designated areas.
- Keep the foil away from shorebreak crowds.
- Yield predictably.
- Do not drop gear in a busy channel.
- Avoid riding through fishing lines or boat lanes.
- Pack out damaged hardware and tape.
- Share conditions honestly.
The International Sailing Federation publishes widely used right-of-way principles for sailing, but local watersports rules may differ. Ask local authorities and experienced riders before assuming priority.
How to Identify Helpful Advice and Avoid Unsafe Tips
✅ Helpful advice:
- “Use a buddy and stay within your limits.”
- “Check the mast bolts before every session.”
- “Start in deep, flat water.”
- “Use a larger, slower foil.”
- “Take a lesson before riding alone.”
❌ Unsafe advice:
- “You don’t need a helmet.”
- “Shallow water is fine if you’re careful.”
- “Just use a tiny high-aspect wing.”
- “Ride offshore wind because it’s smoother.”
- “The foil will teach you.”
The foil teaches through consequences. We prefer textbooks.
Hydrofoil Safety Essentials Before Your First Session 🛟
Helmet, Impact Vest, Leash, and Personal Flotation Equipment
Recommended equipment varies by discipline, but most beginners should consider:
- Water-sports helmet designed for impact protection.
- Impact vest or suitable personal flotation device.
- Wetsuit for thermal protection and abrasion resistance.
- Whistle or communication device where appropriate.
- Board leash only when the local discipline and conditions make it safe.
- Quick-release systems for kiteboarding.
- Towline and kill-switch systems for e-foiling.
Do not use a leash automatically in breaking waves or strong wind. A leash can keep a heavy foil board attached to you. Ask an instructor about the correct leash configuration for your discipline.
The U.S. Coast Guard’s life jacket guidance explains why properly fitted flotation matters. A surf impact vest is not always a legally approved life jacket, so check local regulations.
Why a Hydrofoil Can Cause Serious Injuries
The foil includes:
- Rigid metal or carbon components.
- Sharp leading edges.
- A long mast.
- Momentum from board and rider.
- Potentialy high riding speed.
Common injury mechanisms include:
- Falling onto the mast or fuselage.
- Contact with a wing tip.
- Board recoil.
- Losing control near rocks.
- Being separated from gear in current.
- Colliding with another rider.
Protective gear reduces severity but cannot remove the need for distance and judgment.
Safe Falling Techniques and Foil Clearance
Practice the fall before you practice the flight:
- Release propulsion: Let go of the wing, bar, or throttle as appropriate.
- Jump or fall away: Move laterally from the board.
- Protect your head: Use your arms and keep your chin tucked.
- Do not dive toward the foil.
- Surface calmly: Locate the board only after checking your surroundings.
- Recover upwind or up-current when safe.
A common beginner instinct is to grab the board. Resist it if the foil is moving toward you.
Weather, Water Depth, Current, and Offshore Wind Risks
Never treat a good-looking surface as proof of safe conditions. Check:
- Forecast wind and gust spread.
- Lightning risk.
- Tide and current.
- Water temperature.
- Depth along the riding route.
- Shoreline exits.
- Visibility.
- Boat traffic.
- Wind direction relative to shore.
The National Weather Service marine safety resources and NOAA tides and currents provide useful planning data in the United States.
A teaching area should generally offer:
- Sufficient depth for the mast.
- A clear launch.
- A manageable return route.
- No submerged rocks.
- No offshore escape problem.
- Enough space for falls.
Buddy Systems, Emergency Plans, and Self-Rescue
Before launching, tell someone:
- Where you are riding.
- When you expect to return.
- What equipment you have.
- Who your buddy is.
- What to do if you do not return.
Carry a charged phone in a waterproof case where practical. E-foil riders should understand battery warnings and return-to-shore time. Kite and wing riders should know how to depower and separate from the power source.
Choosing the Best Hydrofoil Discipline for Your Learning Goals 🏄 ♂️
Beginner Wing Foiling Lessons
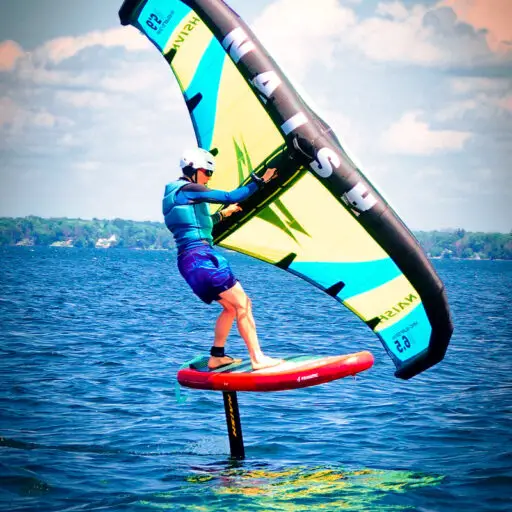
Wing foiling is often the most accessible wind-powered pathway because the wing has no lines. You can release it when things go wrong, then focus on board control.
Beginer-friendly setup characteristics include:
- High-volume board.
- Large, stable front wing.
- Short-to-medium mast.
- Low-aspect foil.
- Soft, controllable wing.
- Neutral foot placement.
The drawback is that you must learn both wing handling and foil balance. Flat water and steady wind help enormously.
Surf Foiling and Downwind Foiling
Surf foiling requires strong wave judgment and efficient paddling. It is not usually the easiest first discipline because the takeoff zone is dynamic and the foil accelerates quickly.
Downwind foiling adds:
- Open-water distance.
- Bumps and swell timing.
- Self-rescue considerations.
- Stronger board-control demands.
Start with surf foiling only if you already possess reliable surf positioning and can manage falls away from the foil.
Kite Foiling for Existing Kiteboarders
Kite foiling makes sense for riders who can already:
- Ride confidently upwind.
- Relaunch a kite.
- Control power in gusts.
- Perform basic transitions.
- Self-rescue.
- Maintain safe separation from other riders.
Kite Puerto Rico’s prerequisite guidance specifically expects good kiteboarding skills, including upwind riding and comfortable transitions. We agree. Learning kite control and foil control simultaneously is possible, but it is a poor bargain for most students.
E-Foil Training for Flat-Water Beginners
E-foiling offers consistent motor power and does not require wind or waves. That makes it attractive for inland riders, but the motor does not eliminate foil physics.
Beginners still need to learn:
- Throttle control.
- Weight distribution.
- Battery safety.
- Water depth.
- Falling away from the mast.
- Return-to-shore planning.
Brands such as Fliteboard, Lift Foils, and Waydoo offer complete e-foil systems. Choose a larger stabilizing board and beginner front wing rather than chasing maximum speed.
Beginner Hydrofoil Equipment: What You Actually Need 🧰
Stable Boards, Low-Aspect Foils, and Beginner-Friendly Wings
A beginner setup should prioritize control over top speed.
Look for:
- Enough board volume to float you comfortably.
- A wide, stable platform.
- A forgiving mast connection.
- A large front wing.
- A stable rear stabilizer.
- Durable construction.
- Clear hardware instructions.
- Spare bolts and appropriate tools.
Our Hydrofoil Board Selection guides cover board volume, shape, mast tracks, and discipline-specific sizing.
Mast Length, Front-Wing Size, and Fuselage Selection
| Component | Beginner preference | Why |
|---|---|---|
| Mast | Short or medium teaching mast | Lower height and easier recovery |
| Front wing | Large, stable, low-to-medium aspect | Early lift and predictable behavior |
| Rear stabilizer | Stable, moderate surface area | Better pitch control |
| Fuselage | Longer or neutral-stability option | Smother pitch response |
| Board | High volume and wide | Easier kneling and standing |
| Foot straps | Optional at first | Easier, safer falls |
Always follow the manufacturer’s compatibility instructions. Mixing random masts, fuselages, and wings can create dangerous loading or poor handling.
Why Starting With Advanced, High-Aspect Equipment Backfires
High-aspect wings are efficient and fast, but they often:
- Require more speed.
- Feel less stable during takeoff.
- React quickly to pitch changes.
- Punish poor weight distribution.
- Make low-speed touchdowns harsher.
Experienced riders may love them. Beginners often interpret their speed as progress until the first uncontrolled breach.
Used Hydrofoil Gear: What to Inspect Before Buying
Check:
- Carbon cracks or soft spots.
- Dents in the mast.
- Damaged threaded inserts.
- Coroded stainless hardware.
- Wing delamination.
- Bent fuselage.
- Missing bolts.
- Incompatible mounting standards.
- Evidence of repeated ground strikes.
Ask for the model year and original specifications. Product names can remain similar while mounting systems change.
Recommended Beginner Equipment Examples
- Slingshot Hover Glide foil systems
- Naish Jet foil systems
- Cabrinha Fusion foil systems
- F-One Gravity foil range
- Armstrong CF foil range
- Fliteboard e-foil systems
- Lift Foils e-foil systems
👉 CHECK PRICE on:
- Slingshot Foil Equipment: Amazon | Slingshot Official Website
- Naish Foil Equipment: Amazon | Naish Official Website
- Cabrinha Foil Equipment: Amazon | Cabrinha Official Website
- F-One Foil Equipment: Amazon | F-One Official Website
- Fliteboard E-Foil Equipment: Amazon | Fliteboard Official Website
- Lift Foils E-Foil Equipment: Amazon | Lift Foils Official Website
A Step-by-Step Hydrofoiling Learning Plan 📚
1. Build Balance and Board-Control Skills
Begin in deep, calm water:
- Lie or knel on the board.
- Find the centerline.
- Practice turning without lift.
- Keep the foil submerged.
- Stand only when stable.
- Maintain a relaxed lower body.
Do not rush to fly. Your first victory is controlling the board while the foil remains boringly underwater.
2. Practice Kneling, Standing, and Wing Handling
For wing foiling:
- Place the wing on the water.
- Knel with the board pointing across the wind.
- Hold the front handle lightly.
- Keep the wing neutral.
- Stand with feet shoulder-width apart.
- Sheet in gradually.
For e-foiling, use the lowest practical power setting and remain kneling until pitch control feels automatic.
3. Learn Controlled Starts and Low-Speed Stability
The board must gain enough speed before the foil generates meaningful lift. Start with:
- Straight-line travel.
- Gentle power.
- Weight centered over the mast.
- Eyes on the horizon.
- Knes bent.
- Hands relaxed.
If the foil rises immediately, reduce power or add gentle front-foot pressure. Do not throw your shoulders forward.
4. Perform Short, Low Flights Above the Water
Aim for tiny flights:
- Gain stable speed.
- Add gradual power.
- Allow the foil to rise slightly.
- Hold a level pitch.
- Reduce pressure before the board climbs too high.
- Touch down smoothly.
- Repeat.
A controlled two-second flight teaches more than a chaotic twenty-second launch.
5. Control Pitch, Roll, and Yaw
Use this simple correction guide:
| Problem | Likely correction |
|---|---|
| Nose rises | Add gentle front-foot pressure or reduce power |
| Nose dives | Add slight rear-foot pressure and regain speed |
| Board rolls left | Shift hips and pressure subtly right |
| Board rolls right | Shift hips and pressure subtly left |
| Wanders off course | Look ahead and stabilize shoulders |
| Touches down repeatedly | Build speed and reduce abrupt inputs |
These are starting points, not universal laws. Equipment setup and rider weight can change the response.
6. Link Flights With Smooth Touchdowns
Once you can fly briefly, stop chasing height. Practice:
- Low altitude.
- Level pitch.
- Straight tracking.
- Gentle touchdown.
- Immediate recovery.
- Restart without panic.
The goal is to make touchdown feel like a normal gear change, not a surprise meeting with the ocean.
7. Learn Upwind, Downwind, and Crosswind Riding
Before turns, ride confidently in several directions. You should be able to:
- Return to your launch point.
- Stop safely.
- Regain the board after a fall.
- Identify wind shifts.
- Avoid other water users.
- Control speed without constant crashes.
For kite foilers, upwind ability should come before experimentation. For wing foilers, learn how the wing behaves when depowered and during a tack-side change.
8. Progress to Jibes, Tacks, and Advanced Foil Maneuvers
Begin turns only when you can fly consistently on both sides. Progress in stages:
- Touchdown jibes.
- Foil-low jibes.
- Linked flights through a jibe.
- Toeside riding.
- Tack preparation.
- Full foiling tacks.
- Small bumps, waves, or jumps.
Our Advanced Hydrofoiling Techniques resources cover these movements in greater detail.
How Long Does It Take to Learn Hydrofoiling? ⏱️
There is no universal timeline, but skill transfer matters.
| Background | Likely advantage |
|---|---|
| Surfer | Wave reading and balance |
| Windsurfer | Wind awareness and stance |
| Kiteboarder | Power control and board handling |
| Wakeboarder | Edging and tow-based starts |
| SUP rider | Balance and paddling |
| Complete beginner | No bad habits, but more foundations required |
Typical Milestones for First Flights and Consistent Riding
A realistic progression might include:
- First session: Equipment handling, safety, kneling, standing.
- Sessions two to four: Taxing and brief lifts.
- Several sessions: Short controlled flights.
- Later progression: Linked flights and directional control.
- Advanced stage: Jibes, tacks, waves, jumps, or downwind riding.
Some riders fly during their first session. That does not mean they can safely return to shore, turn, or handle a gust. A first flight is a milestone, not a graduation certificate.
How Often Should You Practice?
Consistency beats heroic once-a-month sessions. Aim for:
- Frequent short sessions.
- Rest between physically demanding attempts.
- Review of one or two technique goals.
- Conditions that repeat familiar wind and water behavior.
- A buddy or coach present during new skills.
Fatigue causes late corrections and sloppy falls. End while your technique still resembles technique.
Common Beginner Hydrofoiling Mistakes 🚫
Using Too Much Front-Foot or Back-Foot Pressure
Overcorection creates oscillation. Use small movements and wait for the foil to respond. The underwater wing does not need dramatic encouragement.
Trying to Stand Too Early
Standing increases your center of gravity and makes pitch errors larger. Kneling is not a defeat; it is a stable laboratory.
Choosing Conditions That Are Too Strong or Too Weak
Strong, gusty wind makes power unpredictable. Very light wind may fail to provide enough speed for stable lift. A steady moderate session is usually more productive.
Looking Down at the Foil
Looking down encourages poor posture and makes balance reactive. Look toward your travel direction and use peripheral vision for the board.
Attempting Jibes Before Mastering Straight-Line Control
A jibe combines speed, pressure, direction, and power changes. If straight-line riding is inconsistent, the turn will magnify every weakness.
Ignoring Equipment Checks and Loose Hardware
Before every session:
- Tighten hardware to manufacturer specifications.
- Check wing edges.
- Inspect mast and fuselage.
- Confirm the board connection.
- Examine straps and leash points.
- Rinse equipment with fresh water after use.
Our Hydrofoil Equipment Reviews compare construction, compatibility, and beginner usability across major brands.
Self-Assessment: Is Independent Learning Right for You? 🧠
Prior Board-Sport Experience That Helps
Independent learning is more realistic if you already can:
- Swim confidently in open water.
- Read wind and weather.
- Fall safely.
- Control a board under power.
- Return to shore without assistance.
- Understand local water hazards.
- Stay calm during equipment separation.
Even then, one lesson can prevent weeks of inefficient practice.
When Solo Learning Is a Poor Choice
Do not learn alone if you:
- Are not a confident swimmer.
- Have no experience with wind or waves.
- Cannot self-rescue.
- Are using kite power for the first time.
- Ride near rocks or heavy traffic.
- Have no buddy or emergency plan.
- Are tempted to use advanced equipment immediately.
- Feel pressured by conditions or spectators.
A certified instructor is strongly recommended for complete beginners and anyone learning kite foiling.
When a Hybrid Approach Works Best
The hybrid route is our favorite:
- Take one or two in-person lessons.
- Study Foil Academy modules.
- Practice with a knowledgeable community.
- Film your sessions.
- Book a follow-up coaching session.
- Progress independently within clear limits.
This balances expert feedback, flexible practice, and community motivation.
How to Combine Lessons, Solo Practice, and Community Support 💡
The Most Efficient Beginner Training Schedule
A sensible plan:
- Before the first lesson: Study equipment and safety.
- Lesson one: Board control, falls, and first lift.
- Between lessons: Practice only the assigned skills.
- Community sessions: Ride with a buddy in familiar conditions.
- Lesson two: Correct stance, pitch, and direction control.
- Later sessions: Build flight duration and prepare for turns.
Do not collect lessons without practice, and do not collect practice without feedback.
Using Video, Coaching Apps, and Progress Logs
Film from shore or use a safe action camera setup. Review:
- Body position at takeoff.
- Board angle.
- Wing or kite position.
- Moment of lift.
- Correction before touchdown.
- Fall direction.
Log:
- Wind speed and gusts.
- Wing or foil size.
- Water state.
- Flight duration.
- What caused each crash.
- One goal for next time.
The purpose is not to produce cinematic footage. It is to catch the two-second habit you cannot feel while riding.
Turning Feedback Into Specific Practice Goals
Replace “I need to get better” with:
- “I will keep the foil low for five flights.”
- “I will practice neutral wing handling.”
- “I will return to the launch point twice.”
- “I will stop before fatigue changes my stance.”
- “I will perform three controlled touchdowns.”
Specific goals make progress measurable and reduce random experimentation.
Selecting a Safe Hydrofoiling Location 🌬️
Ideal Water Depth, Launch Areas, and Wind Direction
Choose:
- Clear water.
- Adequate mast depth.
- A forgiving launch.
- Minimal shorebreak.
- Steady wind.
- Easy return access.
- Little boat traffic.
- No swimmers in the riding zone.
Depth requirements depend on mast length and discipline. Never assume a short mast makes shallow water safe; the foil can still strike the bottom and catapult the rider.
Flat Water Versus Open-Ocean Conditions
| Location | Learning value | Main risk |
|---|---|---|
| Sheltered lake | Predictable surface | Suden wind shadows |
| Flat bay | Good visibility and smoother water | Current and boat traffic |
| Open ocean | Real-world wave skills | Swell, currents, shorebreak |
| Surf beach | Wave practice | Crowds and submerged hazards |
| Reservoir | Often uncrowded | Access restrictions and gusts |
Start where the water is boring. Boring water is a generous teacher.
Local Regulations, Restricted Areas, and Wildlife
Check:
- Harbour rules.
- Personal watercraft restrictions.
- Foil-specific bans.
- Swimming zones.
- Wildlife protection areas.
- Seasonal closures.
- Launch permits.
- E-foil registration requirements.
For U.S. waterways, consult local authorities and U.S. Coast Guard boating regulations. Rules vary significantly by location.
Lessons vs. Solo Learning vs. Community Coaching 📊
| Factor | Certified lesson | Solo learning | Community coaching |
|---|---|---|---|
| Initial safety | Excellent | Variable | Variable |
| Personalized feedback | Excellent | Poor | Moderate |
| Flexibility | Moderate | Excellent | Good |
| Social motivation | Moderate | Low | Excellent |
| Equipment guidance | Excellent | Variable | Moderate |
| Risk of bad habits | Low | High | Moderate |
| Best use | First sessions | Consolidation | Ongoing support |
Best Option for Complete Beginners
Certified instruction first. A private lesson with appropriate equipment, short teaching mast, safety gear, and radio communication provides the cleanest start.
Best Option for Experienced Surfers, Kiters, and Windsurfers
Use a hybrid approach:
- Take a discipline-specific lesson.
- Keep your familiar board-sport strengths.
- Deliberately discard habits that do not transfer.
- Practice in a community.
- Get feedback before increasing foil size, speed, or wave exposure.
Best Option for Self-Directed Learners
Use:
- Foil Academy courses.
- Manufacturer manuals.
- A buddy system.
- Beginner equipment.
- Flat, deep water.
- A progress log.
- Occasional professional coaching.
Self-directed learning is viable when it is structured. It becomes reckless when it is improvised.
Questions to Ask Before Your First Hydrofoil Session ❓
Before launching, confirm:
- Is the water deep enough?
- Can I return to shore?
- Is the wind appropriate?
- What happens if I lose the board?
- How will I communicate with my buddy?
- Is my foil assembled correctly?
- Do I know how to fall away?
- Is my equipment suitable for my weight and skill?
- What is the emergency plan?
- What skill am I practicing today?
The biggest question is often the quietest one: “If something goes wrong, can I solve it without panic?” If the answer is no, take another lesson before adding speed or height.