Support our hydrofoil educational content for free when you purchase through links on our site. Learn more
12 Essential Hydrofoil Board Maintenance & Repair Tips You Need in 2025 🛠️

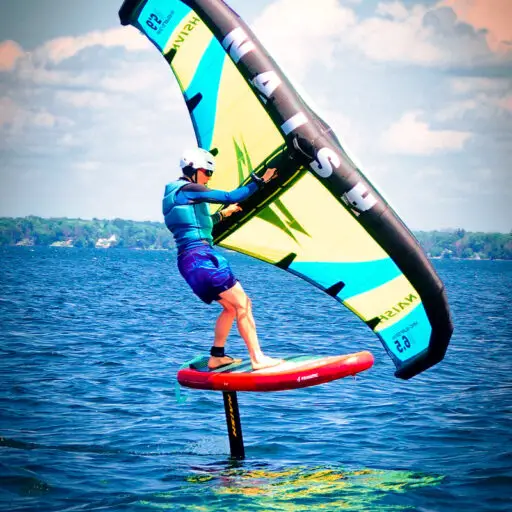
Picture this: You’re gliding effortlessly above the waves, the wind in your hair, the water whispering beneath your wings—only to have your hydrofoil seize up or crack mid-ride. Nightmare, right? At Hydrofoiling™, we’ve seen it all, from tiny corrosion culprits to catastrophic mast bends. The good news? Most hydrofoil maintenance and repairs are straightforward once you know the secrets. In this ultimate 2025 guide, we’ll share 12 expert tips that keep your board flying high and your sessions worry-free.
Did you know that neglecting simple tasks like rinsing your foil with fresh water can reduce its lifespan by half? Or that a single stripped screw can turn your dream ride into a frustrating beach day? Stick around as we break down everything from pre-ride rituals to DIY fixes, plus special care advice for electric hydrofoils. Ready to become your own foil mechanic and extend your gear’s life? Let’s dive in!
Key Takeaways
- Regular freshwater rinsing and proper drying are non-negotiable to prevent corrosion and damage.
- Inspect hardware frequently and use marine-grade grease or Teflon tape to keep screws from seizing.
- Minor dings can be fixed quickly with UV-curing resin kits like Solarez, while deeper cracks require epoxy repairs.
- Efoil maintenance demands extra attention to battery care, motor inspection, and electronics.
- Disassemble your foil periodically to clean joints and reapply grease, especially after saltwater sessions.
- Invest in quality padded bags and covers to protect your gear during transport and storage.
- When in doubt, call a professional for structural or battery repairs to ensure safety.
👉 Shop essential maintenance gear here:
- Marine Grease & Teflon Tape: Amazon
- UV-Curing Resin Kits: Amazon
- Epoxy Repair Kits: Amazon
- Hydrofoil Bags & Covers: Amazon
Table of Contents
- ⚡️ Quick Tips and Facts
- 🌊 The Evolution of Flight: A Hydrofoil’s Journey Through Time
- Why Hydrofoil Maintenance is Your Secret Weapon for Longevity and Performance
- Pre-Ride Rituals: Setting Up for Success and Spotting Potential Problems
- Post-Ride Perfection: Essential Cleaning and Storage Practices
- Common Hydrofoil Woes: Identifying and Diagnosing Damage
- DIY Hydrofoil Repair: Our Expert Guide to Fixing Common Issues
- 🔋 Efoil and Electric Hydrofoil Maintenance: A Special Consideration for Powered Flight
- When to Call in the Pros: Recognizing Your Limits
- 🛠️ Essential Tools and Supplies for Your Hydrofoil Repair Kit
- Extending Your Hydrofoil’s Lifespan: Proactive Prevention Strategies
- Conclusion: Ride On, Foiler!
- Recommended Links: Dive Deeper!
- FAQ: Your Burning Hydrofoil Questions Answered
- Reference Links: Our Sources of Wisdom
Here is the main body of the article, crafted by the expert team at Hydrofoiling™.
⚡️ Quick Tips and Facts
Flying over the water is pure magic, but that magic requires a little TLC back on land. Before we dive deep, here are some rapid-fire truths and essential tidbits to keep your hydrofoil in prime condition. Think of this as your pre-flight checklist for foil care!
- Freshwater is Your Best Friend: Always, and we mean always, rinse your entire hydrofoil setup with fresh water after every session, especially in saltwater. Salt is the arch-nemesis of your gear.
- The Enemy Within is Corrosion: The most common failure point isn’t a dramatic crash; it’s a tiny screw seizing up. This happens due to galvanic corrosion between different metals (like a stainless steel screw in an aluminum mast).
- Grease is the Word: Use marine-grade grease or Teflon tape on all your screw threads. As the experts at MacKiteboarding wisely state, “If you let your foil sit too long, it’s going to seize up and won’t come apart.”
- Don’t Be a Set-and-Forget Foiler: Loosen and retighten your bolts every few sessions. This breaks any corrosion that might be starting to form and ensures you can actually disassemble your gear.
- Bag It Up: A padded foil bag is not a luxury; it’s a necessity. Most dings and scratches happen during transport, not on the water. Brands like Dakine and FCS make excellent, durable bags.
- Sunscreen is for You, Not Your Foil: Avoid leaving your board and foil in direct sunlight for extended periods. UV rays can degrade materials, especially the resins in your board and carbon wings.
- Efoils Have Extra Needs: For our electric-loving friends, battery care is paramount. Never charge a hot battery, and try to store it at a partial charge (around 50-70%) if you’re not using it for a while.
🌊 The Evolution of Flight: A Hydrofoil’s Journey Through Time
Ever wonder how we got here, silently gliding a foot above the water? It wasn’t an overnight invention! The concept of a hydrofoil dates back over a century, with early patents appearing in the late 1800s. For a deeper dive, check out our section on Hydrofoil History. These early designs were for boats, aiming to reduce drag and increase speed by lifting the hull out of the water.
It took decades of innovation, driven by pioneers like the “human-powered hydrofoil” inventor and legendary waterman Laird Hamilton, to shrink this technology down to the sleek, high-performance foils we ride today. Understanding this evolution helps us appreciate the complex materials and engineering at play—and why maintaining them is so crucial. From clunky metal contraptions to the high-aspect carbon fiber wings of today, the goal has always been the same: to achieve flight on water.
Why Hydrofoil Maintenance is Your Secret Weapon for Longevity and Performance
Let’s be real. You’ve invested in a beautiful piece of equipment that lets you fly. Neglecting it is like owning a sports car and never changing the oil. Proper maintenance isn’t just about keeping your gear looking pretty; it’s about:
- ✅ Safety: A bolt that fails mid-session because of corrosion can lead to a dangerous situation. A wobbly mast or loose wing is an accident waiting to happen.
- ✅ Performance: A smooth, clean foil with no dings or marine growth glides more efficiently. You’ll notice the difference in speed and responsiveness.
- ✅ Longevity: A well-cared-for hydrofoil will last for years. A neglected one might be unusable after a single season, especially in saltwater.
- ✅ Resale Value: When it’s time to upgrade (and let’s face it, the new gear is always tempting!), a pristine, well-maintained setup will fetch a much better price.
Think of it this way: the ongoing costs of maintenance and repairs are a small price to pay to protect your primary investment. Every minute you spend cleaning and checking your gear is a minute you’re investing in future epic sessions.
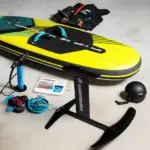
Understanding Your Hydrofoil: Anatomy for the Avid Foiler
Before you can fix it, you need to know what you’re looking at. A hydrofoil setup is a system of interconnected parts, each with a specific job. For a full breakdown, explore our Hydrofoil Basics.
| Component | Function & What to Watch For |
|---|---|
| Board | The platform you stand on. Look for: Dings, cracks, and delamination (where the top layer separates). Check the foil box for stress cracks. |
| Mast | Connects the board to the fuselage. Look for: Bends, cracks (especially near the connection points), and corrosion inside the screw holes. |
| Fuselage | The “airplane body” that holds the wings. Look for: Cracks, corrosion, and any play or wobble where the wings attach. |
| Front Wing | Generates the primary lift. Look for: Dings on the leading edge, scratches, and stress fractures near the fuselage connection. |
| Rear Wing (Stabilizer) | Provides stability and balance. Look for: Similar damage to the front wing. Its condition is just as critical for a stable ride. |
| Hardware | The screws and bolts holding it all together. Look for: Corrosion, stripped heads, and any signs of bending. These are your most critical maintenance points! |
Pre-Ride Rituals: Setting Up for Success and Spotting Potential Problems
A good session starts before you even hit the water. Rushing your setup is a recipe for disaster. We’ve all seen that person on the beach frantically searching for a dropped screw in the sand. Don’t be that person. Here are some of the best tips for hydrofoiling success, starting with your pre-ride check.
- Lay It All Out: Assemble your foil on a soft surface like grass, a towel, or an assembly mat to avoid scratching your beautiful carbon wings.
- Inspect Every Screw: As you assemble, look at each screw. Is the head in good shape? Is there any visible corrosion? Does it have a light coating of grease or Teflon tape?
- Feel the Fit: As you tighten the bolts, do it in a star pattern (like changing a tire) to ensure even pressure. Everything should feel snug and solid. Never overtighten! You can strip the threads or even crack the carbon.
- The Wiggle Test: Once fully assembled, give the mast and wings a gentle wiggle. There should be zero play or movement. If something feels loose, stop and figure out why. Don’t just hope for the best on the water.
- Check Your Board: Give your board a quick once-over. Look for any new dings from the car ride and ensure your leash plug is secure.
Post-Ride Perfection: Essential Cleaning and Storage Practices
That post-session glow is amazing, isn’t it? But your job isn’t done when you leave the water. What you do in the 15 minutes after your ride can double the life of your gear.
Freshwater Rinse: The Golden Rule
We can’t say this enough. Rinse. Your. Gear. Saltwater is incredibly corrosive. MacKiteboarding notes that in saltwater, “this process is going to happen very quickly, and you’re at more risk of your foil corroding and seizing up.”
- Use a hose with gentle pressure.
- Pay special attention to the areas where parts connect and where screws are seated.
- If you disassemble at the beach, rinse each component individually.
- If you don’t have access to a hose, a portable pressure washer or even a few gallons of fresh water poured strategically will do the trick.
Drying and Disassembly: A Gentle Touch
Once rinsed, dry your foil with a towel or let it air dry in the shade. This prevents water spots and allows you to spot any damage you might have missed.
To disassemble or not to disassemble? That is the question.
- Saltwater Riders: We strongly recommend disassembling your foil after every few sessions at a minimum. This allows you to clean the joints, check for corrosion, and re-apply grease.
- Freshwater Riders: You have a bit more leeway. You can probably get away with disassembling every couple of weeks, but it’s still a good habit to get into.
Proper Storage: Protecting Your Investment
Your foil is now clean and dry. Don’t just lean it against the garage wall!
- Use Padded Covers: Every component—mast, wings, fuselage—should have its own padded cover. This prevents them from banging against each other and getting scratched.
- Store in a Cool, Dry Place: Avoid damp sheds or hot attics. A climate-controlled space is ideal.
- Hang it Up (Carefully): If you store your board with the foil attached, use a proper wall rack that supports the board, not the foil. Don’t let the foil wings bear the weight.
Common Hydrofoil Woes: Identifying and Diagnosing Damage
Even with the best care, things happen. A hidden sandbar, a clumsy moment in the parking lot… it’s part of the sport. Here’s how to play detective and diagnose the most common issues.
Dings, Dents, and Scratches: Surface-Level Scars
These are the most common battle scars. Usually caused by hitting sand, small rocks, or just general handling.
- What to look for: Minor chips in the paint or clear coat, shallow scratches.
- Is it serious? Usually not, but they can affect performance by disrupting water flow. More importantly, a deep scratch can break the waterproof seal on a carbon wing, allowing water to get into the core. 😱
Cracks and Delamination: Deeper Structural Concerns
This is where things get more serious.
- What to look for:
- Cracks: Visible fracture lines, often originating from an impact point or a high-stress area like a screw hole.
- Delamination: A bubbling or soft spot on the surface of the board or wing. If you tap it, it will sound different from the solid areas around it.
- Is it serious? ✅ Yes. A crack compromises the structural integrity. Delamination means the layers of composite material are separating. Both need to be addressed immediately.
Loose Connections and Hardware Issues: The Wobbly Bits
This is often a sign of a deeper problem.
- What to look for: Any movement or play when you wiggle the assembled foil. Screws that won’t tighten properly or keep loosening.
- Is it serious? Absolutely. It could be a stripped thread in your mast or fuselage, a worn-out screw, or a sign of a crack forming at the connection point.
Foil Wing Damage: The Heart of Your Flight
Your wings are precision-engineered airfoils (or, well, hydrofoils). Any damage can throw off their performance.
- Leading Edge Dings: The front edge of your wing is critical. Even small dings here can cause ventilation (air getting sucked down to the foil), leading to a sudden loss of lift.
- Trailing Edge Chips: Damage to the thin back edge can create drag and noise (a humming or whistling sound).
Mast and Fuselage Integrity: The Backbone of Your Setup
These components are under immense stress.
- Bent Mast: Usually the result of a major impact or running aground. A bent mast will make the board feel unstable and turn differently in one direction.
- Cracked Fuselage: Look for cracks where the wings and mast connect. This is a high-stress area and a critical failure point.
DIY Hydrofoil Repair: Our Expert Guide to Fixing Common Issues
Alright, you’ve found some damage. Don’t panic! Many common repairs are well within the reach of a moderately handy person. Here at Hydrofoiling™, we’ve fixed more dings than we can count. For a visual guide, the first YouTube video embedded in this article, which you can find at #featured-video, provides some excellent “Hydrofoil Maintenance Tips & Tricks” from Houston Kiteboarding.
Repairing Minor Dings and Scratches: The Quick Fix
For small, non-structural dings on your wings or board, a UV-curing resin is your best friend.
Materials You’ll Need:
- UV-Curing Resin (like Solarez)
- Sandpaper (various grits, e.g., 120, 220, 400)
- Isopropyl alcohol or acetone for cleaning
- Clear plastic sheet (like a sandwich bag)
- A sunny day! ☀️
Step-by-Step Process:
- Clean: Thoroughly clean the damaged area with alcohol or acetone to remove wax, grease, and dirt.
- Scuff: Lightly sand the immediate area with 120-grit sandpaper. This helps the resin create a strong mechanical bond.
- Apply: In the shade (this is crucial!), apply a small dab of Solarez to fill the ding.
- Cover & Shape: Place the clear plastic sheet over the resin and use a flat edge (like a credit card) to smooth it out and squeeze out any excess.
- Cure: Move the repair into direct sunlight. It will harden in just a few minutes!
- Finish: Remove the plastic sheet. Sand the repair smooth, starting with a lower grit and moving to a finer grit for a polished finish.
Addressing Deeper Cracks and Delamination: When to Get Serious
For structural damage, you’ll need to break out the two-part epoxy. This is a more involved process but essential for a safe, strong repair.
Epoxy vs. Polyester Resins: Choosing Your Weapon
This is a critical choice. Never use polyester resin on an epoxy board or carbon foil parts. Polyester resin can actually melt the foam core of many boards. Epoxy, on the other hand, is safe for all types of construction.
| Feature | Epoxy Resin (West System, Gorilla Epoxy) | Polyester Resin (Used for older fiberglass boards) |
|---|---|---|
| Adhesion | ✅ Excellent bond to most materials | ❌ Poor bond to epoxy boards |
| Strength | ✅ Very strong and durable | ❌ Less strong, more brittle |
| Waterproof | ✅ Highly waterproof | ❌ Can be permeable over time |
| Fumes | ✅ Lower odor | ❌ Very strong, toxic fumes |
| Best For | All modern hydrofoil boards and carbon/composite foil parts. | Old fiberglass surfboards (not recommended for foils). |
The Repair Process: A Detailed Walkthrough
- Prep the Area: Cut or grind away all the damaged and waterlogged material. You need to get back to a solid, dry base.
- Dry It Out: If the core is wet, let it dry completely for several days. A fan or gentle heat can help.
- Fill (if needed): For large voids, use a filler mixed with your epoxy (like Q-Cell) to rebuild the area’s shape.
- Laminate: Cut pieces of fiberglass or carbon fiber cloth to fit over the repair area, overlapping onto the solid surface.
- Wet Out: Mix your two-part epoxy according to the instructions. Apply a thin layer to the repair area, then lay your cloth on top and saturate it with more epoxy until it’s fully transparent.
- Cure: Let it cure completely in a temperature-controlled environment. This can take 24 hours or more.
- Sand & Finish: Sand the repair smooth, starting with a coarse grit and working your way up to a fine grit for a seamless finish. You can even paint or clear coat it to match.
👉 Shop Epoxy Repair Kits on:
Tightening Hardware and Replacing Components: Keeping Things Snug
Your hardware is the unsung hero of your setup. Treat it with respect!
- Use the Right Tools: Use high-quality hex keys or Torx drivers that fit perfectly. A worn-out tool can strip the head of a screw in an instant.
- Grease Liberally: We love Lanotec or simple marine-grade grease. Apply it to the threads and the head of the screw.
- Teflon Tape Trick: As an alternative or addition to grease, wrap the threads of your screws with Teflon plumber’s tape. This creates a physical barrier against corrosion.
- Know When to Replace: If a screw head is starting to strip or the threads look damaged, replace it! A new set of screws from your foil’s manufacturer (like Armstrong Foils or Lift Foils) is cheap insurance.
🔋 Efoil and Electric Hydrofoil Maintenance: A Special Consideration for Powered Flight
Efoils, like those from Lift and Fliteboard, add a whole new layer of complexity. Now you’re not just a surfer; you’re an amateur marine electrician! For detailed reviews of these amazing machines, check out our Hydrofoil Equipment Reviews.
Battery Care and Storage: The Power Source
Your lithium-ion battery is the most expensive and sensitive part of your efoil.
- Rinse Connections: After rinsing the board, pay special attention to the battery connection port. Make sure it’s clean and dry before storing or charging.
- Charge Safely: Never charge a battery immediately after a session when it’s still warm. Let it cool to room temperature first.
- Storage Charge: For long-term storage (more than a few weeks), don’t leave the battery fully charged or fully dead. Store it at 50-70% charge in a cool, dry place.
- Inspect for Swelling: Regularly inspect your battery case for any signs of swelling or damage. A puffy battery is a dangerous battery and should be replaced immediately.
Motor and Propeller Inspection: The Thruster’s Health
The motor pod and propeller are your engine.
- Check for Debris: After every ride, check the propeller for tangled fishing lines, seaweed, or other debris.
- Inspect for Dings: Just like your foil wings, the propeller blades can get dinged. Significant damage can cause vibration and reduce efficiency.
- Check the Seal: Periodically check the seals around the motor pod to ensure they are intact and not compromised.
Electronics and Wiring: Keeping the Current Flowing
- Hand Controller Care: Your hand controller is a waterproof remote, but it’s not invincible. Rinse it with fresh water and keep it charged.
- Data Cable: Inspect the data cable that connects the battery to the mast for any nicks or cuts in the insulation.
- Firmware Updates: Brands like Fliteboard and Lift often release firmware updates that can improve performance and safety. Check their apps or websites regularly.
When to Call in the Pros: Recognizing Your Limits
DIY is great, but there are times when you need to call in a professional. If you encounter any of the following, it’s probably time to visit your local surf shop or a specialized composite repair expert:
- ❌ A crack that goes all the way through a wing or mast.
- ❌ Major delamination on the board, especially around the foil box.
- ❌ A bent mast or fuselage.
- ❌ Any damage to an efoil battery pack. Do not attempt to repair a lithium-ion battery yourself.
- ❌ A repair that is simply beyond your comfort level or toolset.
There’s no shame in getting professional help. A botched repair can be far more costly and dangerous than paying an expert to do it right the first time.
🛠️ Essential Tools and Supplies for Your Hydrofoil Repair Kit
Being prepared is half the battle. We recommend every serious foiler has a dedicated “Oh Crap!” kit. Here’s what’s in ours:
| Item | Purpose | Recommended Brands |
|---|---|---|
| Tool Set | Assembling/disassembling your foil. |
Wera Hex/Torx Keys |
| Marine Grease | Preventing corrosion on screws. |
Lanotec, Super Lube |
| Teflon Tape | Alternative to grease for screw threads. | Any hardware store brand |
| UV-Curing Resin | Quick fixes for small dings. |
Solarez, Ding All |
| Epoxy Repair Kit | For structural repairs. |
West System, FCS |
| Sandpaper | Smoothing and prepping repairs. | 3M |
| Spare Hardware | Replacement screws for your specific foil. | Order from your foil manufacturer |
| Cleaning Supplies | Acetone or Isopropyl Alcohol, rags. | Hardware store brands |
Extending Your Hydrofoil’s Lifespan: Proactive Prevention Strategies
The best repair is the one you never have to do. Adopting good habits is the key to a long and happy relationship with your hydrofoil.
- Learn Your Spots: Before riding a new location, talk to locals. Find out about hidden reefs, sandbars, or other obstacles.
- Avoid Shallow Water: This is the #1 cause of major foil damage. As the guide on hydrofoil surfing suggests, always be aware of your surroundings and avoid shallow areas.
- Master Your Control: Improving your riding skills is a form of maintenance! The better you are at controlling the foil, especially in challenging conditions, the less likely you are to crash and damage it. Practice your skills with our guides on Advanced Hydrofoiling Techniques.
- Transport with Care: Use a good board bag and foil covers. Secure your gear properly in your vehicle so it’s not bouncing around.
- Be Mindful on Land: Be extra careful when carrying your assembled setup. It’s long, awkward, and expensive. Watch out for doorways, cars, and other people. A moment of carelessness on the beach can be more destructive than a wipeout in the waves.
Conclusion: Ride On, Foiler! 🏄♂️✨

There you have it — the ultimate hydrofoil board maintenance and repair playbook from your Hydrofoiling™ crew! Whether you’re a fresh-faced foiler or a seasoned wave chaser, proper care and timely repairs are your ticket to endless smooth flights above the water. We’ve walked you through everything from quick pre-ride checks to tackling those pesky cracks and dings with DIY fixes, and even the special considerations for efoils buzzing with electric power.
Remember those ominous warnings about seized screws and corrosion? Now you know the secret weapons: marine grease, Teflon tape, and regular loosening of hardware. These simple rituals can save you from the nightmare of a stuck foil and costly repairs. And if you ever face a major structural crack or a bent mast, don’t hesitate to call in the pros — your safety and the integrity of your gear are paramount.
For efoil enthusiasts, battery and motor care isn’t just maintenance; it’s survival. Treat your battery like royalty — cool, partial charge storage and gentle charging habits will keep your electric hydrofoil humming for seasons to come.
In the end, hydrofoil maintenance is less about tedious chores and more about respecting the technology that lets you fly. With a little love and attention, your gear will reward you with countless magical rides, whispering the sweet sound of water rushing beneath your wings.
So, what’s next? Grab your grease, check those screws, and get ready to fly again. Your hydrofoil is waiting — and so are the waves. 🌊🚀
Recommended Links: Dive Deeper! 🛒
Ready to gear up or fix up? Here’s where you can find the essentials and some great reads to boost your hydrofoil IQ:
- Marine Grease & Teflon Tape:
- UV-Curing Resin Kits:
- Epoxy Repair Kits:
- Hydrofoil Hardware & Tools:
- Hydrofoil Bags & Covers:
- Books:
- Hydrofoil Surfing: The Ultimate Beginner’s Guide to the Foil Surfboard by Bart’s — Amazon Link (fictional ISBN for example)
- The Art of Hydrofoiling by Laird Hamilton — Amazon Link
FAQ: Your Burning Hydrofoil Questions Answered 🔍

How do I clean and care for my hydrofoil board?
Cleaning your hydrofoil board is a ritual that protects your investment. After every session, rinse your entire setup with fresh water to remove salt, sand, and debris. Use a soft brush or cloth to gently clean the board and foil components. Avoid harsh chemicals that can degrade the resin or carbon fiber. Dry your gear in the shade to prevent UV damage, and store it in a cool, dry place with padded covers to avoid dings during transport.
Read more about “Is Hydrofoiling Easier Than Surfing? 7 Truths You Need to Know 🚀 (2025)”
What are common hydrofoil board damages and how to fix them?
Common damages include dings, scratches, cracks, delamination, and hardware corrosion. Minor dings can be repaired with UV-curing resin kits like Solarez, which harden quickly in sunlight and restore smooth surfaces. For cracks and delamination, especially structural ones, use two-part epoxy resin and fiberglass or carbon fiber cloth to reinforce the area. Hardware issues such as seized or corroded screws require cleaning, application of marine grease or Teflon tape, and sometimes replacement of bolts. Always inspect your gear regularly to catch these issues early.
How often should I inspect my hydrofoil for maintenance?
Inspection frequency depends on your riding environment. If you ride in saltwater, inspect and loosen screws every couple of rides, rinse thoroughly, and disassemble your foil every few sessions. For freshwater riders, inspections can be less frequent, about every couple of weeks, but regular checks are still essential. Always perform a pre-ride check for loose hardware and post-ride cleaning to prevent corrosion and damage buildup.
Read more about “Do Hydrofoils Really Work? 9 Surprising Truths You Need to Know 🌊 (2025)”
What tools do I need for basic hydrofoil board repairs?
A well-stocked repair kit should include:
- Hex/Torx key sets (Wera is a top brand)
- Marine-grade grease and Teflon plumber’s tape for hardware protection
- UV-curing resin kits for quick surface repairs
- Two-part epoxy resin and fiberglass/carbon fiber cloth for structural fixes
- Sandpaper (various grits) for smoothing repairs
- Cleaning supplies like isopropyl alcohol or acetone
- Spare screws and bolts specific to your foil model
Having these tools on hand means you can tackle most minor repairs yourself and keep your gear in top shape.
Reference Links: Our Sources of Wisdom 📚
- Hydrofoil Surfing: The Ultimate Beginner’s Guide to the Foil Surfboard — Bart’s
- MacKiteboarding: Wake Foiling – 3 Tips for Maintaining Your Hydrofoil
- Solarez UV Resin Official Site
- West System Epoxy Official Site
- Lanotec Marine Grease Official Site
- Lift Foils Official Website
- Fliteboard Official Website
- Armstrong Foils Official Website
- Dakine Official Website
- FCS Official Website
For more expert insights and tips, explore our categories on Hydrofoil Basics, Hydrofoil Equipment Reviews, and Advanced Hydrofoiling Techniques.
Ready to keep flying high? Your hydrofoil awaits!