Support our hydrofoil educational content for free when you purchase through links on our site. Learn more
Intro to Hydrofoiling Techniques: 12 Skills to Fly 🌊

The best intro to hydrofoiling techniques is simple: build speed steadily, keep your movements small, and learn to control low, stable flights before attempting turns or tricks. With beginner-friendly equipment, safe open water, and patient practice, you can progress without trying to wrestle the foil into the air.
We’ve seen first flights happen in a blink—and end just as quickly when an excited rider leans back too hard. The breakthrough usually comes when they relax, look ahead, and make a subtle adjustment instead. A hydrofoil rewards finesse; it has very little patience for dramatic footwork.
This guide covers the foundations, from choosing a board and foil to finding your stance, managing lift, falling safely, and progressing across surf, wing, kite, and tow foiling. We’ll also show you which common mistakes to avoid—because learning to fly is exciting, but learning to land under control is what keeps you coming back. 🏄
Key Takeaways
- Build speed before takeoff: The foil needs water moving over its wings to generate lift.
- Use small, smooth weight shifts: Gentle pressure helps control pitch and flight height; sudden stomps often cause wobbles or falls.
- Choose beginner-friendly conditions and equipment: A stable board, suitable foil, and uncrowded practice area make learning more manageable.
- Prioritize safety: Wear appropriate protective gear, check your equipment, and stay well clear of swimmers and other riders.
- Progress one skill at a time: Practice starts, balance, and low flights before adding turns, pumping, or more challenging conditions.
Table of Contents
- ⚡️ Quick Tips and Facts
- 🌊 Hydrofoiling Basics: How a Foil Lifts You Above the Water
- What a hydrofoil is and how it works
- The main parts of a hydrofoil setup
- Hydrofoiling disciplines: surf, wing, kite, and behind a boat
- 🧭 Choosing Your First Hydrofoil Setup
- Board size, volume, and stability
- Foil wings, mast length, and beginner-friendly gear
- Wetsuits, helmets, impact vests, and other essentials
- 🛟 Safety, Conditions, and Foil Etiquette
- How to choose a safe learning spot
- Wind, waves, current, and water depth
- Pre-session equipment and safety checks
- Foil awareness, right of way, and protecting others
- 🏄 ♂️ Learning Hydrofoiling: A Step-by-Step Progression
- 1. Get comfortable handling the board and foil
- 2. Practice paddling, water starts, or getting up on the board
- 3. Find your stance and balance
- 4. Build speed before trying to lift off
- 5. Rise onto the foil with small, controlled movements
- 6. Hold a steady flight height
- 7. Link turns and ride back down safely
- 🎯 Essential Hydrofoiling Techniques to Master
- Balance, posture, and foot placement
- Weight shifts and pitch control
- Rail control, steering, and carving turns
- Pumping the foil to maintain speed
- Reading waves and connecting bumps
- Managing speed and controlling flight height
- Falling safely and recovering for another attempt
- 🌬️ Techniques by Hydrofoiling Style
- Prone surf foiling
- Wing foiling
- Kite foiling
- Wake and tow foiling
- Downwind foiling
- 🚫 Common Beginner Mistakes and How to Fix Them
- Popping up too early or forcing lift
- Leaning back and overcorrecting
- Looking down instead of toward your path
- Choosing a foil that is too small or conditions that are too challenging
- 📈 Practice Plans, Progression, and Lesson Tips
- A first-session practice plan
- How to track progress between sessions
- When to book a coach or take a lesson
- 🧰 Foil Care, Setup, and Troubleshooting
- Asembling and tuning your hydrofoil
- Rinsing, storing, and inspecting your gear
- Diagnosing woble, ventilation, and unexpected touchdowns
- ✅ Quick Tips for Your Next Hydrofoiling Session
- 🏁 Conclusion
- 🔗 Recommended Links
- ❓ FAQ
- Is hydrofoiling hard to learn?
- How long does it take to learn to foil?
- What is the easiest type of hydrofoiling to learn?
- Can you learn hydrofoiling without waves?
- How deep does the water need to be for hydrofoiling?
- What should you do when you fall?
- Can beginners use a short mast?
- 📚 Reference Links
Table of Contents
- ⚡️ Quick Tips and Facts
- 🌊 Hydrofoiling Basics: How a Foil Lifts You Above the Water
- What a hydrofoil is and how it works
- The main parts of a hydrofoil setup
- Hydrofoiling disciplines: surf, wing, kite, and behind a boat
- 🧭 Choosing Your First Hydrofoil Setup
- Board size, volume, and stability
- Foil wings, mast length, and beginner-friendly gear
- Wetsuits, helmets, impact vests, and other essentials
- 🛟 Safety, Conditions, and Foil Etiquette
- How to choose a safe learning spot
- Wind, waves, current, and water depth
- Pre-session equipment and safety checks
- Foil awareness, right of way, and protecting others
- 🏄 ♂️ Learning Hydrofoiling: A Step-by-Step Progression
- 1. Get comfortable handling the board and foil
- 2. Practice paddling, water starts, or getting up on the board
- 3. Find your stance and balance
- 4. Build speed before trying to lift off
- 5. Rise onto the foil with small, controlled movements
- 6. Hold a steady flight height
- 7. Link turns and ride back down safely
- 🎯 Essential Hydrofoiling Techniques to Master
- Balance, posture, and foot placement
- Weight shifts and pitch control
- Rail control, steering, and carving turns
- Pumping the foil to maintain speed
- Reading waves and connecting bumps
- Managing speed and controlling flight height
- Falling safely and recovering for another attempt
- 🌬️ Techniques by Hydrofoiling Style
- Prone surf foiling
- Wing foiling
- Kite foiling
- Wake and tow foiling
- Downwind foiling
- 🚫 Common Beginner Mistakes and How to Fix Them
- Popping up too early or forcing lift
- Leaning back and overcorrecting
- Looking down instead of toward your path
- Choosing a foil that is too small or conditions that are too challenging
- 📈 Practice Plans, Progression, and Lesson Tips
- A first-session practice plan
- How to track progress between sessions
- When to book a coach or take a lesson
- 🧰 Foil Care, Setup, and Troubleshooting
- Asembling and tuning your hydrofoil
- Rinsing, storing, and inspecting your gear
- Diagnosing woble, ventilation, and unexpected touchdowns
- ✅ Quick Tips for Your Next Hydrofoiling Session
- 🏁 Conclusion
- 🔗 Recommended Links
- ❓ FAQ
- What equipment do beginners need to start hydrofoiling?
- How do you get up on a hydrofoil board for the first time?
- What are the most common mistakes beginners make when hydrofoiling?
- How long does it take to learn basic hydrofoiling techniques?
- 📚 Reference Links
⚡️ Quick Tips and Facts
If you’re wondering how to get started with hydrofoiling, begin with the right conditions, beginner-friendly gear, and a plan to learn one skill at a time. We’ve watched plenty of eager riders try to skip straight to “flying.” The water tends to vote against that plan. 🌊
| Hydrofoiling fact | What it means for you |
|---|---|
| A foil generates lift as it moves through water | Speed and balance work together. Don’t stamp on the back foot to force takeoff. |
| The board rises when lift overcomes the rider-and-board load | Use small, steady weight shifts to control pitch and height. |
| Foil wings have sharp edges | Carry and handle the setup carefully; keep bystanders well clear. |
| Larger, more forgiving front wings generally make low-speed learning easier | They can improve lift and stability, though they may feel less nimble at speed. |
| A shorter mast limits the height of a fall | It can be friendlier early on, but offers less clearance in chop and turns. |
| A clear practice area is more valuable than a crowded “perfect” wave | Space gives you time to learn, fall, and recover without putting others at risk. |
Five quick-start rules
- ✅ Learn in an uncrowded area with plenty of water around you.
- ✅ Wear a well-fitted helmet and impact vest, and use discipline-appropriate safety gear.
- ✅ Start with a stable board and a foil suited to your weight, ability, and conditions.
- ✅ Keep your first flights low and controlled; smooth touchdowns are part of learning.
- ❌ Don’t learn close to swimmers, swimmers’ entry points, rocks, docks, or shallow reefs.
For more foundational explanations, browse our Hydrofoil Basics and Hydrofoil Board Selection guides.
🌊 Hydrofoiling Basics: How a Foil Lifts You Above the Water
Hydrofoiling is riding a board fitted with an underwater wing system. As the foil moves forward, water flows around its wings and creates lift. Once that lift is sufficient, the board rises above the surface, reducing contact with the water and its drag.
That sensation can feel like someone quietly turned the ocean’s volume down. The board is still responding to waves, wind, and your movements, but it is no longer slapping across every bump. The catch? Because the foil responds quickly, small movements matter.
What a hydrofoil is and how it works
A hydrofoil operates through hydrodynamic lift. The front wing produces most of the lift, while the stabilizer helps balance and control the system. The mast connects these wings to the board.
| Component or force | Job | What you feel |
|---|---|---|
| Front wing | Produces most of the lift | The board starts to rise as speed builds |
| Stabilizer / rear wing | Helps control pitch and stability | The foil feels more settled or more responsive depending on setup |
| Mast | Holds the wings beneath the board | Determines flight clearance and influences how much height you can use |
| Water flow | Creates lift over the foil wings | More speed generally means more lift, within the setup’s limits |
| Rider input | Changes pitch, roll, direction, and speed | Small shifts can create noticeable changes |
A foil doesn’t simply “float” the board upward. Its lift depends on speed, wing shape, rider input, and the direction the foil is moving. That’s why a calm, controlled takeoff is more useful than a dramatic rear-foot stomp.
The International Hydrofoil Society provides background on hydrofoil principles and design. For practical board and foil discussions, explore our Hydrofoil Basics category.
The main parts of a hydrofoil setup
| Part | What to know as a beginner |
|---|---|
| Board | Volume, width, length, and shape affect paddling, standing, and stability. |
| Mast | A shorter mast reduces maximum flight height; a longer mast gives more clearance in chop but raises the learning stakes. |
| Front wing | Larger wings often lift at lower speeds and can feel more forgiving. |
| Stabilizer | Influences pitch stability and turning feel. |
| Fuselage | Connects the front wing, mast, and stabilizer; its length changes the system’s balance and response. |
| Tracks or mounting plate | Let you position the mast to tune board-and-foil balance. |
| Straps | Help hold the feet in place in some disciplines, but are not automatically best for every learner or setup. |
Brands including Armstrong Foils, AXIS Foils, F-One, Naish, Slingshot, and Lift Foils offer distinct foil and board systems. Check compatibility carefully: mast connections, fuselage interfaces, and mounting hardware are not universally interchangeable.
See our Hydrofoil Equipment Reviews and Hydrofoil Brands Comparison for more setup context.
Hydrofoiling disciplines: surf, wing, kite, and behind a boat
The core skills overlap—balance, pitch control, and awareness—but the way you generate speed differs.
| Discipline | Power source | Beginner challenge | Good learning focus |
|---|---|---|---|
| Prone surf foiling | Paddling and wave energy | Catching a wave and standing on a compact board | Takeoff timing, stance, and low flight |
| Wing foiling | Handheld wing and wind | Managing wing power while balancing | Board starts, wing handling, and upwind control |
| Kite foiling | Kite traction | Coordinating kite power and foil response | Kite control, speed management, and safe water starts |
| Wake / tow foiling | Boat or personal watercraft tow | Holding a steady line while learning foil balance | Smooth starts, handle control, and pitch |
| Downwind foiling | Wind-driven swell and bumps | Reading moving bumps and connecting runs | Gliding, pumping, and route planning |
| eFoiling | Electric motor | Managing throttle and balance | Smooth acceleration, braking, and controlled turns |
A boat tow can give a learner consistent forward speed, but it comes with tow-line, boat-traffic, and communication risks. A wingfoil lesson lets you learn in wind without needing waves, but adds another piece of equipment to manage. There isn’t one universal “easiest” method: the best entry point is the discipline you can practice safely, with suitable instruction and conditions.
🧭 Choosing Your First Hydrofoil Setup
Good beginner gear isn’t the fanciest gear. It’s the gear that gives you time to make a mistake before the water collects its tuition. Rider weight, board discipline, skill, and local conditions all matter, so ask a qualified local instructor or reputable shop to check your setup.
For more detailed board-fit considerations, visit Hydrofoil Board Selection.
Board size, volume, and stability
A longer or higher-volume board can feel steadier while paddling and standing. A compact board may be easier to turn and maneuver once you’re flying, but can demand more balance during starts.
| Board characteristic | Beginner-friendly advantage | Trade-off |
|---|---|---|
| More volume | Easier flotation and often easier paddling | Can feel bulky once flying |
| Greater width | More side-to-side stability | May feel less agile |
| Longer outline | Can help with glide and paddling | Requires room to turn |
| Compact shape | Easier to maneuver and transport | Less forgiving during kneling, paddling, and touchdowns |
| Durable construction | Better tolerance for regular learning sessions | Heavier builds may feel less lively |
Board volume is not a simple “bigger is always better” equation. Your body weight, intended discipline, and water state change what feels manageable. A SUP foil setup, for example, may use a very different board from a prone surf foil.
Try the board in the discipline you plan to learn. A board that’s wonderfully stable for wingfoil starts may feel awkward for prone paddling.
Foil wings, mast length, and beginner-friendly gear
Beginners often benefit from a front wing that offers accessible lift and predictable handling. But very large wings can feel cumbersome at speed or in steep, powerful surf. A good instructor can help match wing area and foil design to your weight and conditions.
| Setup choice | What it can help with | What to watch |
|---|---|---|
| Larger front wing | Earlier lift and lower-speed support | Can feel slower or less nimble at higher speeds |
| More moderate-aspect wing | Often a balance of lift and control | Exact behavior varies by design |
| Shorter mast | Less flight height and a shorter fall | Less room for chop, turns, and touchdowns |
| Longer mast | More clearance in uneven water | More height to manage and potentially harder falls |
| Stable stabilizer setup | Can make pitch control feel more predictable | May feel less loose in turns |
Mast length is a trade-off, not a badge of courage. A shorter mast may be a sensible learning tool in suitable shallow, protected conditions, but it does not make shallow water safe: the foil can still strike the bottom. Never choose a mast length without checking water depth, local hazards, and the discipline’s needs.
Browse current options from Armstrong Foils, AXIS Foils, and Lift Foils, and compare systems in our Hydrofoil Brands Comparison.
Wetsuits, helmets, impact vests, and other essentials
| Equipment | Why it matters | Selection tip |
|---|---|---|
| Helmet | Helps protect your head from impacts | Choose a water-sports helmet that fits securely and is designed for your activity |
| Impact vest | Adds torso protection and flotation support, depending on model | Confirm it’s appropriate for your discipline and local rules |
| Wetsuit or thermal layers | Keeps you warm and can reduce exposure to scrapes | Match thickness to water temperature and session length |
| Leash | Can keep board and rider connected in some conditions | Use only a discipline-appropriate leash; avoid entanglement hazards |
| Water shoes | Help protect feet during shore entry | Check they fit securely and don’t interfere with stance |
| Communication device | Helps contact others in remote areas | Keep it accessible and protected from water |
The U.S. Coast Guard’s boating safety guidance is a useful starting point for water-safety basics, while local rules determine what equipment is required where you ride. A helmet and impact vest can reduce some risks, but neither makes a foil strike harmless. Distance, control, and judgment remain your best protection.
🛟 Safety, Conditions, and Foil Etiquette
A hydrofoil is a fast-moving piece of equipment with rigid, sometimes sharp edges. Your first safety skill is not a trick. It’s learning where not to ride.
Before a session, check local regulations, tide and weather forecasts, water depth, access, and other water users. The National Weather Service marine forecast and NOAA Tides and Currents can help you assess conditions in the United States; use your local equivalents elsewhere.
How to choose a safe learning spot
Choose a site with:
- Plenty of open water and a clear path downwind or down-current.
- No swimmers, fishing lines, docks, mored boats, rocks, or shallow reefs nearby.
- Manageable wind, waves, and current for your current ability.
- A safe way to enter and exit the water.
- A buddy, coach, or reliable observer where possible.
- Permission to foil—some beaches and waterways restrict boards, towing, or powered craft.
A foil-friendly spot is not necessarily a beginner-friendly spot. A powerful wave may look inviting, but it can leave little room to recover. We’d rather have a modest, uncrowded practice area than a photogenic break with surfers scattered through the landing zone.
Wind, waves, current, and water depth
| Condition | Beginner consideration |
|---|---|
| Gusty or offshore wind | Can make returns and self-rescue harder; avoid learning beyond your reliable return range. |
| Strong current | Can carry you away from your entry point and complicate recovery. |
| Choppy water | Makes starts and height control more demanding. |
| Step or breaking waves | Increase the consequences of poor timing and uncontrolled lift. |
| Shallow water | Creates a serious risk of striking the bottom with the foil. |
| Busy waterway | Adds collision risk and reduces room to fall safely. |
Don’t assume a short mast makes shallow water safe. The foil wing still extends below the board, and the water depth can change quickly with tide or swell. If you cannot confirm safe depth along your full route, choose another location.
Pre-session equipment and safety checks
Before entering the water:
- Inspect the foil. Check wings, mast, fuselage, and mounting points for cracks, dents, or loose hardware.
- Confirm compatibility. Make sure all components fit the manufacturer’s system and that bolts are the correct type and length.
- Tighten hardware according to the manufacturer’s instructions—don’t guess or overtighten.
- Check the board. Look for damage near the foil tracks, leash plug, and handles.
- Fit your protective gear. Test helmet fit and vest closures before launching.
- Review the plan. Agree on your practice zone, return route, hand signals, and emergency plan with your buddy or coach.
- Carry the gear safely. Keep foil wings away from people, legs, and pets.
For repair and assembly details, always prioritize the specific brand’s manual. Different systems use different fasteners, torque requirements, and maintenance procedures.
Foil awareness, right of way, and protecting others
- Keep generous distance from swimmers, surfers, paddlers, and boats.
- Don’t launch or land through crowded water.
- Never assume someone can hear your warning over wind or surf.
- If control is uncertain, fall away from people and let go of the handle or tow rope when appropriate.
- Keep your board and foil under control; a loose board can travel farther than you expect.
- Follow local right-of-way rules and any designated foil zones.
Foil etiquette is simple: if your line puts someone else at risk, change your line or end the run. The sport’s reputation depends on riders making space for everyone.
🏄 ♂️ Learning Hydrofoiling: A Step-by-Step Progression
Progress varies by discipline, fitness, conditions, and experience. Don’t treat the steps below as a race. We recommend moving forward when you can repeat the current skill calmly—not just when you’ve had one lucky ride.
1. Get comfortable handling the board and foil
On land, learn how your board carries and where the foil edges are. Practice lifting, turning, and setting it down without swinging the foil near people.
- Carry the setup with the foil behind or away from your body, according to the board design.
- Keep hands clear of wing edges.
- Place the board down gently to avoid damaging the foil or deck.
- Learn where the front and rear of the board are before you’re in choppy water.
For prone and surf foiling, Lift Foils’ technique guide also emphasizes careful handling and choosing a roomy, uncrowded practice area.
2. Practice paddling, water starts, or getting up on the board
The start depends on your discipline:
- Prone: Practice paddling straight and popping up on a suitable board without trying to foil.
- Wing: Practice handling the wing on land and on water, then learn to control the board before chasing flight.
- Kite: Work with a qualified instructor on kite handling and water starts before adding foil complexity.
- Tow: Agree on clear signals with the driver and practice a stable start before focusing on lift.
- SUP foil: Start kneling if needed, then stand when your board feels stable and has enough forward movement.
A video tutorial can make starts look simple because the rider knows exactly what’s coming. In real water, the board may yaw, the wind may gust, and your balance may choose the least convenient moment to go sightseeing. Rehearse each stage separately.
3. Find your stance and balance
Stand with feet near the board’s centerline and roughly shoulder-width apart, adjusting for your board, body, and discipline. Keep your knees soft and your chest relaxed.
- Look ahead toward your route, not down at your toes.
- Keep your hips over the board rather than leaning far back.
- Let your arms balance you without windmilling.
- Start in a low, athletic stance so you can absorb movement.
Foot placement depends on board length, foil position, and rider size. A useful starting point is to place the back foot near the foil mast area and the front foot forward enough to help control pitch. Treat that as a setup reference—not a universal measurement. Make small adjustments and change one variable at a time.
4. Build speed before trying to lift off
A foil needs water moving over its wings. Focus first on steady, controlled forward speed.
- Keep your path straight and predictable.
- Avoid sudden steering inputs while accelerating.
- In tow foiling, communicate with the driver and use a consistent tow line.
- In wing or kite foiling, learn to regulate power instead of pulling harder whenever the board slows.
- In surf foiling, use wave energy and timing rather than trying to muscle the board onto foil.
This is where patience pays off. If you force lift before the foil has enough speed, you’re asking it to do a job it can’t yet do—and your back foot may take the blame.
5. Rise onto the foil with small, controlled movements
As speed builds, apply gentle back-foot pressure to encourage lift. As the board rises, ease pressure and use the front foot to limit further pitch-up.
- Build steady speed.
- Keep your knees bent and eyes forward.
- Add a small amount of back-foot pressure.
- Feel the board begin to rise; don’t chase extra height.
- Shift pressure forward gradually to level the board.
- If the board climbs too quickly, reduce rear-foot pressure and bring your stance lower.
The goal is a low, level flight, not a dramatic launch. The Lift Foils guide gives similar practical advice: keep the foil submerged and avoid rising so far that air reaches the wing.
6. Hold a steady flight height
Once you lift, your job is to make the smallest useful corrections.
- Keep the board nearly level.
- Use ankles and knees for subtle pitch control.
- Avoid big fore-and-aft swings.
- Look ahead and choose a clear line.
- If you feel a touchdown coming, stay centered and let the board settle rather than panic-stomping.
A smooth touchdown is not failure. It’s a normal part of learning and often a sign that you’re keeping the ride controlled.
7. Link turns and ride back down safely
Learn to hold a straight line before adding turns. Then begin with broad, gentle arcs.
- Turn your head and shoulders toward the direction you want to travel.
- Keep your knees flexed and weight centered.
- Apply gradual rail pressure rather than twisting abruptly.
- At higher speed, use wider turns and leave yourself more room.
- End a run in open water with a controlled touchdown, not near a shoreline or another rider.
When learning to turn, ask a coach to observe whether you’re leaning, twisting, or changing foot pressure too abruptly. What feels like a “turning problem” may actually begin with pitch or speed control.
🎯 Essential Hydrofoiling Techniques to Master
Balance, posture, and foot placement
Good hydrofoil balance starts with a stable, athletic stance:
- Feet near the centerline, adjusted to your board and foil.
- Knes bent enough to absorb movement.
- Hips centered over the board.
- Shoulders relaxed and facing your intended travel direction.
- Eyes up and looking through the turn or down your line.
Avoid locking your knees. Stiff legs turn small bumps into big corrections. Also avoid copying a pro’s exact foot position from a clip: their board, mast track, foil, and speed may be completely different from yours.
Weight shifts and pitch control
Pitch is the foil-and-board system’s nose-up or nose-down movement.
| Rider input | Typical effect | Better beginner response |
|---|---|---|
| More rear-foot pressure | Encourages nose-up lift | Use a small input, then ease off |
| More front-foot pressure | Encourages nose-down control | Apply progressively, not as a panic stomp |
| Suden large shift | Can produce a rapid pitch change | Keep pressure smooth and centered |
| Bent knees | Helps absorb movement | Stay mobile rather than rigid |
The precise response depends on foil design and setup. When things feel unpredictable, reduce the size of your movements and check whether your speed or stance changed.
Rail control, steering, and carving turns
Foil turns come from coordinated body position, rail pressure, and looking where you want to go. Keep your turns gentle while learning:
- Look toward the direction of travel.
- Rotate your shoulders and hips smoothly.
- Shift pressure gradually through your feet.
- Keep the board low and stable.
- Exit the turn with your weight centered.
Leaning too far back can increase lift and make a turn feel unstable. Stay compact, use your legs, and give yourself room. For more advanced carving and board-control ideas, browse Advanced Hydrofoiling Techniques.
Pumping the foil to maintain speed
Pumping uses coordinated body movement to help maintain or generate forward movement, but it’s not a magic substitute for speed or technique. It takes timing, strength, and a feel for the foil’s glide.
- Begin with a stable ride before adding pumping.
- Use your legs and hips rather than flailing your arms.
- Keep the foil level and movements rhythmic.
- Learn to feel when the foil is gliding before trying to add a pump.
- Stop if fatigue is making your timing sloppy.
The Lift Foils guide notes that pumping can take practice and encourages riders not to be discouraged if it feels difficult at first. We agree. For many beginners, getting comfortable riding and turning should come before deliberate pumping drills.
Reading waves and connecting bumps
In surf and downwind foiling, look beyond the bump directly under you. Scan the water ahead to spot the next useful line.
- Choose smaller, more manageable waves while learning.
- Watch how the swell moves, not just where it breaks.
- Keep space between you and other riders.
- Use your first runs to learn the route and exit options.
- Prioritize control over linking every bump.
A foil can carry you into water that would be difficult to surf on a conventional board, but that extra glide also means a longer ride toward hazards if you don’t plan ahead. Lift Foils describes the reduced drag and extended glide as part of foiling’s appeal; the same glide makes route planning and awareness essential.
Managing speed and controlling flight height
The easiest way to manage foil height is to avoid creating large swings in the first place.
- Use smooth foot pressure.
- Keep speed consistent.
- Stay low enough to react.
- Watch your direction of travel and water state.
- Reduce power or settle down when you’re approaching traffic, shallow water, or the end of your practice area.
If the foil begins to rise too high, shift pressure forward gently and lower your body. Avoid a sudden front-foot stomp that could turn a manageable climb into a hard touchdown.
Falling safely and recovering for another attempt
Falls are part of learning. Before each run, know where you’ll fall and what’s nearby.
- If you lose control, fall away from the foil and other people.
- Don’t reach toward the wing as the board moves.
- Let go of a tow handle when continuing to hold it would pull you into danger.
- After falling, locate the board and foil before swimming toward them.
- Recover the board from a safe position, keeping clear of the foil edges.
- Take a moment to reset before trying again.
Your best recovery tool is often a calm pause. Check yourself, your gear, and your surroundings before turning a tumble into another attempt.
🌬️ Techniques by Hydrofoiling Style
Prone surf foiling
Prone foiling begins with paddling and wave selection. A compact board may demand more balance than a long surfboard, so practice paddling and standing separately when possible.
- Start in a clear area away from a crowded surf lineup.
- Paddle with controlled strokes and keep the board tracking straight.
- Pop up smoothly and aim for a low stance.
- Use the wave’s energy without forcing a steep takeoff.
- Keep your foil submerged and ride a safe, open line.
The Lift Foils foil-surfing techniques guide highlights safe spacing, stance, and gradual control. For prone foiling, a dedicated instructor can help you choose a board and foil matched to the wave conditions at your local break.
Wing foiling
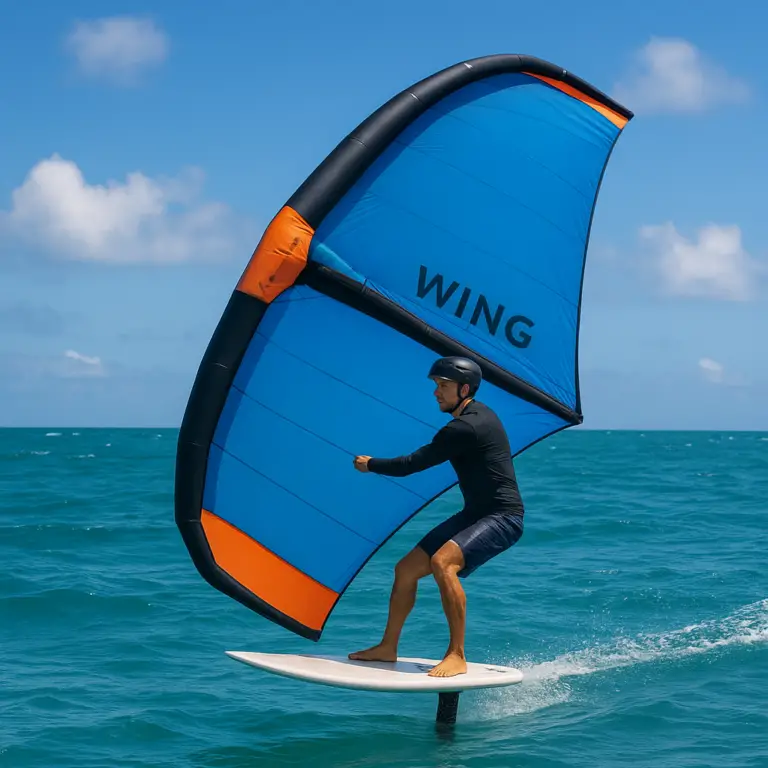
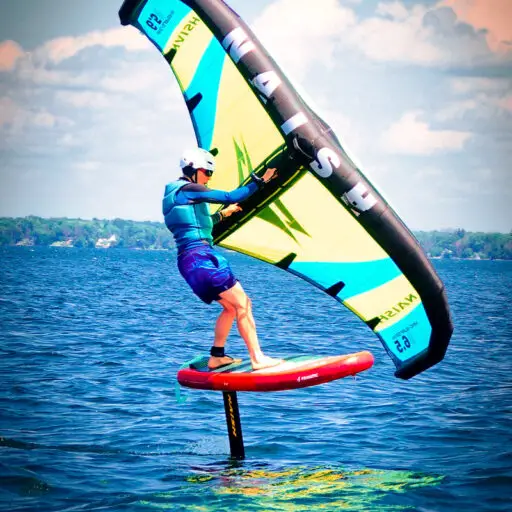
Wing foiling combines board control with handling a handheld wing. Learn to control the wing on land and in the water before trying to foil.
- Practice holding and depowering the wing.
- Learn how to stand and steer the board without seeking lift.
- Keep the wing in a position that gives you manageable power.
- Use an instructor to learn safe upwind and downwind routes.
- Avoid gusty conditions that can overpower your current skill level.
Brands such as Duotone, F-One, and Naish make wing-foiling equipment, but a specific model is not a substitute for correct sizing, instruction, and safe conditions.
Kite foiling
Kite foiling requires kite skills and foil skills at once. If you’re new to kiting, learn with a certified instructor before adding a foil.
- Practice kite control, relaunches, and self-rescue.
- Choose a large, open learning area with suitable wind.
- Start with manageable power and a predictable water start.
- Keep clear of shore hazards and other kite users.
- Make sure your leash, quick-release system, and safety plan are appropriate.
Do not borrow a kite setup and improvise. Kite size and line setup depend on wind, rider weight, and experience.
Wake and tow foiling
Tow foiling can offer steady speed and repeatable attempts, which is useful for learning balance. It also demands clear communication between rider and driver.
- Agree on hand signals before starting.
- Use a safe line and suitable tow speed set by an experienced driver or coach.
- Start with a stable, predictable pull.
- Keep a clear zone behind the boat and away from other users.
- Never wrap the tow line around your hand or body.
- Release the handle if you fall and continuing to hold it could create danger.
In the MasterCraft beginner lesson, athlete Meagan Ethell introduces behind-the-boat foiling as an accessible way to get started. The video is introductory rather than a detailed equipment manual, so pair it with in-person instruction and the boat manufacturer’s safety guidance. MasterCraft’s lighthearted invitation—“Foiling… Everyone’s doing it. You should, too.”—is fun encouragement, not a substitute for proper training.
Downwind foiling
Downwind foiling uses wind-driven bumps and swell rather than a tow or a continuously powered wing. It rewards glide and reading the water, but can place you far from your launch point.
- Start with an experienced local guide and a conservative route.
- Check wind direction, tide, current, and landing options.
- Use an appropriate board and safety equipment.
- Carry a reliable communication device where suitable.
- Don’t attempt a long downwind route alone or beyond your self-rescue ability.
Downwind foiling is a progression, not the ideal first session for most riders. Work on controlled flights and turns before attempting long open-water runs.
🚫 Common Beginner Mistakes and How to Fix Them
Popping up too early or forcing lift
What happens: The foil lacks steady speed, so a heavy rear-foot push produces an abrupt, unstable climb—or no useful lift at all.
Try this instead: Build speed first, keep your stance low, and make a small rear-foot input. Ease forward as the board begins to rise.
Leaning back and overcorrecting
What happens: Leaning back often drives the foil upward. A sudden forward correction can then cause a hard touchdown.
Try this instead: Keep your hips centered, knees bent, and movements small. Think “trim the board,” not “fight the board.”
Looking down instead of toward your path
What happens: Your shoulders and balance follow your gaze, making it harder to anticipate where you’re heading.
Try this instead: Look ahead to your safe line. Check the board only briefly when needed, then lift your eyes again.
Choosing a foil that is too small or conditions that are too challenging
What happens: A demanding foil or rough environment can leave you with little time to learn balance and pitch control.
Try this instead: Ask a knowledgeable shop or coach to match your wing, board, and mast to your weight, ability, and conditions. More lift can help a beginner, but excessive wing size may feel cumbersome at speed—there’s no one-size-fits-all answer.
Other common troublemakers include:
- Practicing in crowded surf: Move to an uncrowded spot.
- Making multiple gear changes at once: Change one variable, then assess.
- Using a foil with unfamiliar hardware: Confirm compatibility and assembly.
- Training until exhausted: Stop when your judgment or coordination fades.
📈 Practice Plans, Progression, and Lesson Tips
A first-session practice plan
Keep the first session focused. Your goal is not a long flight; it’s building repeatable foundations.
| Session block | Practice focus | Success looks like |
|---|---|---|
| Before entering | Gear check, safety plan, site scan | You know your zone and exit plan |
| Early practice | Board handling and starts | You can set up and begin calmly |
| Main practice | Balance and controlled forward movement | You can hold a stable stance |
| Short attempts | Small lift and low flight, if conditions suit | You make controlled takeoffs or touchdowns |
| End of session | Cool down and review | You know one skill to repeat next time |
Take breaks before fatigue takes over. Short, attentive practice blocks are usually more useful than one marathon session of increasingly creative falls.
How to track progress between sessions
Record a few details after each session:
- Location and conditions.
- Board, foil, and setup used.
- What felt easier than last time.
- What caused the most difficulty.
- One specific goal for your next outing.
- Any equipment changes or maintenance needs.
Progress can mean paddling straighter, standing more calmly, or recovering safely—not only flying. If you’re flying briefly but losing control, repeat the stability work before adding speed or turns.
When to book a coach or take a lesson
A qualified coach is especially valuable when:
- You’re new to the sport and need a safe setup.
- You’re learning kite or wing control alongside foiling.
- You’re unsure about local hazards, depth, or currents.
- You’re repeatedly falling in the same way.
- You plan to learn behind a boat or attempt a downwind run.
A coach can spot stance and timing issues that are hard to diagnose from your own perspective. The MasterCraft lesson video offers an introductory look at tow foiling, while an in-person lesson adds site-specific feedback and supervision.
🧰 Foil Care, Setup, and Troubleshooting
Asembling and tuning your hydrofoil
Always follow the manual for your particular brand and system. Before assembly:
- Identify each part and confirm its compatibility.
- Inspect threaded holes, inserts, and contact surfaces.
- Use the correct fasteners and supplied tools.
- Tighten hardware according to the manufacturer’s instructions.
- Check that the foil sits securely in the board track or plate.
- Recheck hardware after your first short session and as recommended by the manufacturer.
Mast position in the board track affects how the board balances over the foil. Make small, documented adjustments rather than moving the mast several centimeters and changing the stabilizer at the same time.
For brand-specific parts and manuals, check Armstrong Foils, AXIS Foils, F-One, Naish, Slingshot, and Lift Foils.
Rinsing, storing, and inspecting your gear
After saltwater sessions:
- Rinse the board and foil with fresh water.
- Remove sand and salt from joints and hardware.
- Dry the setup before long-term storage.
- Store the foil so wings and board are supported and protected.
- Inspect for cracks, loose hardware, corrosion, and impact damage.
- Follow the manufacturer’s guidance for removing or lubricating fasteners.
Don’t ignore a small crack or a bolt that repeatedly loosens. A damaged foil can fail under load, and a loose connection can change how the setup rides.
Diagnosing woble, ventilation, and unexpected touchdowns
| Symptom | Possible causes | First things to check |
|---|---|---|
| Side-to-side woble | Stance too narrow or wide, unstable speed, fatigue, setup mismatch | Centerline stance, knee bend, steady speed |
| Suden loss of lift | Speed loss, wing breach, turbulence, damaged or loose hardware | Speed, water state, foil position, hardware |
| Board climbs too quickly | Too much rear-foot input, speed increase, setup balance | Reduce rear-foot pressure and stay lower |
| Repeated touchdowns | Pitch instability, inconsistent speed, rough water, early lift attempts | Smooth speed, small corrections, simpler conditions |
| Foil feels unresponsive | Setup or mast-track balance, rider stance, unsuitable conditions | Confirm assembly and make one small adjustment |
| Air reaches the foil wing | Wing breach or ventilation | Lower the flight height and keep the foil submerged |
“Ventilation” generally refers to air reaching a foil surface and disrupting its flow, which can cause an abrupt loss of lift or control. If a problem persists, stop and inspect the equipment; don’t assume every strange sensation is a technique issue.
✅ Quick Tips for Your Next Hydrofoiling Session
- Choose space over spectacle. An uncrowded learning area beats a crowded, powerful wave.
- Start with control, not height. Low flights are easier to manage.
- Keep your eyes up. Look toward your safe route.
- Use small inputs. Smooth foot pressure beats frantic corrections.
- Change one thing at a time. Record setup adjustments.
- Fall away from the foil. Protect people around you and keep distance from the wings.
- Stop before fatigue wins. Tired riders make rushed decisions.
- Ask for coaching. A few good cues can save a lot of guesswork.
- Treat a touchdown as practice. A controlled return to the water is part of the skill.
The International Hydrofoil Society offers additional background on hydrofoil design, while our Advanced Hydrofoiling Techniques category is there for when straight-line flight starts feeling comfortably repeatable.