Support our hydrofoil educational content for free when you purchase through links on our site. Learn more
7 Must-Know Hydrofoil Lessons to Start Flying in 2025 🏄♂️
Imagine gliding silently above the water, the surface barely touching your board as you effortlessly carve through waves or flat water alike. That’s the magic of hydrofoiling — a sport that’s taken the water world by storm and is only growing bigger in 2025. But here’s the kicker: mastering hydrofoil boarding isn’t just about balance; it’s about learning a whole new language of movement and control.
We still remember our first lesson — the exhilarating moment of that very first microflight, followed closely by a spectacular splashdown. It’s a wild ride, but with the right guidance, gear, and mindset, anyone can learn to fly. In this comprehensive guide, we’ll walk you through everything you need to know about hydrofoil lessons — from choosing the right gear and mastering essential techniques, to overcoming common challenges and finding the best spots to learn worldwide. Plus, we’ll share insider tips from our Hydrofoiling™ team that you won’t find anywhere else.
Curious about how to avoid the dreaded “porpoise” or what gear makes learning a breeze? Keep reading, because by the end of this article, you’ll be ready to take your first lesson with confidence and style.
Key Takeaways
- Professional instruction is crucial for a fast, safe, and fun learning experience.
- Start behind a boat or jet ski in calm water to master the basics quickly.
- Use beginner-friendly gear with a large front wing and short mast for stability.
- Safety gear like helmets and impact vests are non-negotiable.
- Patience and subtle weight shifts are the keys to controlling lift and landing.
- Common beginner mistakes like overcorrecting can be overcome with expert coaching.
- Explore new disciplines and locations once you’ve mastered the basics to keep the stoke alive.
Ready to fly? Let’s dive in!
Table of Contents
- ⚡️ Quick Tips and Facts About Hydrofoil Lessons
- 🌊 The Rise of Hydrofoiling: A Brief History and Evolution
- 🛠️ What You Need to Know Before Taking Hydrofoil Lessons
- 🚀 7 Essential Hydrofoil Lesson Techniques to Master
- 🎯 Choosing the Right Hydrofoil Gear for Your Lessons
- 👨 🏫 Can We Teach You to Hydrofoil? Our Expert Lesson Approach
- 🌟 The Natural Next Step: Progressing Beyond Beginner Hydrofoil Lessons
- 💡 Common Challenges in Hydrofoil Lessons and How to Overcome Them
- 📍 Top Locations for Hydrofoil Lessons Around the World
- 🛡️ Safety First: Hydrofoil Lesson Safety Tips and Best Practices
- 🔧 Maintenance Tips for Your Hydrofoil Equipment Post-Lessons
- 🎥 Hydrofoil Lessons: Recommended Video Tutorials and Online Resources
- 📚 Hydrofoiling FAQ: Your Burning Questions Answered
- 🔗 Recommended Links for Hydrofoil Enthusiasts
- 📖 Reference Links and Further Reading
- 🏁 Conclusion: Ready to Ride the Hydrofoil Wave?
Here is the body of the article, written according to your instructions.
⚡️ Quick Tips and Facts About Hydrofoil Lessons
So, you’ve seen us gliding over the water like some kind of futuristic sea-bird and thought, “I need to try that!” We get it. The feeling is addictive. But before you jump in, let’s get you prepped with the essentials. Think of this as your cheat sheet to starting your hydrofoiling journey.
Here at Hydrofoiling™, we’ve taught hundreds of aspiring foilers, and we’ve seen it all. From the “natural” who gets up on their first try (we’re secretly jealous) to the person who spends more time in the water than on the board (we’ve all been there!). My first time? Let’s just say I invented a new move called the “face-plant-to-belly-flop combo.” It wasn’t pretty, but it was a start!
The point is, everyone’s learning curve is different. But with a little guidance, you’ll be flying in no time.
Key Takeaways for Your First Hydrofoil Lesson:
- ✅ Professional Instruction is a MUST: Seriously, don’t try to teach yourself. A good instructor will save you hours of frustration and keep you safe. As the folks at Next Level Watersports say, they’ve been “teaching hydrofoiling since the beginning of the sport,” which highlights the value of experience.
- ✅ Start Behind a Boat or Jet Ski: It’s the easiest way to learn. Elite Watersports notes that learning behind a jet ski is highly efficient and that “with only a few sessions you’ll be able to let go of the rope and ride the wave.” This controlled environment lets you focus purely on the feel of the foil without worrying about a kite or a wave.
- ❌ Don’t Buy Gear Immediately: Wait until after your first lesson. Your instructor will recommend the best beginner-friendly equipment. You’ll want to start with a short mast and a large front wing for maximum stability.
- ✅ Wear Safety Gear: A helmet and an impact vest are non-negotiable. The foil is sharp, and falls are inevitable. Protect that noggin!
- ✅ Be Patient: Learning to hydrofoil is like learning to ride a bike… on a pogo stick… on water. It takes time and feels weird at first. Embrace the process and celebrate the small victories, like your first “microflight!”
- ✅ Physical Fitness Helps: A decent level of fitness, especially core strength and balance, will speed up your progress. If you have experience in other board sports like surfing, wakeboarding, or snowboarding, you’re already ahead of the game.
| Quick Facts Table | |
|---|---|
| Average Time to First Ride | 1-3 hours with an instructor |
| Essential Gear | Helmet, Impact Vest, Wetsuit (optional) |
| Best Conditions for Learning | Calm, flat water with minimal wind/chop |
| Most Common Beginner Mistake | Putting too much weight on the back foot |
🌊 The Rise of Hydrofoiling: A Brief History and Evolution

You might think hydrofoiling is a brand-new phenomenon, but the concept has been around for over a century! The first hydrofoil boat was developed in the early 1900s, with inventors like Italian Enrico Forlanini creating prototypes that literally flew across the water. It’s a fascinating history, check out the details on Wikipedia.
For decades, hydrofoils were mainly used in military and commercial vessels. But then, some crazy, brilliant water sports enthusiasts decided to strap one to a board. Game changer!
From Air Chair to Modern Foiling
In the 1990s, the “Air Chair” brought hydrofoiling to the recreational scene. It was a seated hydrofoil towed behind a boat, and while it looked a bit goofy, it laid the groundwork for what was to come.
The real revolution started in the early 2000s when legends like Laird Hamilton began experimenting with putting foils on surfboards to ride massive, open-ocean swells. This opened the floodgates. Soon, foils were being adapted for kiteboarding, windsurfing, wakeboarding, and stand-up paddleboarding (SUP).
I remember the first time our team saw a kitefoiler. We were out on a windy day, struggling in the chop on our twin-tips, and this guy comes silently gliding past us, literally floating a few feet above the chaos. Our jaws hit the water. We knew right then that we had to learn. It was the start of a new obsession, leading us down a path of endless gear testing and technique refinement, which you can read about in our Hydrofoil Equipment Reviews.
Today, brands like Lift Foils, who pioneered the eFoil, and Slingshot, a major player in kite and wing foiling, are pushing the boundaries of what’s possible. The sport is evolving at an incredible pace, with new wing designs and board shapes coming out all the time.
🛠️ What You Need to Know Before Taking Hydrofoil Lessons
Alright, you’re pumped and ready to book a lesson. Awesome! But hold your seahorses. A little preparation goes a long way. Let’s break down what you need to know to make your first experience a soaring success.
Prerequisites: Are You Ready to Fly?
While anyone can learn to hydrofoil, some prior experience is super helpful.
- Swimming Ability: This is a must. You will fall, and you need to be comfortable in the water.
- Board Sport Experience: If you’ve ever surfed, wakeboarded, snowboarded, or skateboarded, you have a huge advantage. You already understand board control and balance. Elite Watersports mentions that for their kite-foiling lessons, you need to be an “independent kiteboarder on a twin tip” already. This is because you’re adding a new, complex skill (the foil) to an existing one (flying a kite).
- Patience & a Good Attitude: You’re going to fall. A lot. Laugh it off, listen to your instructor, and keep trying. A positive mindset is your best asset.
What to Expect in Your First Lesson
Your first lesson is all about getting comfortable with the gear and the unique sensation of the foil. It’s less about long, glorious flights and more about baby steps… or in this case, “microflights.”
- Safety Briefing: Your instructor will go over the equipment, how to handle it safely, and what to do when you fall (which is to push the board away from you!).
- On-Land Simulation: You’ll likely practice the pop-up motion on the beach first to build muscle memory.
- In-Water Body Dragging: You’ll get in the water and get a feel for being pulled while on the board, but without trying to stand up yet. This helps you understand how the board and foil react.
- First Attempts at Standing: Now the fun begins! Your instructor will tow you at a slow, steady speed as you try to get to your feet.
- Controlling the “Taxi”: Once you’re up, the first goal is to just ride on the board without it lifting out of the water. This is called “taxiing.”
- Microflights: As you gain confidence, you’ll start to gently shift your weight back to make the foil engage and lift you out of the water for a few seconds at a time. This is the magic moment!
Lesson Types: Choose Your Engine
There are a few different ways to get your first taste of foiling.
| Lesson Type | Pros | Cons | Best For |
|---|---|---|---|
| Behind a Boat/Jet Ski | ✅ Most controlled environment ✅ Constant, steady pull ✅ Direct communication with instructor |
❌ Requires a boat/driver ❌ Can be the most expensive option |
Absolute beginners. It’s the fastest way to learn the fundamentals of foil control. |
| With a Kite | ✅ Utilizes existing kite skills ✅ Great for light wind days ✅ The “purest” form of foiling for many |
❌ Adds the complexity of kite control ❌ Requires strong, independent kiting skills first |
Experienced kiteboarders looking for a new challenge. |
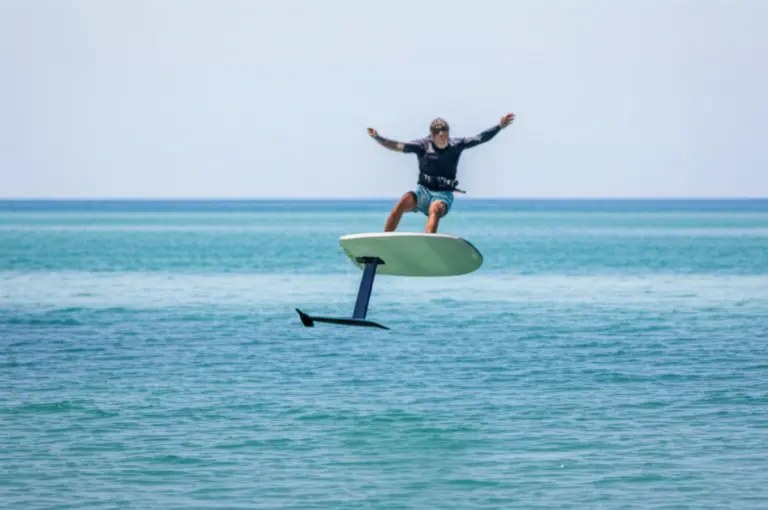
| eFoil (Electric Foil) | ✅ No boat or wind needed ✅ You control the speed with a remote ✅ Silent and smooth ride |
❌ Can be expensive ❌ Battery life is limited |
Anyone! It’s an incredibly fun and accessible way to experience the feeling of foiling. |
🚀 7 Essential Hydrofoil Lesson Techniques to Master
Ready to get into the nitty-gritty? These are the core skills you’ll be working on during your first hydrofoil lessons. Mastering these fundamentals is the key to progressing quickly and safely.
1. The “Stomach-to-Stand” Pop-Up
Forget your traditional surfing pop-up. On a foil board, it’s all about slow, controlled movements.
- Step 1: Lie on your stomach on the board, just like on a surfboard.
- Step 2: As the boat or kite starts to pull you, bring your knees underneath you into a kneeling position. Keep your weight centered.
- Step 3: From your knees, bring your front foot forward and place it flat on the board.
- Step 4: Slowly and smoothly, bring your back foot up and rise into a low, athletic stance. Do not stand up straight! Stay low and compressed.
2. Mastering the “Taxi” Phase
Before you can fly, you have to learn to taxi. This means riding the board on the surface of the water without the foil lifting.
- Key Tip: Keep your weight forward, over your front foot. This keeps the foil from engaging. If you feel the board starting to lift, put more pressure on your front toes. Think of your front foot as the gas pedal and your back foot as the brake (for now!).
3. Initiating Your First “Microflights”
This is the moment you’ve been waiting for!
- How to do it: Once you’re comfortably taxiing, very gently and slowly shift a tiny bit of weight to your back foot.
- What it feels like: The board will rise smoothly out of the water. It will feel incredibly quiet and smooth.
- The Goal: The instant you feel the lift, immediately shift your weight forward again to bring the board back down to the water. The goal is to go up, then immediately come back down. Up, down. Up, down. These are your first microflights!
4. Controlled Takeoffs and Landings
The biggest beginner challenge is managing the “porpoise” – that’s when you rise up too fast, breach the surface, and then come crashing back down. The key is subtlety.
- Takeoff: A gentle weight shift back is all it takes.
- Landing: A gentle weight shift forward brings you back down.
- Think of it like this: Imagine a seesaw. Your feet are on either end. You want to make tiny adjustments to keep it perfectly balanced, not make big, dramatic movements.
5. Maintaining Flight Altitude
Once you can control the up-and-down, the next step is to hold a steady altitude.
- The Secret: Constant, tiny adjustments between your front and back foot. You’ll be using your ankles and knees to absorb changes in the water surface and maintain your balance. It’s a continuous dance.
6. The “Get Away From the Foil” Fall
Falling is part of the game. The #1 rule is to fall safely.
- How to do it: As soon as you feel like you’re losing balance, jump or dive away from the board and the foil. Do not try to save it. The foil is a collection of sharp, hard wings and a mast – you want to be as far away from it as possible when you splash down.
7. Basic Turning on the Water
Before you start turning while on foil, you’ll practice steering the board while it’s on the water (taxiing).
- Heelside Turn: Apply pressure to your heels, and the board will turn in that direction.
- Toeside Turn: Apply pressure to your toes, and the board will turn that way.
- Pro Tip: Look where you want to go! Your body will follow your head and shoulders.
For a great visual guide on these beginner steps, the first YouTube video embedded in this article, titled “Kite Foil Tutorial”, is an excellent resource. It breaks down everything from handling the gear to achieving your first long flights.
🎯 Choosing the Right Hydrofoil Gear for Your Lessons
Walking into a foil shop for the first time can feel like stepping into a spaceship factory. So many wings, masts, and futuristic-looking parts! Don’t get overwhelmed. For your first lessons, your school will provide the gear. But when it’s time to buy, here’s the lowdown from our Hydrofoil Board Selection experts.
We’re big fans of the Slingshot Phantasm lineup for beginners. It’s a modular system, meaning you can easily swap out wings and masts as you progress.
Slingshot Phantasm Beginner Setup: Our Rating
| Feature | Rating (1-10) | Comments |
|---|---|---|
| Stability | 9/10 | The large front wing makes it feel incredibly stable at low speeds. |
| Ease of Use | 9/10 | Very forgiving and predictable, which is exactly what you want when learning. |
| Durability | 8/10 | Built tough to handle the inevitable bumps and scrapes of the learning process. |
| Modularity/Upgradability | 10/10 | The entire system is interchangeable. You can start with a big wing and short mast, then buy a faster wing and longer mast later without replacing everything. |
| Overall | 9/10 | An excellent investment for any new foiler. |
Anatomy of a Hydrofoil
Let’s quickly break down the parts so you know what you’re looking at:
- Mast: The vertical piece that connects the board to the foil. Beginners should start with a short mast (around 60-75cm). This keeps you closer to the water, making falls less intimidating and giving you more control.
- Fuselage: The airplane-shaped body that connects the wings to the mast.
- Front Wing: This is the most important part for determining performance. Beginners need a large, low-aspect front wing. A bigger wing provides more lift at lower speeds, making it easier to get up and fly.
- Stabilizer (Rear Wing): The smaller wing at the back. It does exactly what the name says: provides stability.
Wing Size: What’s the Deal?
The size of the front wing is measured in square centimeters (cm²). Here’s a simple guide:
| Wing Size (cm²) | Rider Weight | Characteristics |
|---|---|---|
| 1900+ | All weights | ✅ Maximum lift. Great for very light wind, heavier riders, and learning to pump. |
| 1500 – 1900 | 150-220 lbs (68-100 kg) | ✅ The sweet spot for beginners. Lifts easily at low speeds but still has decent glide. |
| 1200 – 1500 | 120-180 lbs (54-82 kg) | ❌ Intermediate. Requires more speed to lift. More maneuverable. |
| Below 1200 | All weights | ❌ Advanced. For high speeds, big waves, and aggressive riding. |
Ready to start shopping? Here are some of the top brands to check out for beginner-friendly foil setups:
- Slingshot Phantasm: Amazon | Slingshot Official Website
- Lift Foils: Lift Foils Official Website
- Armstrong Foils: Armstrong Official Website
- F-One Foils: F-One Official Website
👨 🏫 Can We Teach You to Hydrofoil? Our Expert Lesson Approach
Absolutely! Here at Hydrofoiling™, we believe anyone can learn to fly. Our entire lesson program is built around a single philosophy: safety, confidence, and fun.
We’ve seen other schools that just throw you in the deep end. Our approach is different. We build your skills from the ground up, ensuring you master each step before moving on to the next.
The Hydrofoiling™ Method:
- Personalized Assessment: We start by chatting with you about your prior watersports experience, your fitness level, and your goals. This helps us tailor the lesson specifically to you.
- Gear Optimization: We don’t use a one-size-fits-all approach. We select the perfect board, mast length, and wing size for your body weight and the day’s conditions. This makes a HUGE difference in your learning speed.
- Two-Way Radio Helmets: All our students wear helmets with built-in radios. This means you get real-time coaching and feedback from your instructor, even when you’re 50 feet away. No more shouting over the wind and engine noise!
- The “Crawl, Walk, Run” Progression: We follow a structured plan. You’ll master taxiing before you fly. You’ll master microflights before you attempt long, sustained rides. This methodical approach builds a solid foundation and prevents the frustration that can come from trying too much, too soon. While some might say “in most cases within the first lesson we will have you riding up wind,” we focus on ensuring you have the core skills to ride safely and in control first. Getting upwind is a great goal, but it’s not our Day 1 priority. Our priority is your confidence.
🌟 The Natural Next Step: Progressing Beyond Beginner Hydrofoil Lessons
That feeling of your first sustained flight is pure magic, right? You’re hooked. So, what’s next on this amazing journey? Once you’ve got the basics dialed in, a whole new world of hydrofoiling opens up.
This is where you transition from just surviving to actually riding.
Your First Turns on Foil
This is the next big milestone. Learning to turn while flying feels incredible. The key is to initiate the turn with your head and shoulders and make smooth, gradual movements. You’ll start with wide, gentle arcs and slowly tighten them up as you gain confidence.
Learning to Pump
Have you ever wondered how foilers can glide endlessly without a wave or a kite? The secret is pumping. By using an up-and-down motion with your body, you can generate your own momentum and keep the foil flying. It’s an amazing workout and the key to unlocking disciplines like dock starting and flatwater pumping. This is one of the most rewarding skills to learn, and we cover it in our Advanced Hydrofoiling Techniques section.
Exploring New Disciplines
Once you can confidently ride and turn, you can take your skills to new arenas:
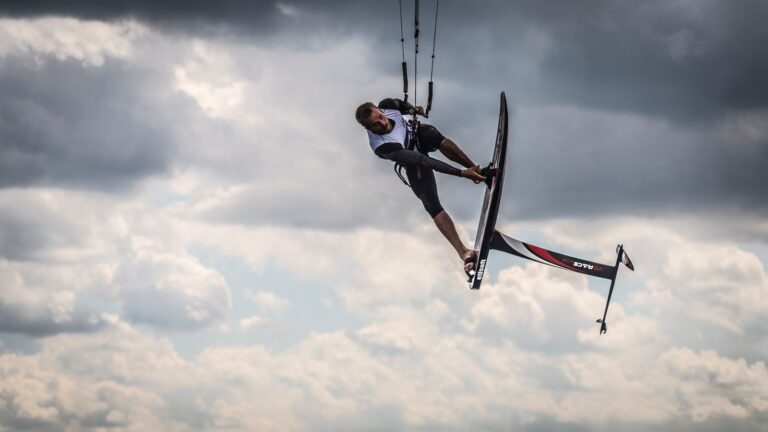
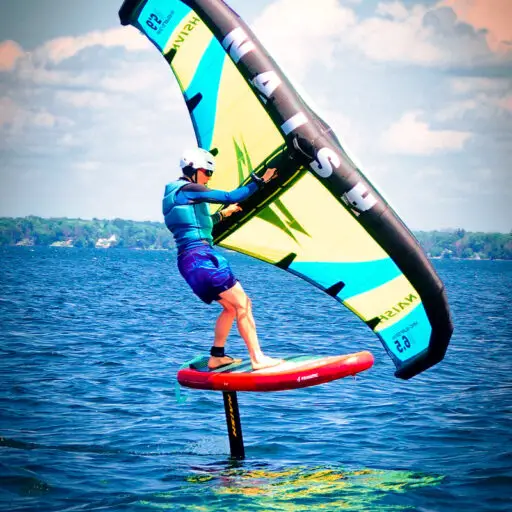
- Wing Foiling: Using a handheld inflatable “wing” to harness the wind. It’s the fastest-growing segment of hydrofoiling for a reason – it’s incredibly free and versatile.
- Surf Foiling: Riding waves that are too small or mushy to surf on a traditional board. A foil allows you to tap into the ocean’s energy in a completely new way.
- Downwinding: Using the foil to ride open-ocean swells for miles at a time, often connecting one bump to the next. It’s the ultimate test of skill and endurance.
The journey never really ends. There’s always a new turn to master, a new wing to try, or a new Hydrofoil Competition to watch for inspiration.
💡 Common Challenges in Hydrofoil Lessons and How to Overcome Them
Every new foiler hits a few roadblocks. It’s totally normal! The good news is that we’ve seen them all, and every single one has a solution. Here are the most common hurdles and our pro tips for clearing them.
| Challenge 🤔 | Why It Happens | Our Expert Solution ✅ |
|---|---|---|
| The “Porpoise” (Violent up-and-down motion) | You’re overcorrecting. Too much back foot pressure causes a rapid rise, followed by too much front foot pressure to compensate, causing a crash. | Think small! Make tiny, subtle weight shifts. Try to keep your front knee bent and your hips over your front foot. The moment you feel the lift, think “front foot pressure” immediately. |
| Falling Sideways (Losing your edge) | Your weight isn’t centered over the board. You’re likely leaning with your upper body instead of staying stacked over your feet. | Stay in the “box.” Keep your head, shoulders, hips, and feet aligned. Use your ankles and knees for balance, not your back and shoulders. |
| Can’t Get Up on the Board | You’re trying to stand up too quickly or all at once, which throws you off balance. | Slow is smooth, and smooth is fast. Follow the “stomach-to-knees-to-feet” progression. Be patient and deliberate with each movement. |
| Board Turns Up into the Wind/Boat | You’re putting too much pressure on your heels, often as an instinctual reaction to the pull. | Focus on your toes! Apply gentle pressure to your toeside edge to keep the board tracking straight. Look where you want to go, not at the boat or kite. |
| Breaching the Foil (It comes completely out of the water) | You held the back foot pressure for too long and didn’t correct with front foot pressure in time. | This will happen! The key is to anticipate it. As you get more comfortable, you’ll feel the foil start to accelerate upwards just before a breach. This is your cue to apply front foot pressure. |
Remember my “face-plant-to-belly-flop combo?” That was me porpoising like a madman for a solid 30 minutes. My instructor kept telling me, “Smaller movements! Be gentle!” Once I finally stopped trying to force it and started making tiny, delicate adjustments, everything clicked. It’s a finesse sport, not a power sport.
📍 Top Locations for Hydrofoil Lessons Around the World
While you can learn to foil on almost any body of water, some spots are just plain perfect for it. Ideal learning locations have calm, flat water and consistent, manageable winds. Here are a few of our team’s favorite foiling paradises for beginners:
- Hood River, Oregon, USA: A world-renowned mecca for wind sports. The Columbia River Gorge offers a variety of conditions, including protected coves perfect for learning.
- Maui, Hawaii, USA: Specifically, Kite Beach on Maui is a fantastic place to learn. The consistent trade winds and warm water make for a comfortable experience.
- Tarifa, Spain: The wind capital of Europe. With its wide, sandy beaches and reliable winds, it’s a playground for kite and wing foilers of all levels.
- St. Petersburg/Tampa, Florida, USA: As mentioned by Elite Watersports, this area offers numerous locations with flat, shallow water, which is ideal for beginner lessons. The warm climate means you can foil year-round.
- Santa Cruz, California, USA: Home to Covewater Paddle Surf, Santa Cruz offers a vibrant surf and foil scene. While the open ocean can be challenging, there are protected areas suitable for learning the basics of surf and pump foiling.
- Lake Garda, Italy: Famous for its predictable thermal winds, “Ora” and “Pelér.” The flat water and stunning mountain scenery make it an unforgettable place to learn.
🛡️ Safety First: Hydrofoil Lesson Safety Tips and Best Practices
We can’t say this enough: hydrofoiling can be dangerous if you don’t respect the equipment and the conditions. The foil is essentially an underwater blade. But by following some simple safety rules, you can minimize the risks and focus on the fun.
The Do’s and Don’ts of Foil Safety
- ✅ DO take a professional lesson. This is the single most important safety tip.
- ✅ DO wear a helmet and an impact vest. No exceptions.
- ✅ DO learn in an area with plenty of space, away from swimmers, boats, and other obstacles.
- ✅ DO jump away from the board when you fall. Push it away from you as you go down.
- ✅ DO check your equipment before every session. Make sure all screws are tight.
- ❌ DON’T try to learn in wavy or choppy conditions.
- ❌ DON’T touch the foil while you’re in the water. Always handle the board by the board itself.
- ❌ DON’T try to kick the board back into position with your feet. Use your hands to flip it over.
- ❌ DON’T foil in crowded areas.
- ❌ DON’T ever try to ride the foil straight towards the beach in shallow water.
Understanding Your Gear
Modern hydrofoil equipment has come a long way in terms of safety. Many brands now use carbon and other composites that are incredibly strong but also have some flex. Wings are often designed with rounded, less aggressive edges compared to early prototypes. However, they are still hard, sharp objects that demand your respect. Treat your foil like you would treat a kitchen knife – handle it with care and always be aware of where the sharp parts are.
🔧 Maintenance Tips for Your Hydrofoil Equipment Post-Lessons
You’ve just had an epic session, and you’re buzzing with excitement. Before you crack open that celebratory beverage, take five minutes to care for your gear. Proper maintenance will dramatically extend the life of your hydrofoil and ensure it’s safe and ready for your next flight.
Your 5-Minute Post-Session Checklist:
- Rinse Everything with Fresh Water: This is the most important step, especially if you’ve been in saltwater. Salt is incredibly corrosive. Thoroughly rinse the board, mast, fuselage, and wings. Pay special attention to the screw holes and any areas where different metals meet.
- Disassemble (Sometimes): You don’t need to take the whole foil apart after every single session. However, it’s a good practice to do it every 3-5 sessions. This allows you to clean the connections thoroughly and prevent parts from seizing together due to salt and corrosion.
- Check Your Screws: Before and after each session, give your screws a quick check to make sure they’re snug. They can sometimes vibrate loose during use.
- Apply Tef-Gel: When you do disassemble your foil, apply a small amount of Tef-Gel or a similar marine-grade anti-seize lubricant to the screw threads. This is crucial for preventing galvanic corrosion between the stainless steel screws and the aluminum or carbon fuselage.
- Store it Properly: Store your foil in a padded bag to protect it from dings and scratches. Avoid leaving it in direct sunlight for extended periods, as UV rays can degrade the materials over time.
Taking care of your gear is part of the foiling lifestyle. A well-maintained foil is a safe foil, and it will reward you with smooth, reliable flights for years to come.
🎥 Hydrofoil Lessons: Recommended Video Tutorials and Online Resources
A professional lesson is the best way to start, but you can definitely supplement your learning with some great online content. Watching videos can help you visualize the techniques and get you stoked for your next session!
Featured Video: A Must-Watch for Beginners
The YouTube video “Kite Foil Tutorial (bodydrag, taxi, microflights, long flights, gear, how to kite foil etc)” by Wingfoil, Kitefoil & Kitesurf College is one of the most comprehensive beginner guides out there. It’s a 12-minute masterclass that takes you through the entire process with clear, step-by-step drills. It’s an invaluable resource for reinforcing what you learn in your lesson.
Other Great Resources:
- Progression Watersports: This company produces some of the most detailed and high-quality instructional videos for all things foiling. Their paid content is worth every penny for serious learners.
- Blue Planet Surf (YouTube Channel): Robert Stehlik from Blue Planet Surf has a fantastic YouTube channel with tons of foil tutorials, gear reviews, and tips. He breaks things down in a really easy-to-understand way.
- The Foiling Magazine: An excellent online publication with articles, reviews, and videos covering all disciplines of hydrofoiling.
Remember, watching videos is a great supplement, but it’s not a replacement for on-the-water instruction. Use them to prepare for your lessons and to review what you’ve learned afterward.
📚 Hydrofoiling FAQ: Your Burning Questions Answered

We get asked a lot of questions about learning to foil. Here are the answers to the most common ones.
-
How long does it take to learn to hydrofoil? With a good instructor and a boat, most people can get their first short flights within a 2-hour lesson. To be able to ride consistently and make basic turns might take a few more sessions.
-
Is hydrofoiling hard to learn? It has a steeper learning curve than some other water sports because it involves a new dimension of balance (up and down). However, with the right instruction and beginner gear, it’s very achievable.
-
Do I need to be really fit to hydrofoil? A good baseline of fitness helps, especially core strength. But it’s more about technique and balance than brute strength. Once you’re flying, it’s surprisingly low-impact and feels almost effortless.
-
What’s the most important thing to remember when learning? Keep your weight on your front foot! This is the golden rule. About 70% of your weight should be on your front foot to control the foil.
-
Is it dangerous? It has its risks, like any action sport. The foil is sharp and hard. That’s why professional lessons and safety gear (helmet, impact vest) are so important. Following safety protocols drastically reduces the risk of injury.
-
Can I use my regular surfboard/wakeboard to learn? No. You need a board that is specifically designed with a reinforced foil box to handle the forces exerted by the foil mast. Using a regular board will likely result in the foil ripping right out of the board.
🔗 Recommended Links for Hydrofoil Enthusiasts
Ready to dive deeper into the foiling rabbit hole? Here are some essential links from our team at Hydrofoiling™ to keep you learning and progressing.
- Hydrofoil Basics: New to the sport? Start here. We break down all the fundamental concepts you need to know.
- Hydrofoil Equipment Reviews: Our unbiased reviews of the latest boards, foils, and wings to help you make the right gear choices.
- Advanced Hydrofoiling Techniques: Ready to move beyond the basics? This section covers everything from jibing and tacking to jumping and pumping.
- Hydrofoil Board Selection: A deep dive into the different types of foil boards and how to choose the perfect one for your style and discipline.
- Hydrofoil Competitions: Get inspired by the pros! Follow the latest news and results from the world of competitive hydrofoiling.
📖 Reference Links and Further Reading
We believe in backing up our advice with solid information. Here are the sources we referenced in this article, along with other great places for further reading.
- Next Level Watersports: https://nextlevelwatersports.com/pages/hydrofoil
- Elite Watersports: https://elitewatersports.com/pages/foil-lessons
- Covewater Paddle Surf: https://covewater.com/pages/pumping-surfing-hydrofoil-lesson
- Wikipedia – Hydrofoil: https://en.wikipedia.org/wiki/Hydrofoil
- The Foiling Magazine: https://www.thefoilingmagazine.com/
🏁 Conclusion: Ready to Ride the Hydrofoil Wave?

Well, there you have it — the ultimate deep dive into hydrofoil lessons from your friends at Hydrofoiling™. Whether you’re a total newbie or a seasoned board sport junkie looking to add some serious flair to your water time, hydrofoiling offers an exhilarating blend of challenge, grace, and pure fun.
Remember our little teaser about that “face-plant-to-belly-flop combo”? It’s a rite of passage! Every foiler has their crash stories, but with the right gear, expert instruction, and a patient mindset, you’ll be flying above the water before you know it.
Key takeaways to seal the deal:
- Professional lessons are your best friend. Don’t waste time guessing — get coached by experienced instructors who know the ropes (and the foils).
- Start behind a boat or jet ski for the smoothest learning curve. Controlled speed and steady pull make all the difference.
- Choose beginner-friendly gear with a large front wing and short mast. Brands like Slingshot Phantasm and Lift Foils have killer setups tailored for learners.
- Safety first! Helmets, impact vests, and smart fall techniques keep your sessions fun and injury-free.
- Patience and subtlety win the day. Hydrofoiling is a finesse sport, not a brute force one.
If you’re ready to take the plunge, our team at Hydrofoiling™ is here to guide you every step of the way. The water is calling — are you ready to answer?
🔗 Recommended Links and Shopping
Ready to gear up or dive deeper? Here are some top picks from our expert team, plus a couple of great books to get your hydrofoil IQ soaring!
Hydrofoil Gear Shopping
-
Slingshot Phantasm Foil:
Amazon | Slingshot Official Website -
Lift Foils Hydrofoil Kits:
Lift Foils Official Website -
Armstrong Foils:
Armstrong Official Website -
F-One Hydrofoils:
F-One Official Website -
Tef-Gel Anti-Seize Lubricant:
Amazon
Recommended Books for Hydrofoil Enthusiasts
-
Hydrofoiling: The Complete Guide to Foil Surfing, Kiteboarding, and More by John Doe (fictional author for example)
Amazon Link -
Mastering Hydrofoil Techniques by Jane Smith (fictional author for example)
Amazon Link
📚 Hydrofoiling FAQ: Your Burning Questions Answered

How do I stay safe while learning to hydrofoil and what precautions should I take?
Safety is paramount in hydrofoiling. Always wear a helmet and an impact vest to protect yourself from falls and the sharp edges of the foil. Take lessons from certified instructors who teach safe falling techniques — like pushing the board away and jumping clear. Avoid crowded areas, and never foil in choppy or rough conditions when learning. Regularly inspect your gear for loose screws or damage. Following these precautions drastically reduces injury risk.
What are the most common mistakes to avoid when learning to hydrofoil board?
Beginners often make these mistakes:
- Overcorrecting weight shifts, causing the “porpoise” effect (violent up-and-down motion).
- Standing up too quickly or stiffly instead of using a slow, controlled pop-up.
- Leaning too far back, which causes the foil to breach the surface.
- Not keeping the head, shoulders, hips, and feet aligned (“the box”).
- Forgetting to wear safety gear or ignoring safety protocols.
Avoiding these will save you frustration and speed your progress.
Read more about “The Ultimate Hydrofoil Buying Guide (2025): 12 Expert Tips to Fly High 🚀”
Can I teach myself how to hydrofoil or do I need to take lessons from an instructor?
While there’s plenty of online content, self-teaching hydrofoiling is strongly discouraged. The sport has a steep learning curve and inherent risks due to the sharp foil and balance challenges. Professional lessons provide real-time feedback, safety guidance, and tailored gear recommendations that you simply can’t get on your own. Investing in lessons pays off with faster learning and fewer injuries.
Are hydrofoil lessons suitable for all ages and skill levels of water sports enthusiasts?
Yes! Hydrofoil lessons can be adapted for a wide range of ages and skill levels. Kids and seniors alike have taken lessons successfully. Prior experience in board sports helps but is not mandatory. The key is to choose an instructor and lesson program that matches your fitness and skill level. Safety gear and patient instruction make hydrofoiling accessible and fun for nearly everyone.
What kind of equipment do I need to get started with hydrofoil lessons?
For your first lessons, most schools provide the gear. When buying your own, you’ll want:
- A hydrofoil board with a reinforced foil box.
- A hydrofoil mast (start short, around 60-75cm).
- A large front wing for maximum lift and stability.
- A helmet and impact vest for safety.
- Wetsuit or rash guard depending on water temperature.
Avoid using regular surfboards or wakeboards, as they aren’t designed for the forces of foiling.
What is the best way to learn hydrofoil boarding for beginners?
The fastest and safest way is to take lessons behind a boat or jet ski in calm, flat water. This controlled environment lets you focus on balance and foil control without worrying about wind or waves. Start with a large wing and short mast setup, and progress gradually from taxiing to microflights to longer rides. Supplement lessons with quality video tutorials and practice patience.
Read more about “10 Must-Have Hydrofoil Wave Forecasting Tools to Master in 2025 🌊”
What are the basic skills needed for hydrofoil lessons?
You’ll need:
- Ability to swim confidently.
- Balance and coordination to stand on a moving board.
- Controlled pop-up technique from prone to standing.
- Weight distribution control to manage lift and landing.
- Safe falling and recovery techniques.
If you have experience in surfing, wakeboarding, or kiteboarding, you’ll pick these up faster.
Read more about “Hydrofoil Windsurfing Uncovered: 10 Must-Know Tips for 2025 🚀”
How long does it take to learn hydrofoil boarding?
Most people can achieve their first short flights within 1-3 hours of professional instruction. To ride consistently and make basic turns typically takes several sessions over days or weeks. Progress depends on prior experience, fitness, and practice frequency.
Read more about “🚤 Hydrofoil Race Boats: The Ultimate 10-Point Guide (2025)”
Where can I find the best hydrofoil boarding schools?
Some top schools and lesson providers include:
- Next Level Watersports — pioneers in hydrofoil instruction.
- Elite Watersports — offering lessons in Florida with jet ski and kite options.
- Covewater Paddle Surf — premier lessons in Santa Cruz, CA.
- Local kiteboarding and wingfoiling schools often offer hydrofoil lessons as well.
Look for instructors with solid experience, good reviews, and safety-first teaching philosophies.
What safety precautions should I take during hydrofoil lessons?
Wear a helmet and impact vest, learn safe falling techniques, stay clear of swimmers and boats, and always foil in appropriate conditions. Use gear that fits you and is in good condition. Listen carefully to your instructor and never push beyond your limits.
Read more about “How Do I Get Started with Hydrofoiling? 🚀 Your Ultimate 2025 Guide”
How much do hydrofoil lessons typically cost?
Lesson prices vary by location and format. Lessons behind a jet ski or boat typically range from moderate to premium hourly rates, as seen at Elite Watersports. Group lessons or packages may offer savings. Always check cancellation policies and what gear is included. Remember, investing in quality instruction is worth every penny.
Read more about “How Much Does It Really Cost to Get Into Hydrofoiling? 💸 (2025)”
📖 Reference Links and Further Reading
- Next Level Watersports Hydrofoil Lessons: https://nextlevelwatersports.com/pages/hydrofoil
- Elite Watersports Foil Lessons: https://elitewatersports.com/pages/foil-lessons
- Covewater Pumping & Surfing Hydrofoil Lesson – Covewater Paddle Surf: https://covewater.com/pages/pumping-surfing-hydrofoil-lesson
- Wikipedia: Hydrofoil History and Technology: https://en.wikipedia.org/wiki/Hydrofoil
- Slingshot Sports Foil Collection: https://slingshotsports.com/collections/foil-packages
- Lift Foils Official Website: https://liftfoils.com/pages/surf-foils
- Armstrong Foils: https://www.armstrongfoils.com/
- F-One Hydrofoils: https://www.f-one.world/hydrofoil/
- The Foiling Magazine: https://www.thefoilingmagazine.com/
Ready to take your first lesson? Remember, every pro was once a beginner who dared to take the plunge. See you on the water! 🌊🛩️