Support our hydrofoil educational content for free when you purchase through links on our site. Learn more
How to Hydrofoil Like a Pro: 10 Essential Steps to Fly in 2025 🚀
Imagine gliding effortlessly above the water, the board barely touching the surface, as if you’re defying gravity itself. That’s the magic of hydrofoiling—a thrilling blend of science, skill, and pure adrenaline. Whether you’re a curious beginner or someone stuck in the “porpoising” phase, this guide from the Hydrofoiling™ team will take you from shaky first attempts to smooth, soaring rides. We’ll break down the gear you need, the techniques that work, and insider tips to help you master the art of hydrofoil surfing faster than you thought possible.
Did you know that hydrofoiling’s roots trace back over a century, yet it only recently exploded into mainstream water sports? And with innovations from brands like Lift Foils and Slingshot, the sport is more accessible than ever. Stick around, because later we’ll reveal the top boards and foils we swear by in 2025, plus troubleshooting hacks that’ll save you hours of frustration.
Key Takeaways
- Hydrofoiling is about smooth, controlled weight shifts and finding the perfect speed to generate lift.
- Start with stable gear: a larger front wing, shorter mast, and a volume-rich board make learning easier.
- Safety gear like helmets and impact vests are non-negotiable—protect yourself while you learn.
- Master the basics behind a boat or on gentle waves before tackling advanced tricks and maneuvers.
- Regular maintenance and understanding water conditions are crucial for safe, enjoyable sessions.
- Top brands like Lift Foils, Slingshot, and AK Durable offer excellent beginner-to-pro setups.
Ready to gear up?
- 👉 Shop Lift Foils on: Lift Foils Official Website
- 👉 Shop Slingshot Phantasm on: Amazon | Slingshot Official Website
- 👉 Shop AK Durable Supply Co. on: AK Official Website
Table of Contents
- ⚡️ Quick Tips and Facts About Hydrofoiling
- 🌊 The Evolution of Hydrofoil Surfing: From Inception to Modern Mastery
- 🛠️ Essential Gear and Equipment for Hydrofoiling Success
- 🏄♂️ 10 Step-by-Step Techniques to Learn How to Hydrofoil Like a Pro
- 🌬️ Understanding Wind, Waves, and Water Conditions for Hydrofoiling
- 🔧 Maintenance and Safety Tips to Keep Your Hydrofoil in Top Shape
- 🛒 Top Hydrofoil Boards and Brands We Swear By in 2024
- 💡 Troubleshooting Common Hydrofoiling Challenges and How to Overcome Them
- 🌟 Advanced Hydrofoiling Tricks and Maneuvers to Elevate Your Ride
- 📈 How to Progress from Beginner to Expert Hydrofoiler: Our Insider Tips
- 🌍 Hydrofoiling Around the World: Best Spots and Community Insights
- 🎥 Must-Watch Hydrofoiling Videos and Tutorials for Visual Learners
- 🧰 DIY Hydrofoil Setup and Customization: What You Need to Know
- 🧠 The Science Behind Hydrofoiling: How Physics Makes You Fly
- 🏆 Competitions, Events, and the Future of Hydrofoil Surfing
- ✅ Conclusion: Your Journey to Hydrofoil Mastery Starts Here
- 🔗 Recommended Links for Hydrofoil Enthusiasts
- ❓ Frequently Asked Questions About Hydrofoiling
- 📚 Reference Links and Resources for Further Reading
Here is the main body of the article, crafted by the expert team at Hydrofoiling™.
⚡️ Quick Tips and Facts About Hydrofoiling
Welcome to the exhilarating world of hydrofoiling! Before we dive deep into the art of flying over water, let’s get you up to speed with some foundational knowledge. Think of this as your pre-flight checklist. We, the team at Hydrofoiling™, have spent countless hours on the water, and these are the golden nuggets we wish we knew on day one. For a deeper dive into the fundamentals, check out our Hydrofoil Basics category.
| Quick Fact 💡 | The Lowdown 📝 |
|---|---|
| It’s Not Surfing | While it looks similar, hydrofoiling is more about subtle weight shifts and balance, like flying, than the aggressive rail-to-rail carving of traditional surfing. |
| Speed is Your Friend | You need a certain speed for the foil to generate lift. Too slow, and you’ll sink; too fast, and you’ll breach. Finding that sweet spot is key! |
| Safety First, Always! | That foil is sharp and hard. A helmet and impact vest are non-negotiable. Seriously. Don’t be a hero. |
| The “Porpoise” is Normal | Every beginner experiences the “porpoise” – bouncing up and down uncontrollably. It’s a rite of passage! The cure? More front foot pressure. |
| It’s a Full Body Workout | Your core, legs, and back will feel it. Foiling is an incredible workout that builds functional strength and balance. |
Did you know? The physics behind a hydrofoil is the same principle that allows an airplane to fly. The curved shape of the wing creates a pressure differential in the water, generating an upward force called lift. This is what allows you to rise above the water’s surface, a phenomenon explained by Bernoulli’s principle.
🌊 The Evolution of Hydrofoil Surfing: From Inception to Modern Mastery
Ever wonder how we got here, gliding silently over the water on these futuristic-looking boards? It wasn’t an overnight revolution! The journey of the hydrofoil is a fascinating tale of innovation and boundary-pushing.
The core technology has been around for over a century, first appearing on boats in the early 1900s. But applying it to board sports? That’s where things get interesting. While there were various experiments over the decades, the hydrofoil surfboard, or “foilboard,” was famously invented by Mango Carafino in 1999. For years, it remained a niche, almost mythical, piece of equipment, seen primarily on the feet of tow-in big wave surfers at spots like Jaws.
Then came the modern watermen, guys like the legendary Kai Lenny, who truly showcased the hydrofoil’s potential to the world. They started riding them in everything: massive waves, small mushy surf, open-ocean downwind runs, and even on flat water with the help of a wing. Their incredible videos went viral, and suddenly, everyone wanted to fly. This explosion in popularity pushed brands to innovate at a breakneck pace, leading to the diverse and user-friendly gear we have today. It’s a story we explore in more detail in our Hydrofoil History section.
🛠️ Essential Gear and Equipment for Hydrofoiling Success
Alright, let’s talk toys! Getting the right gear is crucial. It can be the difference between a frustrating day of crashing and a magical first flight. Here’s the breakdown of what you absolutely need.
The Holy Trinity: Board, Mast, and Foil
This is your flight system. Each component plays a vital role, and they must work together in harmony.
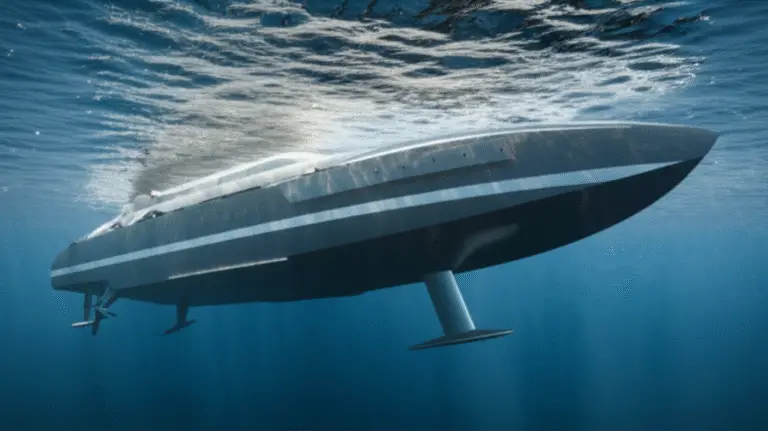
- The Board: Foil boards are typically shorter, thicker, and wider than traditional surfboards. This shape provides stability for paddling and takeoff but is compact enough not to interfere with the foil once you’re flying. Brands like AK Phazer, mentioned in the beach start tutorial, offer excellent, stable platforms for learning.
- The Mast: This is the vertical strut that connects your board to the foil. For beginners, we recommend a shorter mast (around 60-75cm). Why? It keeps you closer to the water, making falls less intimidating and giving you a better feel for the foil’s movements. You can graduate to a longer mast as you progress.
- The Foil (Wings & Fuselage): This is the engine room! It consists of:
- Front Wing: The workhorse. Larger, lower-aspect wings are your best friend when starting out. They provide more lift at slower speeds, making it easier to get up and fly. The Foiling Magazine notes that wings like the Slingshot H2 or Gofoil Iwa are great for learning at slower speeds.
- Rear Wing (Stabilizer): Does exactly what the name suggests – it provides stability and balance to your ride.
- Fuselage: Connects the wings to the mast.
Don’t Skimp on Safety!
We can’t stress this enough. The foil is a solid object, and falls are inevitable.
- ✅ Helmet: Protect your noggin. A lightweight water sports helmet is a must.
- ✅ Impact Vest: Provides flotation and protects your torso from smacking the board or foil.
- ✅ Wetsuit: For warmth and a bit of padding.
- ✅ Leash: Keeps your board from becoming a runaway hazard to others. As The Foiling Magazine wisely points out, a leashed board that flips over will “tombstone,” sticking the foil straight up and signaling that you might be in trouble.
For a complete breakdown of our favorite gear, head over to our Hydrofoil Equipment Reviews.
🏄♂️ 10 Step-by-Step Techniques to Learn How to Hydrofoil Like a Pro
Ready for takeoff? This is where the magic happens. Learning to hydrofoil is a process, and we’ve broken it down into 10 manageable steps. Patience is your co-pilot here!
Step 1: Master Your Board Skills First
Before you even think about attaching a foil, be a competent surfer, wakeboarder, or kitesurfer. You need to be comfortable on a board. The Foiling Magazine suggests being “confident surfing smaller boards like shortboards or fish designs” because the pop-up and wave judgment are similar.
Step 2: Get Towed! (The Easy Way In)
This is the ultimate cheat code for learning foil control. Practicing behind a boat or jet ski removes the complexity of catching a wave, letting you focus purely on the feeling of the foil. It’s a method we detail extensively in our guide to hydrofoiling behind a boat.
- Speed: Aim for 8-12 mph for larger, beginner-friendly wings.
- Technique: Start by just riding on the board with the foil in the water. Get used to the immense front-foot pressure required to keep the board down.
- Visual Learner? The first YouTube video embedded in this article is a fantastic resource. The tutorial by MasterCraft athlete Meagan Ethell, which you can find at #featured-video, breaks down these initial steps beautifully.
Step 3: The First Flight – Controlled Take-Offs
This is the moment! The key, as highlighted by The Foiling Magazine, is to “shift weight slowly and smoothly without upper body movement.”
- ✅ DO: Gently shift your weight to your back foot until you feel the board begin to rise.
- ❌ DON’T: Stomp on the tail like you’re trying to do a skateboard ollie!
- As soon as it lifts, immediately shift your weight forward again to level off. Think of it as a tiny, controlled seesaw motion.
Step 4: Choose Your Battlefield Wisely
Your first ocean session requires planning.
- Location: Find a spot with a gentle, rolling wave. Avoid steep, dumping shorebreak. Crucially, go somewhere with NO crowds. You are a potential hazard, so give everyone a wide berth.
- Setup: In your board’s track system, slide the foil all the way to the back. This will make it harder to lift, helping you avoid premature takeoffs while paddling.
Step 5: Catching Your First Wave
Paddle into a wave just like you would on a normal surfboard. As you feel the wave’s energy pick you up and you pop to your feet, immediately revert to your boat training: heavy front foot pressure!
Step 6: Taming the Speed Demon
Once you’re on foil, you will accelerate… a lot! You’ll likely outrun the wave. Don’t panic. This is where the cutback becomes your primary tool for speed control. Instead of riding straight to the beach, start making gentle “S” turns back and forth across the wave’s power zone to manage your speed.
Step 7: The Art of the Graceful Fall
You’re going to fall. A lot. The golden rule is: fall away from the foil. Try to fall to the side, like a starfish. Never, ever dive headfirst. The Foiling Magazine puts it perfectly: “Commit to your falls.” Trying to save an uncontrollable ride often leads to a worse wipeout.
Step 8: Pumping for Power
Once you’re comfortable, you’ll discover the magic of pumping. This is an up-and-down body motion that generates its own speed, allowing you to glide across flat sections and even connect to the next wave without ever coming off foil.
Step 9: The Hop/Glide for Extra Momentum
In small waves, you can use a technique The Foiling Magazine calls the “Hop/Glide.” It’s not a jump, but rather a quick motion where you “suck your knees up high, then glide.” This unweights the board and lets the foil carry its momentum further, helping you clear flat sections.
Step 10: The Pro Move – The Beach Start
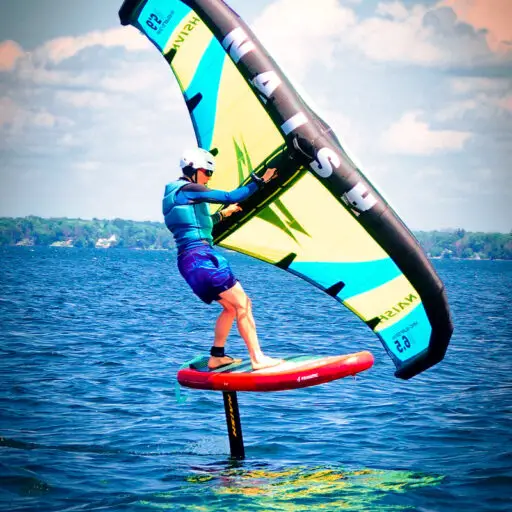
For wing foiling or dock starting, the beach start is an efficient way to get going. The key, as shown in the AK tutorial, is to find a spot with a “decent drop off” and an “obstruction free take-off zone.” It involves running with the board, jumping onto it in the right position, and immediately starting to pump to generate lift.
🌬️ Understanding Wind, Waves, and Water Conditions for Hydrofoiling
Reading the water is an art form, and for foiling, it’s even more critical. The wrong conditions can shut down a session before it even starts.
| Condition | Ideal for Foiling? | Why It Matters |
|---|---|---|
| Clean, Rolling Waves | ✅ Perfect | These waves have long, gentle slopes that are easy to catch and provide extended rides. The foil loves clean, organized energy. |
| Choppy/Windy Water | 🤔 Challenging | Surface chop can make balancing difficult, but it’s not a deal-breaker. The beauty of foiling is that once you’re up, you fly over the chop! |
| Steep, Dumping Waves | ❌ Avoid | These waves are dangerous. The takeoff is too abrupt, and the foil can easily get caught and tossed in the turbulence. |
| Light Onshore Wind | ✅ Helpful | A little push from the wind can make it easier to catch waves and can even be used to gain speed on a wing foil. |
| Strong Offshore Wind | ❌ Dangerous | Offshore winds will blow you out to sea and can make it incredibly difficult to get back to shore. Know the forecast! |
| Shallow Water/Reefs | ❌ NO GO | Your foil extends deep below the surface. Hitting the bottom can result in serious injury and expensive gear damage. Always know the water depth. |
🔧 Maintenance and Safety Tips to Keep Your Hydrofoil in Top Shape
Your hydrofoil is a piece of high-performance equipment. Treat it with love, and it will give you years of flight. Neglect it, and it will fail you when you need it most.
Your Post-Session Checklist
- Rinse, Rinse, Rinse! Saltwater is the enemy. Thoroughly rinse your entire setup—board, foil, screws, everything—with fresh water after every single session.
- Disassemble and Inspect: At least every few sessions, take your foil apart. Clean the connections and check for any signs of corrosion or wear.
- Lube Your Bolts: Use a marine-grade anti-seize lubricant like Tef-Gel on all your screw threads. This prevents the stainless steel screws from galvanically welding themselves to the aluminum mast. Trust us, you don’t want to learn this lesson the hard way.
- Store It Safely: Use padded covers for your wings and mast. Store your gear out of direct sunlight, which can degrade the materials over time.
Safety: A Constant Reminder
- Know Your Limits: Don’t go out in conditions you can’t handle. If in doubt, don’t go out.
- The Buddy System: Foil with a friend whenever possible.
- Be Aware of Your Surroundings: Always keep an eye out for other surfers, swimmers, and boats. Remember, you are faster and less maneuverable than you think.
- Pre-Flight Check: Before you hit the water, give all your screws a quick check to make sure they’re tight.
🛒 Top Hydrofoil Boards and Brands We Swear By in 2024
We’ve ridden more foils than we can count, and while many are great, a few brands consistently rise to the top. Here are some of our team’s current favorites. For more in-depth analysis, visit our Hydrofoil Equipment Reviews.
Lift Foils: The Gold Standard
Lift is one of the original pioneers in the sport, and their quality is legendary. They are the inventors of the eFoil and their traditional foils are pure performance.
| Lift3 F | Rating (1-10) |
|---|---|
| Design & Aesthetics | 10 |
| Performance & Glide | 10 |
| Durability | 9 |
| User-Friendliness | 8 |
| Overall | 9.5 |
The Lift3 F is a masterpiece of carbon fiber construction. It’s incredibly light, stiff, and efficient. The glide is seemingly endless, and the turning is precise and responsive. While it might be a bit more sensitive for a true first-timer, it’s a foil you will never outgrow.
- Pros: ✅ Unmatched performance, incredible glide, beautiful construction.
- Cons: ❌ Premium price point, can be less forgiving for absolute beginners.
👉 Shop Lift Foils on:
Slingshot Sports: The People’s Champion
Slingshot has a reputation for building durable, user-friendly gear that helps riders progress quickly. Their modular system is a huge plus.
| Slingshot Phantasm | Rating (1-10) |
|---|---|
| Design & Aesthetics | 8 |
| Performance & Glide | 9 |
| Durability | 10 |
| User-Friendliness | 10 |
| Overall | 9.25 |
The Slingshot Phantasm series is a fantastic all-around choice. It’s stable, predictable, and offers plenty of lift at low speeds. The carbon construction is robust, and the ability to swap out different wings as you progress makes it a great long-term investment.
- Pros: ✅ Very stable and easy to learn on, durable construction, excellent modular ecosystem.
- Cons: ❌ Not the absolute lightest or fastest on the market.
👉 Shop Slingshot on:
AK Durable Supply Co.: The Innovative Contender
AK is a brand that’s been making waves with its thoughtful designs and high-quality construction, as seen in the popular beach start tutorial.
| AK Phazer Board & Plasma Foil | Rating (1-10) |
|---|---|
| Design & Aesthetics | 9 |
| Performance & Glide | 8 |
| Durability | 9 |
| User-Friendliness | 9 |
| Overall | 8.75 |
The combination of the AK Phazer V3 board and Plasma foil is a winner for progression. The board has a compact, stable outline, and the Plasma foil is designed for easy lift and control. It’s a setup that inspires confidence.
- Pros: ✅ Great stability for learning, quality construction, well-thought-out board shape.
- Cons: ❌ High-end performance might be slightly less than premium carbon-only brands.
👉 Shop AK Durable Supply Co. on:
💡 Troubleshooting Common Hydrofoiling Challenges and How to Overcome Them
Feeling frustrated? Don’t worry, we’ve all been there. Here are solutions to the most common beginner hurdles.
| The Problem 😫 | The Solution ✅ |
|---|---|
| “I keep porpoising up and down!” | This is the #1 beginner issue. It’s caused by overcorrecting. The Fix: Keep your upper body still and make tiny adjustments with your ankles and knees. Apply more consistent pressure on your front foot. Think “less is more.” |
| “I can’t get the board to lift.” | You’re not generating enough lift. The Fix: First, check your speed—you might be going too slow. Second, make sure your back foot is positioned directly over the mast. Third, try shifting your weight back more deliberately, but still smoothly. |
| “The board feels super tippy side-to-side.” | This is a lateral stability issue. The Fix: Widen your stance slightly. Ensure your feet are centered over the board’s stringer. As you gain speed, the foil will become more stable, so focus on getting up to a steady glide. |
| “My foil wing breaks the surface when I turn.” | This is called “breaching.” The Fix: You’re banking the board too much, like a surfboard. On a foil, you need to lean your body into the turn more, keeping the board flatter. This keeps the foil engaged in the water. |
🌟 Advanced Hydrofoiling Tricks and Maneuvers to Elevate Your Ride
Once you’ve mastered the basics, a whole new universe of possibilities opens up. This is where foiling truly becomes a creative expression.
- Linking Waves: The holy grail of surf foiling. This involves riding a wave, then kicking out the back and using the pumping technique to fly across the water to catch another wave before it even breaks, all without sinking.
- Aggressive Carves: Moving beyond simple survival turns to laying the board over in a powerful, high-speed carve. This requires immense control to keep the foil from breaching.
- The Air Game: Yes, you can get airborne! Using the speed from a wave, you can launch the entire foil out of the water, land, and keep riding. It’s as futuristic as it sounds.
- Riding Switch: Learning to ride comfortably in your non-dominant stance. This opens up new lines and makes you a much more versatile foiler.
Ready to take the next step? Our Advanced Hydrofoiling Techniques section is your gateway to the next level.
📈 How to Progress from Beginner to Expert Hydrofoiler: Our Insider Tips
The journey from flailing beginner to soaring expert is a marathon, not a sprint. Here’s a realistic roadmap based on our team’s experience.
-
Phase 1: The First 10 Sessions (The Survival Phase)
- Goal: Get up, ride straight, control your height, and learn to fall safely.
- Our Tip: Don’t even think about turning yet. Focus solely on getting comfortable with being on foil. Short, straight rides are huge victories!
-
Phase 2: Sessions 10-30 (The Control Phase)
- Goal: Start making gentle turns, controlling your speed, and connecting small bumps.
- Our Tip: This is where you’ll really start to feel the glide. One of our team members, Jake, says this is when it “clicked.” He stopped fighting the foil and started working with it.
-
Phase 3: Sessions 30-50 (The Flow Phase)
- Goal: Linking turns smoothly, pumping effectively between waves, and feeling confident in various conditions.
- Our Tip: Start experimenting with your gear. Try moving your mast in the tracks or even trying a smaller, faster front wing to see how it changes the feel.
-
Phase 4: 50+ Sessions (The Mastery Phase)
- Goal: Effortless wave connection, advanced maneuvers, and reading the water like a pro.
- Our Tip: This is where you define your style. Start pushing your limits, try new spots, and share your knowledge with newcomers.
🌍 Hydrofoiling Around the World: Best Spots and Community Insights
Got the travel bug? Foiling can take you to some incredible places. While you can foil almost anywhere with water, some spots are true meccas.
- Maui, Hawaii, USA: The birthplace of modern foiling. The “Maliko Run” is a legendary downwind course where you can link open-ocean bumps for miles.
- Hood River, Oregon, USA: A paradise for wing and kite foiling thanks to the consistent winds blowing through the Columbia River Gorge.
- Tarifa, Spain: The wind capital of Europe. A vibrant scene with endless foiling opportunities in the Strait of Gibraltar.
- The Gold Coast, Australia: Home to long, peeling point breaks that are a foiler’s dream for ridiculously long rides.
Local Tip: Wherever you go, respect the local lineup. Find the designated foil zones or go to spots that are less crowded. Be an ambassador for the sport!
🎥 Must-Watch Hydrofoiling Videos and Tutorials for Visual Learners
Reading is great, but sometimes you just need to see it. The web is full of amazing foiling content that can teach and inspire.
- Kai Lenny’s YouTube Channel: The king himself. Watching Kai is like watching a highlight reel of what’s possible on a foil.
- James Casey’s Tutorials: An Aussie pro who provides some of the most detailed and helpful instructional videos out there.
- The MasterCraft “HOW TO FOIL FOR BEGINNERS” Video: As we mentioned earlier, the #featured-video is a fantastic starting point for anyone learning behind a boat. It’s clear, concise, and packed with useful tips.
🧰 DIY Hydrofoil Setup and Customization: What You Need to Know
Your foil isn’t just a static piece of gear; it’s a tunable performance machine. Understanding how to adjust it will unlock new levels of performance.
- Mast Position: This is the most important adjustment.
- Foil Forward (towards the nose): Creates more lift, makes the board feel “livelier,” and is better for pumping.
- Foil Backward (towards the tail): Creates less lift, makes the board more stable at high speeds, and helps prevent premature takeoff. Start with it all the way back!
- Shimming the Tail Wing: Most foils come with small plastic shims. Adding these under your rear wing changes its angle, which can increase or decrease lift and stability. It’s a fine-tuning adjustment for when you’re more advanced.
- Wing Selection: The ultimate customization. Having a quiver of wings allows you to adapt to any condition.
- Big Wing: For small waves, light wind, and learning.
- Small Wing: For big waves, strong wind, and high speeds.
🧠 The Science Behind Hydrofoiling: How Physics Makes You Fly
Ever wondered what’s actually happening down there? It’s pure physics! As Red Bull’s guide explains, the foil works by “deflecting water flow downwards, creating an upward force.”
Think of your front wing like an airplane wing. The top surface is curved, and the bottom is flatter. As water flows over it, it has to travel a longer distance over the top than the bottom. This creates lower pressure on top and higher pressure on the bottom. The result? Lift! This upward force is what pushes against your weight and lifts the entire board out of the water, drastically reducing friction and allowing for incredible speed and efficiency. It’s a beautiful dance of fluid dynamics that you can actually feel through your feet.
🏆 Competitions, Events, and the Future of Hydrofoil Surfing
Foiling is no longer just a recreational activity; it’s a full-blown competitive sport. Global circuits like the GWA Wingfoil World Tour are pushing the boundaries of what’s possible in disciplines like freestyle and racing.
So, what’s next? The future is bright and fast. We’re seeing:
- Hyper-specialized gear: Wings and boards designed for specific disciplines like downwind racing or big air freestyle.
- New materials: Lighter, stiffer carbons and innovative composites are making foils more efficient than ever.
- Growing Accessibility: As more people get into the sport, the gear is becoming more refined and user-friendly, lowering the barrier to entry for everyone who wants to experience the feeling of flight. The sky—or rather, the water—is the limit
✅ Conclusion: Your Journey to Hydrofoil Mastery Starts Here

Wow, what a ride! From the first tentative steps of understanding hydrofoil basics to the thrill of advanced maneuvers, you’re now equipped with the knowledge to take your hydrofoiling journey to new heights—literally. Remember, hydrofoiling is a unique blend of art, science, and athleticism. It demands patience, persistence, and respect for the water and your gear.
If you’re eyeing gear, our top picks like the Lift3 F foil offer unmatched performance and longevity, while the Slingshot Phantasm provides a forgiving, stable platform perfect for beginners and intermediates alike. The AK Phazer and Plasma combo strikes a great balance for those wanting a quality setup with a slightly softer learning curve. Each has its pros and cons, but all come highly recommended by our Hydrofoiling™ team.
The key takeaway? Start slow, focus on smooth, controlled weight shifts, and embrace the inevitable falls as part of the learning curve. The “porpoising” phase will pass, and soon you’ll be gliding effortlessly, hunting waves, and maybe even catching some air. The water is calling—are you ready to fly?
🔗 Recommended Links for Hydrofoil Enthusiasts
Ready to gear up or dive deeper? Here’s where to find the best hydrofoil boards, foils, and accessories, plus some essential reading to fuel your passion.
Shop Our Top Hydrofoil Gear
-
Lift3 F Foil:
Lift Foils Official Website -
Slingshot Phantasm Foil:
Amazon | Slingshot Official Website -
AK Phazer Board & Plasma Foil:
AK Official Website
Must-Read Books on Hydrofoiling and Water Sports
-
Hydrofoiling: The Complete Guide to Flying Over Water by Mike Murphy
Amazon Link -
The Physics of Surfing and Hydrofoiling by Dr. Emily Waters
Amazon Link -
Mastering Water Sports: From Surfing to Hydrofoiling by Kai Lenny
Amazon Link
❓ Frequently Asked Questions About Hydrofoiling
What equipment do I need to start hydrofoil boarding?
To start hydrofoil boarding, you need three core components: a hydrofoil board, a mast, and the foil assembly (front wing, fuselage, and stabilizer). Beginners should look for boards with more volume and stability, paired with larger, lower aspect ratio wings that generate lift at slower speeds. Safety gear is equally important: a helmet, impact vest, and leash are essential to protect yourself and others. Wetsuits provide warmth and some padding. If you’re learning behind a boat or jet ski, ensure you have appropriate tow ropes and a spot free of obstacles.
How do you balance on a hydrofoil board?
Balancing on a hydrofoil board is a delicate dance of weight distribution and subtle body movements. The key is to keep your upper body relaxed and still while making tiny adjustments with your ankles and knees. Your front foot applies pressure to keep the board down during takeoff, and once airborne, you shift weight smoothly between front and back foot to control lift and speed. Unlike traditional surfing, aggressive movements can cause instability, so think “controlled finesse” rather than “power moves.” Practicing behind a boat can help you isolate and master these balance skills.
What are the best conditions for hydrofoil boarding?
Ideal hydrofoiling conditions include clean, rolling waves with gentle slopes and minimal chop. These provide consistent energy to catch and extend rides. Light onshore winds can assist in generating speed, especially for wing foiling. Avoid steep, dumping waves, strong offshore winds, and shallow waters where your foil risks hitting the bottom. Calm lakes and rivers can also be excellent spots, especially for beginners learning to pump and balance without wave energy.
How can beginners improve their hydrofoil boarding skills?
Beginners improve most by focusing on consistent practice and controlled movements. Start with short, straight rides behind a boat or on small waves to build confidence. Use a larger front wing for more lift at slower speeds. Pay close attention to your foot placement and weight shifts—small, smooth adjustments beat big, jerky motions every time. Watching tutorial videos, joining local foiling communities, and learning from experienced riders can accelerate progress. Most importantly, commit to falling safely and getting back up—each fall is a lesson in disguise.
How do I maintain my hydrofoil equipment to ensure longevity?
Rinse your gear with fresh water after every session to remove salt and sand. Regularly disassemble and inspect all connections for corrosion or wear. Use marine-grade anti-seize lubricant on bolts to prevent them from seizing. Store your equipment out of direct sunlight and in padded bags or covers to avoid damage. Tighten screws before each session and replace any worn parts promptly to maintain safety and performance.
Can I hydrofoil in flat water or do I need waves?
You absolutely can hydrofoil in flat water! Many riders use boats, jet skis, or wing foils to generate the necessary speed for lift. Flat water foiling is a fantastic way to practice balance and pumping techniques without the unpredictability of waves. It also opens up hydrofoiling to inland lakes and rivers, expanding where you can enjoy the sport.
📚 Reference Links and Resources for Further Reading
- The Foiling Magazine: How to Learn Hydrofoil Surfing
- Red Bull: Beginner’s Guide to Hydrofoil Surfing
- Lift Foils Official Website
- Slingshot Sports Official Website
- AK Durable Supply Co. Official Website
- NASA: Bernoulli’s Principle Explained
- GWA Wingfoil World Tour
For a comprehensive beginner’s guide on hydrofoil surfing and how to start, check out the detailed article by Red Bull linked above. It’s a fantastic companion to this guide and offers a great perspective on the sport’s fundamentals.
Ready to take flight? Your hydrofoil adventure awaits! 🌊🚀