Support our hydrofoil educational content for free when you purchase through links on our site. Learn more
How to Get Started With Hydrofoil Boarding 🌊

How do you get started with hydrofoil boarding? Choose a beginner-friendly discipline, learn with an experienced instructor, and practice on stable, suitable equipment in safe, uncrowded conditions. Focus first on balance, controlled starts, and safe falls—not on flying high.
The first lift can feel like the board has suddenly decided to leave the conversation. We’ve found that staying relaxed and making small adjustments beats stomping the tail and hoping for the best. And while a beach start makes for a dramatic first impression, it’s a specialized technique—not the only, or necessarily easiest, way to learn.
Key Takeaways
- Start with instruction and the right discipline. Prone, wing, wake, and tow foiling each have different learning paths.
- Choose stable, compatible beginner gear. Prioritize control and predictable lift over the smallest or fastest setup.
- Make safety part of every session. Wear a watersports helmet and impact vest, check depth and conditions, and keep clear of other water users.
- Build skills in stages. Practice balance and controlled starts before working on lift, turns, and longer rides.
- Treat beach starts as a coached skill. Learn the technique in a suitable location rather than assuming it’s the default first step.
Table of Contents
- ⚡️ Quick Tips and Facts
- 🌊 Hydrofoil Boarding: How It Works and Where It Began
- 🏄 ♂️ What You Need to Get Started
- Choosing a Hydrofoil Board and Foil Setup
- Wings, Masts, Fuselages, and Stabilizers Explained
- Wetsuits, Helmets, Impact Vests, and Other Safety Gear
- 📍 Choosing the Right Hydrofoiling Spot and Conditions
- Best Water Conditions for Learning to Foil
- How to Check Depth, Wind, Waves, and Local Rules
- 🛟 Hydrofoil Safety: What to Know Before Your First Session
- Foil Awareness, Fall Zones, and Safe Distances
- Why Lessons and an Experienced Instructor Help
- 🧭 Your First Hydrofoil Session: A Step-by-Step Guide
- 1. Set Up and Check Your Foil
- 2. Practice Balancing on the Board
- 3. Learn to Paddle, Tow, or Catch a Small Wave
- 4. Get to Your Knes, Then Stand Up
- 5. Build Speed and Lift Off Gradually
- 6. Control Your Height and Ride Under Control
- 7. Turn, Touch Down, and End Your Ride Safely
- 🌬️ Choosing Your Hydrofoil Boarding Discipline
- Prone Foiling and Surf Foiling
- Wing Foiling and Wind-Powered Hydrofoiling
- Wake Foiling and Tow-In Foiling
- Downwind Foiling and Pump Foiling
- 🎯 Beginner Hydrofoiling Skills and Drills
- Balance, Stance, and Foot Placement
- Weight Shifts, Pitch Control, and Smooth Turns
- How to Fall, Recover, and Reset
- ❌ Common Beginner Mistakes and How to Fix Them
- 🔧 Hydrofoil Setup, Maintenance, and Transport
- Foil Assembly and Fastener Checks
- Rinsing, Inspecting, and Storing Your Gear
- 📈 Progressing from First Flights to Longer Foil Rides
- ✅ Quick Tips for a Better First Hydrofoil Session
- Conclusion
- Recommended Links
- FAQ
- Reference Links
Table of Contents
- ⚡️ Quick Tips and Facts
- 🌊 Hydrofoil Boarding: How It Works and Where It Began
- 🏄 ♂️ What You Need to Get Started
- Choosing a Hydrofoil Board and Foil Setup
- Wings, Masts, Fuselages, and Stabilizers Explained
- Wetsuits, Helmets, Impact Vests, and Other Safety Gear
- 📍 Choosing the Right Hydrofoiling Spot and Conditions
- Best Water Conditions for Learning to Foil
- How to Check Depth, Wind, Waves, and Local Rules
- 🛟 Hydrofoil Safety: What to Know Before Your First Session
- Foil Awareness, Fall Zones, and Safe Distances
- Why Lessons and an Experienced Instructor Help
- 🧭 Your First Hydrofoil Session: A Step-by-Step Guide
- 1. Set Up and Check Your Foil
- 2. Practice Balancing on the Board
- 3. Learn to Paddle, Tow, or Catch a Small Wave
- 4. Get to Your Knes, Then Stand Up
- 5. Build Speed and Lift Off Gradually
- 6. Control Your Height and Ride Under Control
- 7. Turn, Touch Down, and End Your Ride Safely
- 🌬️ Choosing Your Hydrofoil Boarding Discipline
- Prone Foiling and Surf Foiling
- Wing Foiling and Wind-Powered Hydrofoiling
- Wake Foiling and Tow-In Foiling
- Downwind Foiling and Pump Foiling
- 🎯 Beginner Hydrofoiling Skills and Drills
- Balance, Stance, and Foot Placement
- Weight Shifts, Pitch Control, and Smooth Turns
- How to Fall, Recover, and Reset
- ❌ Common Beginner Mistakes and How to Fix Them
- 🔧 Hydrofoil Setup, Maintenance, and Transport
- Foil Assembly and Fastener Checks
- Rinsing, Inspecting, and Storing Your Gear
- 📈 Progressing from First Flights to Longer Foil Rides
- ✅ Quick Tips for a Better First Hydrofoil Session
- Conclusion
- Recommended Links
- FAQ
- Reference Links
⚡️ Quick Tips and Facts
If you’re new to hydrofoiling, think of your first session as learning balance and control—not trying to fly as high or far as possible. We’ve found that calm water, suitable beginner gear, and coaching turn the early wobbles into useful feedback instead of a yard sale of board, foil, and dignity.
| Beginner question | Helpful starting point |
|---|---|
| What should I learn first? | Balance, stance, safe falling, and foil awareness |
| What conditions help? | A spacious, uncrowded area with manageable wind or small, clean swell, depending on discipline |
| What gear matters most? | A stable board, an appropriate foil, a helmet, and an impact vest |
| Do I need to fly immediately? | No. Start by controlling the board on the water |
| Should I try a beach start first? | Usually not. It’s a specialized technique, not the easiest universal first step |
| How do I make progress? | Take lessons, repeat short sessions, and change one variable at a time |
Five facts worth remembering
- A hydrofoil lifts the board above the water as it moves forward. The foil’s underwater wings generate lift; speed, wing design, rider weight, and setup all influence when that happens. Learn the basics in our Hydrofoil Basics guide.
- “Hydrofoil boarding” covers several sports. Prone surf foiling, wing foiling, wake foiling, and tow foiling use related equipment but have different learning sequences.
- Beginer-friendly usually means stable, not tiny. A board with enough volume and a forgiving foil can make water starts and early balance practice less demanding.
- A short mast can make beach starts less of a leap. That doesn’t mean a short mast is best for every discipline or every learner. The right length depends on conditions, clearance, and your instructor’s advice.
- You can make progress before your first flight. Smooth starts, controlled turns, and safe falls are real skills—not consolation prizes.
🌊 Hydrofoil Boarding: How It Works and Where It Began
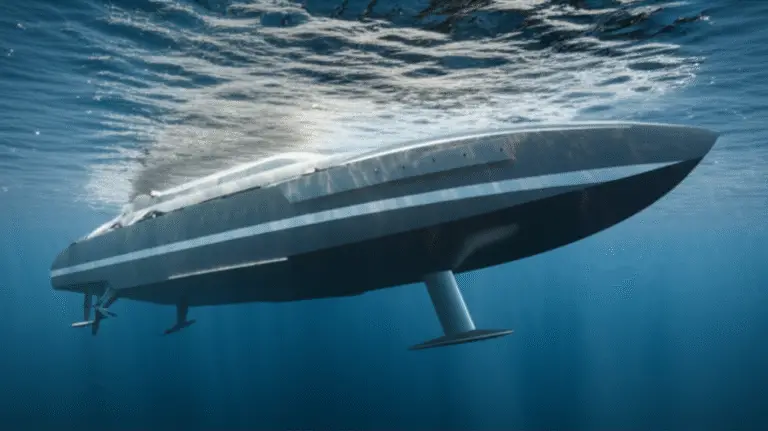
A hydrofoil board has a submerged wing assembly attached beneath the board. As it travels forward, the foil generates lift, raising the board and reducing its contact with the water. Less board-on-water drag can make a ride feel remarkably smooth—but the foil also reacts to small shifts in speed and balance.
That’s the magic and the catch. A surfboard lets you push against the water with a broad hull; a hydrofoil gives you a narrow underwater wing that responds quickly. Tiny movements can make a noticeable difference in pitch and height.
A quick glossary
| Term | What it means |
|---|---|
| Front wing | The primary lifting surface beneath the board |
| Mast | The vertical section connecting the foil assembly to the board |
| Fuselage | The section connecting the front wing to the stabilizer |
| Stabilizer | The smaller rear wing, which influences pitch and stability |
| Pitch | The board-and-foil angle moving nose-up or nose-down |
| Touchdown | When the board settles back onto the water |
Hydrofoils have a long history in boats and marine engineering; modern board sports adapted the principle to surfing, sailing, wind sports, and towing. For a useful overview of the underlying physics, see the Woods Hole Oceanographic Institution’s explanation of lift and drag.
Why the first ride feels different
When the board is on the water, its hull provides a familiar point of contact. Once it lifts, that contact changes: you’re balancing over an underwater wing rather than riding a board supported by the surface. That can feel twitchy until your movements become smaller and more deliberate.
The biggest early revelation is often this: don’t chase lift by stomping on the tail. Build speed progressively, keep your stance relaxed, and let the foil rise only as much as you can control.
🏄 ♂️ What You Need to Get Started
You’ll need a suitable board-and-foil setup, safety gear, and a way to generate the speed your chosen discipline requires. Before buying equipment, decide whether you’re learning through a school, a tow, a wing, or small surf. Gear that works beautifully for one route can be awkward for another.
Browse our Hydrofoil Equipment Reviews and Hydrofoil Board Selection resources before committing to a setup.
Choosing a Hydrofoil Board and Foil Setup
For a first setup, prioritize predictable lift, manageable speed, and enough board stability to practice starts. The smallest, fastest board is not automatically the best board for learning. It may look nimble on the beach and feel like balancing on a wet ruler in the water.
| Component | Beginner-friendly priority | Trade-off to understand |
|---|---|---|
| Board | Stable platform and sufficient volume for your body weight and discipline | A larger board can feel less agile once flying |
| Front wing | Predictable lift and a broad usable speed range | Very high-lift wings may feel less suited to faster riding |
| Mast | Appropriate length for water depth, discipline, and progression | Shorter can simplify shallow-water starts but limits clearance |
| Stabilizer | Predictable pitch and turning behavior | Different sizes and shapes change feel significantly |
| Connection system | Secure, compatible parts from the same system | Mixing components may cause fit or safety problems |
Our recommendation: learn on equipment chosen for your discipline and conditions, ideally with an instructor or experienced local shop. Use the manufacturer’s compatibility guidance rather than assuming that every mast, fuselage, and wing will fit together.
Well-known brands include Armstrong, AXIS Foils, Duotone, F-One, and Slingshot Sports. Each has different product families and fit systems, so compare complete setups rather than judging one wing in isolation. See our Hydrofoil Brands Comparison for more selection guidance.
Wings, Masts, Fuselages, and Stabilizers Explained
A foil is a connected system. Changing one part can affect lift, pitch, turning, and speed.
- Front wing: Larger area commonly favors earlier lift and lower-speed control, while smaller wings are generally designed for higher speeds or greater maneuverability. Shape and profile matter too; area alone doesn’t tell the whole story.
- Mast: A longer mast offers more room between the board and water during flight, but requires adequate depth and may make shallow-water launches trickier. A shorter mast reduces the height needed to get onto the board, but provides less clearance.
- Fuselage: Its length influences how the front wing and stabilizer interact. The result can change stability and turning response.
- Stabilizer: It helps tune pitch behavior and feel. Small changes can be surprisingly noticeable, so follow the brand’s recommended combinations.
For specifications and setup advice, consult the relevant manufacturer’s technical pages, such as Armstrong foil systems, AXIS Foils, and Duotone foil products.
Is a shorter mast better for a beginner?
Sometimes—for a specific start, not automatically for the whole learning journey. In the beach-start video with Zane Schweitzer, the lesson emphasizes choosing a clear launch area with a decent drop-off and obstruction-free take-off zone. A shorter mast can reduce how far you need to jump from shore onto the board.
The featured beach-start advice in the video linked earlier in this article also recommends a short mast for that particular technique: “The shorter the mast, the less you have to jump up onto the board from the sand.” That’s practical beach-start guidance—not a blanket rule that every beginner should use the shortest mast available.
Wetsuits, Helmets, Impact Vests, and Other Safety Gear
Wear gear that suits the water temperature, discipline, and conditions. A watersports helmet and impact vest are sensible choices when learning; they can help protect against impact, though no protective gear eliminates risk.
| Gear | Why it helps | What to check |
|---|---|---|
| Watersports helmet | Helps protect your head from impacts | Secure fit, suitable water-sport design, no damage |
| Impact vest | Adds impact protection and may aid flotation | Fit that allows movement and matches your activity |
| Wetsuit or thermal layers | Helps manage cold-water exposure | Water temperature, wind chill, session length |
| Leash, where appropriate | Can keep equipment within reach | Use only the type recommended for your discipline and location |
| Water shoes, where useful | Protect feet during shore entry | Avoid snaging hazards; check local launch conditions |
Leash recommendations vary across disciplines and locations. A leash can keep a board close, but it can also create entanglement or impact hazards. Ask a qualified instructor and follow local safety rules rather than copying a setup from a different sport. The Royal National Lifeboat Institution’s water-safety guidance and U.S. Coast Guard boating safety resources are useful starting points for general water awareness.
📍 Choosing the Right Hydrofoiling Spot and Conditions
A good learning spot gives you room to fall, reset, and try again without putting other people in the foil’s path. It should also suit your chosen discipline: a calm lake may work well for a supervised tow session, while surf foiling needs suitable swell and a careful assessment of the lineup.
Best Water Conditions for Learning to Foil
Look for manageable conditions, predictable water, and plenty of clear space. “Small and easy” is relative, so ask a local instructor what conditions are appropriate for your body weight, board, foil, and experience.
| Discipline | Helpful learning conditions | Conditions to avoid while learning |
|---|---|---|
| Prone surf foiling | Small, clean, uncrowded waves with an appropriate launch | Crowded breaks, shallow reef, powerful surf |
| Wing foiling | Manageable, steady wind and ample room downwind | Offshore wind, gusty storms, congested beaches |
| Wake foiling | Qualified driver, suitable boat and wake, designated riding area | Unsupervised towing or crowded waterways |
| Tow foiling | Experienced operator and clear communication | Unknown tow setup, unsafe speed, poor visibility |
| Pump foiling | A controlled, suitable location and coaching | Crowds or obstacles where falls create collisions |
Wind and weather can change quickly. Check official forecasts and local advisories before you go; NOAA’s National Weather Service provides U.S. forecasts, while Windy can help visualize wind patterns. Forecast apps are tools, not permission slips: always compare them with local conditions.
How to Check Depth, Wind, Waves, and Local Rules
Before unpacking the foil, walk the launch area and identify hazards.
- Check depth. Make sure the mast and foil won’t strike the bottom during launch, falls, or shallow-water riding.
- Inspect the entry and exit. Look for rocks, reefs, sandbars, pilings, kelp, and sudden drop-offs.
- Read the wind and current. Note where you’ll drift if you fall or lose power.
- Check traffic. Identify swimmers, surfers, boats, and other foilers, then choose a route that keeps clear of them.
- Confirm local rules. Some beaches, waterways, and parks restrict towing, motorized access, or particular launch zones.
- Make a return plan. Don’t ride downwind or down-current without knowing how you’ll get back.
The beach-start lesson featuring Zane Schweitzer specifically advises choosing a location with a clear take-off zone and a suitable drop-off. That’s valuable when you already have beach-start skills; a clear launch area does not make the technique beginner-proof. If you’re new, a supervised water start or tow lesson may be more appropriate.
🛟 Hydrofoil Safety: What to Know Before Your First Session
Hydrofoil wings and masts are hard equipment with sharp edges and substantial leverage. Treat the foil as a potential hazard on land and in water, not as a harmless board accessory. Keep people clear while carrying, assembling, launching, and recovering it.
The U.S. Coast Guard’s boating safety information and local water-safety authorities provide useful general guidance, but your instructor and local rules should guide the specifics of your session.
Foil Awareness, Fall Zones, and Safe Distances
- Keep the foil pointed away from people when carrying the board.
- Leave a generous gap between you and other riders, swimmers, and surfers.
- Don’t ride into shallow water unless your setup and skill level make it safe.
- When falling, try to move away from the board and foil rather than reaching blindly for them.
- Regain awareness of your surroundings before climbing back onto the board.
- Stop if you’re tired, cold, confused, or losing concentration.
Instructors may teach different fall and recovery techniques depending on discipline, equipment, and conditions. Follow the method taught for your setup; one-size-fits-all advice can be unsafe when a foil, leash, towline, or wing is involved.
Why Lessons and an Experienced Instructor Help
A qualified instructor can help you choose a suitable learning route, check equipment compatibility, and spot technique errors before they become habits. In wake or tow foiling, supervision also matters for boat operation, rider communication, and maintaining a safe riding zone.
The MasterCraftBoats beginner video frames foiling as something people are excited to try—“Foiling… Everyone’s doing it. You should, too.”—but excitement isn’t a lesson plan. Watch the MasterCraft beginner video for its introductory perspective, then seek hands-on instruction for your chosen discipline.
🧭 Your First Hydrofoil Session: A Step-by-Step Guide
The exact sequence depends on whether you’re prone foiling, wing foiling, wake foiling, or learning with a tow. Use this as a general progression, not a substitute for in-person coaching. Don’t make a beach start your default first attempt unless a qualified instructor has specifically taught and approved it for your location and ability.
1. Set Up and Check Your Foil
- Assemble the foil according to the manufacturer’s instructions.
- Confirm every component is compatible with the board and foil system.
- Tighten fasteners to the manufacturer’s specified guidance and recheck them before entering the water.
- Inspect the front wing, mast, and stabilizer for damage.
- Carry the board with the foil under control and away from other people.
2. Practice Balancing on the Board
Start with the board in the water and practice getting into a stable position. Notice how your chest, hips, and feet affect the board’s trim.
- Keep your movements slow and purposeful.
- Avoid standing abruptly on a board that’s rolling or sliding.
- Practice remounting and resetting while the foil stays clear of you and others.
3. Learn to Paddle, Tow, or Catch a Small Wave
Your source of speed depends on the discipline. A prone surfer paddles into a wave, a wing foiler uses wind power, and a wake foiler uses a boat. Learn the start mechanics for your chosen sport with coaching and suitable conditions.
Keep the speed manageable at first. If you’re being towed, agree on clear signals and a safe release procedure before the tow begins.
4. Get to Your Knes, Then Stand Up
For disciplines that begin prone or kneling, stabilize first. Bring one foot forward at a time and stand only when the board is moving steadily and you have control.
Don’t rush the pop-up. A controlled, repeatable transition is more useful than an explosive stand that sends you straight back into the water.
5. Build Speed and Lift Off Gradually
As speed increases, the foil may begin to lift. Keep your stance relaxed and make small corrections. Avoid stamping on the tail to force an early takeoff.
Your aim isn’t maximum height. It’s a brief, controlled flight—or a clean touchdown that teaches you what happened.
6. Control Your Height and Ride Under Control
Keep your eyes on the direction of travel and use subtle weight shifts. Large, sudden movements can overcorrect the foil. If the board rises too much, make a gentle adjustment toward controlled touchdown rather than panicking or throwing your body around.
7. Turn, Touch Down, and End Your Ride Safely
Practice straight-line control before adding sharper turns. When you’re ready to stop, reduce power or speed in a controlled way appropriate to your discipline, then make sure you’re clear of other water users before recovering the board.
🌬️ Choosing Your Hydrofoil Boarding Discipline
The best way to start is the one that fits your location, existing skills, and access to instruction. A surfer may gravitate toward prone foiling; someone with wind-sport experience may prefer wing foiling. Neither path is universally easier.
| Discipline | How you get moving | Often suits | Main learning challenge |
|---|---|---|---|
| Prone surf foiling | Paddle into a wave | Experienced surfers with suitable waves | Wave timing and foil control |
| Wing foiling | Hold a handheld wing in the wind | Riders with wind-sport access | Managing wing power and board balance |
| Wake foiling | Ride behind a boat | Learners with supervised boat access | Controlled starts, tow signals, and speed |
| Tow foiling | Towed by a person or craft | Coaching and specialized conditions | Communication and safe release |
| Pump foiling | Pump the board and foil to maintain flight | Riders with established foil control | Timing, endurance, and efficient movement |
Prone Foiling and Surf Foiling
Prone foiling uses paddling power to catch waves. It can suit surfers who already understand lineups and wave timing, but the foil changes how the board responds. Start in an uncrowded location and choose conditions well within your ability.
Wing Foiling and Wind-Powered Hydrofoiling
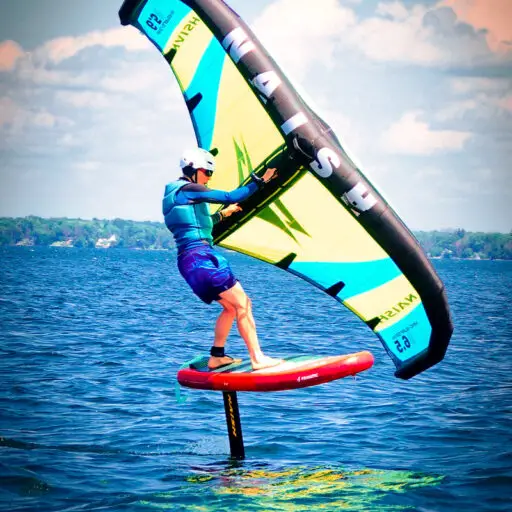
Wing foiling combines a board-mounted hydrofoil with a handheld inflatable wing. You’ll need to learn wing handling, balance, wind awareness, and foil control. A beginner lesson on a larger, stable board can make the early stages far less chaotic.
Brands such as Duotone, F-One, and Slingshot Sports offer wing and foil equipment. Check each brand’s guidance for product compatibility and discipline-specific recommendations.
Wake Foiling and Tow-In Foiling
Wake foiling uses a boat’s wake; tow foiling uses a rope or another tow method to provide speed. These approaches can offer more repeatable starts, but they require a capable operator, clear signals, and a controlled riding area.
The person operating the boat should be experienced with the activity and aware of the foil’s hazards. Never improvise a tow setup or ride without clear communication and appropriate supervision.
Downwind Foiling and Pump Foiling
Downwind foiling involves linking bumps and swell with a board and foil. Pump foiling uses repeated body and board movement to maintain momentum, often in a controlled setting. Both are progression disciplines for riders who already have foundational balance and foil control.
For technique progression and advanced skills, explore our Advanced Hydrofoiling Techniques category.
🎯 Beginner Hydrofoiling Skills and Drills
A good drill isolates one skill at a time. If you change the board, wing, mast, location, and technique all in one session, it’s hard to know what helped—or what sent you swimming.
Balance, Stance, and Foot Placement
Your exact stance depends on your board and discipline, but a relaxed posture and centered balance are reliable starting points.
- Keep knees soft and avoid locking your legs.
- Look ahead rather than staring at your feet.
- Make small, gradual adjustments.
- Ask an instructor to check foot placement; stance markings and recommended positions vary by board and setup.
For a beach start, the Zane Schweitzer tutorial emphasizes choosing the launch spot carefully and coordinating the run-up, jump, and mounting movement. The featured beach-start video also highlights hand placement and timing entry with receding waves. These are technique details for that specific start, not instructions to attempt it without coaching.
Weight Shifts, Pitch Control, and Smooth Turns
Think “quiet feet, small inputs.” Suden shifts can make the foil rise or drop faster than expected.
| What you notice | Possible response to discuss with your coach |
|---|---|
| Board rises sharply | Reduce abrupt tail pressure and focus on a calmer, more centered stance |
| Board drops repeatedly | Check whether speed, stance, or foil setup is suitable |
| Wobbles side to side | Relax your knees and make smaller balance corrections |
| Turns feel unstable | Practice straight-line control before increasing turn sharpness |
These are general observations, not diagnostic rules: equipment, wave shape, wind, and rider position all influence the feel.
How to Fall, Recover, and Reset
Expect falls. They’re part of learning, not proof that you’re bad at the sport.
- Protect your head and keep track of where the board and foil are.
- Create distance from the foil if it’s moving or drifting toward you.
- Check for injury and regain your bearings before getting back on.
- Confirm the area is clear before restarting.
- Stop if you’re fatigued or conditions have changed.
Follow the fall and recovery procedure taught for your discipline, especially when you’re using a towline or wing leash.
❌ Common Beginner Mistakes and How to Fix Them
| Common mistake | Why it causes trouble | Better approach |
|---|---|---|
| Buying advanced gear before choosing a discipline | The setup may not suit your learning conditions | Take a lesson or rent before buying |
| Trying to force an early takeoff | Stomping and overcorrecting can destabilize the board | Build speed smoothly and accept brief touchdowns |
| Looking down at the foil | You lose awareness of direction and surroundings | Look toward your path |
| Starting in crowded surf | Falls and foil movement create hazards for others | Choose an uncrowded, appropriate learning zone |
| Assuming a short mast is always best | Short masts reduce clearance as well as launch height | Choose length based on discipline, depth, and coaching |
| Attempting a beach start too soon | It requires timing, running, jumping, and foil awareness | Learn stable starts first unless coached otherwise |
| Changing several setup parts at once | You can’t tell which change affected the ride | Adjust one variable, then test |
| Continuing when tired | Reactions and judgment deteriorate | Finish the session before fatigue takes over |
The two cited beginner videos offer complementary perspectives. The MasterCraft clip introduces the appeal of learning to foil, while the Zane Schweitzer tutorial focuses on a specific beach-start technique. General beginner encouragement and advanced launch technique are not interchangeable: use the former for motivation, and treat the latter as a coached skill.
🔧 Hydrofoil Setup, Maintenance, and Transport
A well-maintained foil performs more consistently and is less likely to surprise you with a loose connection or damaged component. Follow the instructions supplied with your exact system; fastener layouts and tightening requirements vary by brand.
Foil Assembly and Fastener Checks
- Use only compatible components.
- Check wings, mast, fuselage, and board connections before every session.
- Follow the manufacturer’s instructions for tightening fasteners.
- Don’t ride with cracked, bent, or visibly damaged parts.
- Carry sharp foil edges with care and use protective covers where appropriate.
Brands including Armstrong, AXIS Foils, and F-One publish equipment information and product guidance. When in doubt, contact the manufacturer or a qualified local retailer rather than guessing.
Rinsing, Inspecting, and Storing Your Gear
After saltwater use, rinse equipment with fresh water where the manufacturer recommends it. Dry and inspect the components before storage, and avoid leaving the board or foil exposed to conditions that could damage materials or hardware.
- Check for corrosion, cracks, dings, and loose fasteners.
- Store wings and boards in protective bags or covers.
- Keep small hardware together so a missing screw doesn’t cancel your session.
- Transport the foil so its edges cannot damage people, seats, or other gear.
📈 Progressing from First Flights to Longer Foil Rides
Progress usually comes from repetition and better control, not from chasing dramatic flights. Track one or two useful outcomes per session: a calmer start, fewer abrupt rises, a controlled touchdown, or a safer recovery.
A simple progression plan
- Get comfortable with the equipment. Learn how it assembles, carries, and behaves in the water.
- Build reliable starts. Practice your discipline’s start with coaching and suitable conditions.
- Control brief flights. Aim for calm, low, predictable lift.
- Improve straight-line riding. Keep your path clear and manage speed.
- Add gentle turns. Only progress when you can control height and direction.
- Refine equipment gradually. Make one informed change at a time.
The beach-start clips make the same practical point in different ways: technique takes repetition. In the Zane Schweitzer tutorial, the launch depends on selecting a safe spot and coordinating several movements. The featured video calls beach starts “really technical” and says they require “repetition and training.” So, if your first beach start looks more like a damp leapfrog than a clean takeoff, congratulations: you’ve begun practicing. Just keep it supervised and safe.
✅ Quick Tips for a Better First Hydrofoil Session
- Book a lesson or rent gear first if you’re unsure which discipline or setup suits you.
- Choose a clear, uncrowded place with adequate depth and an easy exit.
- Wear a well-fitting watersports helmet and impact vest.
- Check weather, wind, current, and local rules before launching.
- Keep your first goals modest: stable starts, controlled movement, and safe falls.
- Don’t confuse a specialized beach-start tutorial with a universal beginner lesson.
- Use manufacturer instructions for assembly and component compatibility.
- Stop before fatigue turns small mistakes into big ones.
- Ask an experienced instructor to assess your equipment and technique.
The best first session may not include a long flight. If you leave knowing how to manage your setup, choose a safer launch area, and make one controlled attempt, that’s a strong start.