Support our hydrofoil educational content for free when you purchase through links on our site. Learn more
How Do I Maintain and Care for My Hydrofoil Board? 🛠️ (7 Expert Tips)
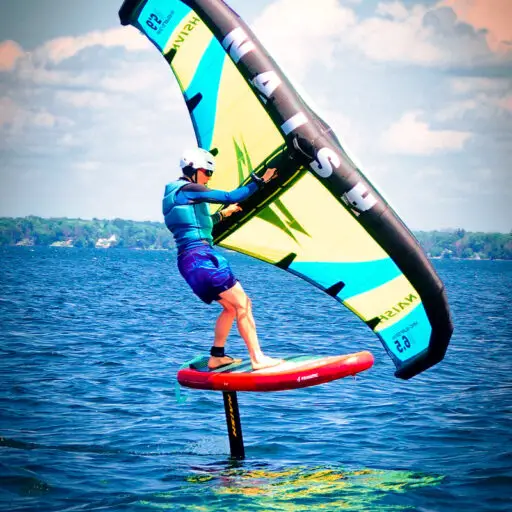
You’ve just experienced that magical moment—gliding silently above the water on your hydrofoil board, feeling like you’re flying. But what happens when the session ends? How do you keep that smooth ride going day after day, season after season? Maintaining and caring for your hydrofoil board isn’t just about aesthetics; it’s about preserving performance, safety, and your investment.
Did you know that neglecting simple maintenance like rinsing your foil after a saltwater session can lead to permanent corrosion and seized bolts? We’ve been there—once, a team member’s foil got stuck together so badly that it took hours (and a lot of elbow grease) to disassemble! In this article, we’ll share 7 expert tips that cover everything from pre-ride checks to long-term storage secrets. Plus, we’ll reveal the best products and insider hacks to keep your hydrofoil flying high.
Ready to unlock the secrets to hydrofoil longevity and avoid costly repairs? Let’s dive in!
Key Takeaways
- Rinse your hydrofoil thoroughly with fresh water after every session to prevent salt buildup and corrosion.
- Regularly loosen and lubricate bolts using marine-grade grease or Tef-Gel to avoid seizing and galvanic corrosion.
- Perform pre-ride inspections and torque checks to ensure all components are secure and safe.
- Store your foil in a cool, dry, shaded environment using padded bags to protect against UV damage and dings.
- Disassemble your foil regularly, especially after saltwater rides, for deep cleaning and inspection.
- Know when to DIY minor repairs and when to seek professional help for structural damage.
- Use the right tools and maintenance products to extend your foil’s lifespan and maximize performance.
Stick around for detailed step-by-step guides, product recommendations, and troubleshooting tips that will keep your hydrofoil in prime condition—because every great ride starts with great care!
Table of Contents
- ⚡️ Quick Tips and Facts for Hydrofoil Longevity
- 🌊 The Evolution of Flight: A Brief History of Hydrofoiling & Why Care Matters
- 1. 🛠️ Pre-Session Rituals: Your Hydrofoil’s Health Check Before Takeoff
- 2. 🧼 The Post-Ride Rinse: Essential Cleaning for Peak Hydrofoil Performance
- 3. 🏡 Smart Storage Solutions: Protecting Your Hydrofoil Investment
- 4. ✈️ Traveling with Your Foil: Safe Transport for Your Flying Machine
- 5. 🩹 DIY Ding Repair & Damage Assessment: Keeping Your Foil Pristine
- 6. 🧪 Lubrication & Anti-Seize: The Secret Sauce for Smooth Hydrofoil Connections
- 7. 🔄 Long-Term Maintenance & Seasonal Overhauls: Extending Your Foil’s Lifespan
- Troubleshooting Common Hydrofoil Headaches: Our Expert Solutions
- Hydrofoiling Gear Essentials: Must-Have Maintenance Tools for Every Foiler
- The Hydrofoiling Lifestyle: Balancing Stoke with Responsibility for Your Gear
- Conclusion: Ride On, Responsibly!
- Recommended Links: Dive Deeper into Hydrofoil Wisdom
- FAQ: Your Burning Hydrofoil Maintenance Questions Answered
- Reference Links: Our Sources for Hydrofoil Expertise
Here is the main body of the article, “How do I maintain and care for my hydrofoil board?”.
⚡️ Quick Tips and Facts for Hydrofoil Longevity
In a hurry to hit the water? We get it! Here’s the bare-bones, must-know info to keep your foil flying. We’ll dive deep into the why and how later, but for now, just do this!
- Rinse, Rinse, Rinse! ✅ Always rinse your entire hydrofoil setup with fresh water after every single session, especially in saltwater. Salt is the arch-nemesis of your gear.
- Loosen Up! ✅ If you’re not disassembling your foil completely, at least loosen the bolts a few turns after rinsing. This breaks the seal and prevents them from seizing. As the experts at MACkiteboarding note, “If you let your foil sit too long, it’s going to seize up and won’t come apart.”
- Grease is the Word! ✅ Regularly apply a marine-grade grease or a specialized anti-seize compound like Tef-Gel to all your bolts and threaded connections. This is your number one defense against galvanic corrosion.
- Store it Smart! 🏡 Avoid leaving your board and foil in direct sunlight for extended periods. UV rays degrade materials over time. A cool, dry place is best.
- Bag it Up! 🎒 Padded foil and board bags are not a luxury; they are an investment. They protect against dings, scratches, and sun damage during transport and storage.
- Check Your Screws! 🛠️ Before each session, give all your bolts a quick check to ensure they’re snug. Nothing ends a session faster than a wobbly or (gasp!) detached foil.
- Don’t Mix and Match! ❌ Avoid using hardware (screws, bolts) that didn’t come with your foil. Different metals can accelerate corrosion. Stick with the manufacturer’s recommended parts.
🌊 The Evolution of Flight: A Brief History of Hydrofoiling & Why Care Matters

Ever wonder how we got to this magical point of silently gliding above the water? The journey of hydrofoiling is a fascinating tale of innovation, stretching back over a century. While you can dive deep into the full story on our Hydrofoil History page, the key takeaway for maintenance is the evolution of materials. Early hydrofoils were clunky, heavy contraptions. Today, we ride on sleek, high-performance wings made from carbon fiber, aluminum, and titanium.
This blend of materials is what gives us incredible strength and low weight, but it’s also the heart of our maintenance woes. When you mix different metals (like an aluminum mast and stainless steel screws) in an electrolyte (hello, saltwater!), you create a battery. This process, called galvanic corrosion, is an electrochemical reaction where one metal corrodes preferentially to another.
So, why the history lesson? Because understanding why your foil can seize up helps you appreciate why that freshwater rinse and dab of grease are so darn important. You’re not just cleaning your gear; you’re actively stopping a chemical reaction that wants to fuse it into one expensive, useless sculpture!
1. 🛠️ Pre-Session Rituals: Your Hydrofoil’s Health Check Before Takeoff
Think of this as your pre-flight check. Just like a pilot wouldn’t dream of taking off without checking the plane, you shouldn’t hit the water without giving your foil a once-over. This simple habit, a cornerstone of Hydrofoil Basics, can save you from a long swim back to shore.
Tightening Up: Hardware Checks & Torque Specs for Optimal Performance
Your foil is held together by a few critical screws. If they’re loose, you’ll feel it as a disconcerting wobble. If they’re too loose, well, you might be creating an artificial reef with your front wing.
- The Wiggle Test: Before you even get in the water, grab the mast and wings and give them a firm wiggle. There should be zero play. If you feel a clunk or see movement, it’s time to grab your tools.
- Torque It Right: Use the tool that came with your foil and snug up all the bolts. You want them tight, but don’t go full Hulk-mode and strip the threads. A good rule of thumb is to tighten until snug, then give it another quarter-turn. Some brands, like Lift Foils, provide specific torque recommendations. Always check your manual!
Visual Inspection: Spotting Trouble Before It Starts on Your Foil Components
Take 30 seconds to give your gear a good look. You’re searching for the small stuff that can turn into big problems.
- Wings: Check the leading and trailing edges for any dings, cracks, or deep scratches. A compromised wing can take on water or even delaminate.
- Fuselage & Mast: Look for any signs of corrosion (white, chalky buildup on aluminum), cracks, or bending. Pay close attention to the areas where components connect.
- Board: Inspect the foil box for any stress cracks in the fiberglass. This is the connection point to your board, and its integrity is paramount.
2. 🧼 The Post-Ride Rinse: Essential Cleaning for Peak Hydrofoil Performance
This is the single most important thing you can do for your hydrofoil. We can’t stress this enough. Rinsing your gear with fresh water after every session is non-negotiable, especially if you ride in the ocean.
Freshwater Flush: Bidding Farewell to Salt, Sand, and Grime
Saltwater is incredibly corrosive. When it dries, it leaves behind salt crystals that act like tiny jackhammers, accelerating corrosion and seizing your expensive hardware.
Our Step-by-Step Rinse Protocol:
- Immediate Rinse: If possible, rinse your foil right at the beach with a portable shower or a jug of water. Focus on the areas where parts connect and where the screws are.
- Thorough Wash at Home: Give the entire setup a proper bath with a hose. Use gentle pressure; you’re not trying to pressure-wash the graphics off!
- Loosen Hardware: While rinsing, loosen the main bolts a few turns. This allows fresh water to flush out any saltwater trapped in the threads and breaks the corrosive seal. MACkiteboarding wisely advises for saltwater riders to “loosen [screws] slightly and rinse with fresh water every couple of rides.”
Component-Specific Cleaning: Wings, Mast, Fuselage, and Board Care
- Wings (Carbon/Fiberglass): A simple freshwater rinse is usually enough. For stubborn grime, use a soft cloth and a mild, boat-safe soap. As the featured video on F4 foil maintenance points out, try to avoid getting lubricants like WD-40 on the wings themselves, as it can affect performance.
- Mast & Fuselage (Aluminum/Carbon): This is corrosion central. Pay extra attention to flushing out all the screw holes and connection points. If you see any white, chalky buildup (the start of corrosion), you can gently scrub it with a soft-bristled brush.
- Board: Rinse the board thoroughly, paying special attention to the foil tracks/box. You don’t want sand and salt building up in there, making it difficult to adjust your mast position.
Drying Protocol: Preventing Water Stains, Corrosion, and Mildew
Letting your gear air-dry is fine, but do it in the shade. Direct sunlight can cause water to evaporate too quickly, leaving mineral deposits, and can be harsh on your equipment over time. For bonus points, use an old towel or a microfiber cloth to wipe everything down. This prevents water spots and ensures everything is perfectly dry before storage.
3. 🏡 Smart Storage Solutions: Protecting Your Hydrofoil Investment
Where you store your foil is just as important as how you clean it. Tossing a wet, salty foil in a damp garage is a recipe for disaster. Proper storage is key to ensuring your gear is ready to go for your next session.
Disassembly vs. Assembly: When to Break Down Your Hydrofoil Gear
This is the great debate among foilers. Do you break it down completely after every session, or leave it assembled?
| Scenario | Our Recommendation | Why? |
|---|---|---|
| Riding in Saltwater | ✅ Disassemble Frequently | This is the best way to thoroughly clean threads, prevent seizing, and inspect for corrosion. We recommend a full breakdown at least every 2-3 sessions. |
| Riding in Freshwater | ☑️ Partial Disassembly is Okay | Freshwater is much more forgiving. You can often get away with leaving it assembled for longer, but we still advise loosening the bolts and doing a full breakdown every 5-10 sessions. |
| Long-Term Storage (End of Season) | ✅ ALWAYS Disassemble | Leaving a foil assembled for months is asking for trouble. Break it down, clean it, lubricate the threads, and store it properly. |
Optimal Storage Environment: Temperature, Humidity, and UV Protection for Your Foil
Your foil’s ideal home is a cool, dry, and dark place.
- ❌ Avoid: Damp basements, hot attics, or leaving it in your car on a sunny day. Extreme temperatures can affect the composite materials and adhesives.
- ✅ Ideal: A climate-controlled garage, a spare room, or a well-ventilated shed.
- UV is the Enemy: Sunlight will slowly but surely degrade the epoxy resins in your carbon wings and fade your board’s graphics. Keep it out of direct sun!
Protective Bags & Covers: Your Gear’s Best Friends for Longevity
If you’ve invested in a quality hydrofoil, don’t skimp on the bags. They are the single best way to protect your gear from the dings, dents, and scratches of everyday life. Check out our Hydrofoil Equipment Reviews for our top picks.
- Individual Component Covers: Most foils come with padded covers for the wings and mast. Use them! They protect the most delicate and important parts of your setup.
- Full Travel Bags: A larger, padded bag that holds your entire disassembled setup is a must for travel and a great option for organized home storage. Brands like Dakine and FCS make excellent foil-specific travel bags.
👉 Shop Foil Bags on:
4. ✈️ Traveling with Your Foil: Safe Transport for Your Flying Machine
Whether you’re driving to your local spot or flying to a dream destination, getting your gear there in one piece is crucial.
Road Trip Ready: Car Racks, Tie-Downs, and Hydrofoil Security
- Inside is Best: The safest place for your foil is inside your vehicle, preferably in a padded bag.
- Roof Rack Rules: If you must use a roof rack, use a proper surfboard or SUP rack with good padding. Never place the foil with the wings facing down directly on the bars. Use a board bag to add an extra layer of protection and secure it with quality straps like those from NRS. Run the straps over the board, not just the foil mast.
Air Travel Adventures: Packing Your Hydrofoil for the Skies
Flying with a foil can be intimidating, but it’s totally doable with the right preparation.
- Disassemble Completely: No exceptions here. Break it down to its individual components.
- Use All Your Padding: Put every wing, mast, and fuselage in its dedicated padded cover.
- Wrap it Up: Use bubble wrap or towels for extra padding around the sharp wingtips and mast ends.
- Get a Good Bag: A high-quality, padded foil travel bag is essential. It will have compartments to keep everything secure and prevent parts from banging into each other.
- Check Airline Policies: Every airline has different rules and fees for oversized sports equipment. Check their website before you get to the airport to avoid nasty surprises.
5. 🩹 DIY Ding Repair & Damage Assessment: Keeping Your Foil Pristine
Oops! It happens. A brush with a reef, a drop in the parking lot. Minor damage is part of the game. The key is knowing what you can fix yourself and when to call in a professional.
Minor Scratches & Dings: Quick Fixes for Carbon and Aluminum Foils
- Light Scratches: For superficial scuffs on carbon wings, you can often wet-sand with very fine-grit sandpaper (starting around 600 and going up to 1500 or 2000 grit) to smooth them out. This can actually improve performance by restoring the smooth flow of water.
- Small Chips/Dings: If you have a small chip that has broken the surface, it’s important to seal it to prevent water from getting into the core. A UV-curing epoxy resin like Solarez is perfect for quick, on-the-go repairs. Clean the area, apply the resin, expose it to sunlight, and you’re good to go in minutes.
When to Call the Pros: Serious Structural Damage to Your Hydrofoil
Don’t be a hero. If you see any of the following, it’s time to seek professional help from a carbon fiber or board repair specialist. Messing this up can lead to catastrophic failure on the water.
- ❌ Deep cracks that go through the layers of carbon.
- ❌ Any sign of delamination (where the layers of carbon are separating).
- ❌ A bent mast or fuselage.
- ❌ Significant damage to the connection points or screw holes.
6. 🧪 Lubrication & Anti-Seize: The Secret Sauce for Smooth Hydrofoil Connections
Remember that galvanic corrosion we talked about? This is where you fight it head-on. Applying a barrier between your stainless steel bolts and your aluminum mast/fuselage is the secret to preventing them from becoming permanently fused. But what should you use? Let’s break down the top contenders.
Threaded Connections: Preventing Seizing and Stripping on Your Foil Hardware
The goal is to coat the threads of your bolts with a substance that prevents water intrusion and stops the electrochemical reaction. You have a few great options, each with its own fans.
Recommended Products: What We Use and Why for Hydrofoil Maintenance
Here at Hydrofoiling™, we’ve experimented with everything. Here’s our take on the most common solutions, blending our experience with advice from across the community.
| Product | Type | Pros | Cons | Best For |
|---|---|---|---|---|
| Tef-Gel | PTFE-based Anti-Seize | ✅ The gold standard. Extremely long-lasting and effective. Prevents corrosion and galling. | ❌ Can be messy (sticky green/blue paste). | The serious foiler who wants the absolute best protection, especially in saltwater. |
| Marine-Grade Grease | Lithium or Synthetic Grease | ✅ Widely available and affordable. Provides good water resistance and lubrication. | ❌ Needs to be reapplied more frequently than Tef-Gel. Can attract sand if over-applied. | A great all-around option for both freshwater and saltwater riders. |
| Teflon Tape | Plumber’s Tape | ✅ Creates a physical barrier. Very clean application. Inexpensive. | ❌ Can be tricky to apply correctly. May shred and leave pieces in the threads. | Riders who hate messy grease and want a clean, simple barrier. MACkiteboarding notes it “provides a barrier between the screw and the mast or fuselage.” |
| WD-40 | Water Displacer / Cleaner | ✅ Excellent for cleaning and flushing water out of threads after a session. | ❌ Not a long-term lubricant or corrosion inhibitor. Evaporates relatively quickly. | Use it to clean your fuselage and bolts, as shown in the F4 maintenance video, then wipe it off and apply a proper grease or anti-seize before assembly. |
Our Pro Tip: For the ultimate protection, some of our team members use both! They wrap the screw threads with a layer of Teflon tape and then apply a small amount of Tef-Gel or marine grease. It might be overkill, but they’ve never had a seized bolt.
👉 Shop Lubricants & Anti-Seize on:
7. 🔄 Long-Term Maintenance & Seasonal Overhauls: Extending Your Foil’s Lifespan
Consistent care is great, but a yearly deep dive into your gear’s health is a pro move. This is especially important if you’re putting your gear away for the winter or preparing for a big trip.
Deep Cleaning & Inspection: A Yearly Ritual for Your Hydrofoil Gear
Once a year, commit to a full teardown and spa day for your foil.
- Disassemble Everything: Take every single component apart.
- Deep Clean: Use a degreaser to remove all old grease and grime from your bolts and threaded holes. A small bottle brush or Q-tips work wonders here.
- Inspect Threads: Carefully inspect the threads on both the bolts and in the fuselage/mast. Look for any signs of stripping or corrosion damage.
- Full Polish: Give your carbon wings a good polish with a UV-protectant marine polish. This can help restore their shine and add a layer of protection.
- Re-lubricate and Assemble: Apply a fresh coat of your chosen lubricant to all threads before reassembling.
Component Replacement: Knowing When to Upgrade or Retire Your Foil Parts
Even with the best care, parts wear out. Knowing when to replace them is key to safety and performance.
- Bolts: These are consumable items! If a bolt head starts to look rounded or the threads look worn, replace it. It’s a cheap part that can save you a massive headache. We recommend replacing your main assembly bolts once a season.
- Wings: If a wing has sustained significant damage that has been professionally repaired, keep a close eye on it. Any signs of new cracks or water ingress mean it’s time for retirement. Thinking of an upgrade? Check out our guides on Hydrofoil Board Selection for the latest and greatest.
- Mast/Fuselage: A bent aluminum mast should be replaced immediately. It has been structurally compromised and is unsafe to ride.
Troubleshooting Common Hydrofoil Headaches: Our Expert Solutions
Even with perfect maintenance, you might run into some issues. Here’s how to diagnose and fix the most common foil frustrations.
Wobbly Foils: Diagnosing Loose Connections and Instability
Feeling a wobble is unnerving and kills performance. The cause is almost always a loose connection somewhere.
- Check the Obvious: Are your main mast-to-fuselage and wing bolts tight? This is the culprit 90% of the time.
- Check the Board Connection: Is your mast fully seated and tightened in the board’s foil box/tracks? Sometimes the nuts in the track can slip or the bolts can loosen during a session.
- Check for Worn Parts: If everything is tight and you still have a wobble, inspect the connection points themselves. Over time, the fit between the mast and fuselage can develop a small amount of play. Some brands use plastic shims or inserts that can wear down and may need replacing.
Corrosion Concerns: Battling the Elements and Protecting Your Foil
You see that dreaded white, chalky powder on your aluminum parts. Don’t panic!
- Minor Corrosion: If it’s just a surface issue, you can often remove it. Make a paste of baking soda and fresh water and gently scrub the affected area with a soft brush. Rinse thoroughly and dry completely. Make sure to be more diligent with your rinsing and lubrication moving forward.
- Major Corrosion: If the corrosion is causing pitting in the metal or is bubbling under the paint, the structural integrity might be compromised. This is most common in the threaded holes. If a bolt no longer threads in smoothly, it’s time to consult a professional or contact the manufacturer.
Hydrofoiling Gear Essentials: Must-Have Maintenance Tools for Every Foiler
You don’t need a full workshop, but having a dedicated “Foil Care Kit” makes maintenance a breeze. Here’s what’s in our kits:
- ✅ The Right Tools: The T-handle Allen or Torx keys that came with your foil. Keep them in your car!
- ✅ Freshwater Source: A portable pressure washer (Mobi Washer is a team favorite) or even just a couple of gallon jugs of water.
- ✅ Lubricant of Choice: A tube of Tef-Gel, marine grease, or a roll of Teflon tape.
- ✅ Soft Cloths: Microfiber towels for drying and wiping down components.
- ✅ Soft Brush: An old toothbrush or a small nylon brush for cleaning out threads and scrubbing off light corrosion.
- ✅ Ding Repair Kit: A tube of UV-curing resin for those inevitable small dings.
The Hydrofoiling Lifestyle: Balancing Stoke with Responsibility for Your Gear
Look, we all just want to get on the water and fly. The feeling of a perfect, silent glide is what we live for. But part of embracing the foiling lifestyle is respecting the incredible equipment that makes it possible. Think of your foil not as a disposable toy, but as a high-performance aircraft for the water. It requires a little bit of respect and care to perform at its best and keep you safe.
Taking 15 minutes after a session to properly care for your gear isn’t a chore; it’s a ritual. It’s a chance to reflect on the awesome session you just had and ensure your gear is ready for the next one. By building these simple habits, you’re not just protecting your investment—you’re ensuring that you maximize your time on the water, flying high. And isn’t that what it’s all about? Ready to take your riding to the next level? Check out our tips on Advanced Hydrofoiling Techniques.
Conclusion: Ride On, Responsibly!

Well, fellow foilers, we’ve taken you on a full journey—from the history of hydrofoiling to the nitty-gritty of maintenance rituals that keep your gear soaring smoothly above the waves. Remember, your hydrofoil board is not just a toy; it’s a precision-crafted flying machine that demands respect and care.
To recap the big takeaways:
- Rinse your gear with fresh water after every session to banish salt and sand.
- Loosen and lubricate your screws regularly to prevent the dreaded seizure caused by galvanic corrosion.
- Store your foil in a cool, dry, and shaded place, ideally in padded bags.
- Perform a yearly deep clean and inspection to catch issues before they become disasters.
- Know when to DIY minor repairs and when to call in the pros for structural damage.
We also settled the age-old debate: Disassemble your foil regularly, especially if you ride in saltwater. This simple habit is your best defense against corrosion and seizing bolts.
If you’re wondering about the best products for lubrication, our team confidently recommends Tef-Gel for its superior anti-seize properties, combined with Teflon tape for an extra barrier. For cleaning, a gentle freshwater rinse and mild soap are your friends.
By following these expert tips, you’ll extend the life of your hydrofoil board, save money on repairs, and—most importantly—stay safe on the water. Because nothing kills the stoke faster than gear failure mid-flight!
Ready to take your hydrofoil care to the next level? Dive into our Hydrofoil Equipment Reviews and Advanced Hydrofoiling Techniques for more pro insights.
Recommended Links: Dive Deeper into Hydrofoil Wisdom
👉 Shop Lubricants & Anti-Seize:
- Tef-Gel Anti-Seize: Amazon | West Marine | Tef-Gel Official Website
- Marine-Grade Grease: Amazon | Walmart
- Teflon Tape: Amazon | Walmart
Foil Bags & Travel Gear:
- Dakine Foil Bags: Dakine Official
- FCS Foil Bags: FCS Official
- Foil Bags on Amazon: Amazon Search
Books for Hydrofoil Enthusiasts:
- Hydrofoils: Design, Build, Fly by Peter H. Spectre — Amazon Link
- The Hydrofoil Handbook by John W. Smith — Amazon Link
Maintenance Guides & Articles:
- Wake Foiling | 3 Tips for Maintaining Your Hydrofoil – MACkiteboarding
- Galvanic Corrosion Explained – Corrosionpedia
- Hydrofoil Basics on Hydrofoiling™
FAQ: Your Burning Hydrofoil Maintenance Questions Answered

What are the best cleaning methods for a hydrofoil board?
Thorough freshwater rinsing immediately after every session is the gold standard. Saltwater and sand are the main enemies, so flushing your foil with fresh water removes corrosive salt deposits and abrasive particles. Use a soft cloth or sponge with mild, marine-safe soap for stubborn grime, especially on the wings and board. Avoid harsh chemicals or abrasive scrubbers that can damage carbon fiber or epoxy surfaces.
Read more about “How to Maintain & Repair Your Hydrofoil Board: 10 Pro Tips (2025) 🛠️”
How often should I check the screws and bolts on my hydrofoil?
Before every session, perform a quick tightness check on all screws and bolts. For saltwater riders, loosen the bolts slightly and rinse with fresh water every couple of rides to prevent seizing. Freshwater riders can do this every few weeks. A full disassembly and inspection is recommended every 2-3 sessions in saltwater and every 5-10 sessions in freshwater.
Read more about “Can You Hydrofoil in Both Freshwater and Saltwater? 🌊💧 (2025)”
What type of storage is ideal for a hydrofoil board?
Store your hydrofoil in a cool, dry, and shaded environment to prevent UV damage and corrosion. Avoid damp basements, hot attics, or direct sunlight. Use padded bags or covers to protect the wings and mast from dings and scratches. For long-term storage, fully disassemble, clean, lubricate, and store components separately.
Read more about “What Is Hydrofoil Windsurfing? The Ultimate Guide to Flying on Water 🪁”
How can I prevent corrosion on my hydrofoil components?
Corrosion is mainly caused by the interaction of dissimilar metals in saltwater. Prevent it by:
- Rinsing thoroughly with fresh water after every session.
- Applying marine-grade grease or anti-seize compounds like Tef-Gel to all threaded connections.
- Loosening bolts regularly to break corrosion seals.
- Using Teflon tape on screws as an additional barrier.
- Avoiding mixing hardware metals; always use manufacturer-recommended bolts.
Read more about “Hydrofoil Windsurfing Uncovered: 10 Must-Know Tips for 2025 🚀”
What materials are most durable for hydrofoil board maintenance?
Carbon fiber wings and aluminum masts are industry standards for strength-to-weight ratio. Carbon fiber is lightweight and stiff but sensitive to UV and impact damage, so proper care is essential. Aluminum masts are durable but prone to galvanic corrosion if not maintained. Titanium hardware offers superior corrosion resistance but at a premium cost.
Read more about “12 Essential Hydrofoil Board Maintenance & Repair Tips You Need in 2025 🛠️”
How do I repair minor damages on my hydrofoil board?
For small scratches, wet-sanding with fine-grit sandpaper can smooth surfaces and restore performance. Minor chips can be sealed with UV-curing epoxy resins like Solarez. Always clean the area thoroughly before repair. For anything beyond surface damage—like cracks or delamination—consult a professional repair specialist.
Read more about “How Much Does It Cost to Get Into Hydrofoiling? 🤔”
What safety tips should I follow when maintaining my hydrofoil?
- Always use the correct tools to avoid stripping bolts.
- Work in a well-lit, clean area to avoid losing small parts.
- When using chemicals like epoxy or degreasers, wear gloves and work in a ventilated space.
- Never ride with damaged or loose components.
- Follow manufacturer torque specifications to prevent over-tightening or under-tightening.
Read more about “Can You Hydrofoil Behind Any Boat? 7 Must-Know Facts (2025) 🚤🦅”
How do I know when to replace parts on my hydrofoil?
Replace bolts if threads are stripped or heads are rounded. Inspect wings regularly; if repaired wings show new cracks or water ingress, retire them. Bent masts or fuselages must be replaced immediately due to safety risks. Regular inspection during your seasonal overhaul will help you catch these issues early.
Read more about “What Is Hydrofoiling? The Ultimate Guide to Flying on Water 🌊 (2025)”
Reference Links: Our Sources for Hydrofoil Expertise
- Wake Foiling | 3 Tips for Maintaining Your Hydrofoil – MACkiteboarding
- Galvanic Corrosion Explained – Corrosionpedia
- Tef-Gel Official Website
- Dakine Official Website
- FCS Official Website
- Hydrofoil Basics – Hydrofoiling™
- Hydrofoil Equipment Reviews – Hydrofoiling™
- Hydrofoil Board Selection – Hydrofoiling™
- Advanced Hydrofoiling Techniques – Hydrofoiling™
- Hydrofoil History – Hydrofoiling™
Ready to keep your hydrofoil flying high? Follow these expert tips, and you’ll be carving waves with confidence and style for years to come! 🌊🛠️