Support our hydrofoil educational content for free when you purchase through links on our site. Learn more
How Hard Is It to Learn to Hydrofoil? 8 Truths You Need to Know 🏄♂️ (2026)
Ever watched a hydrofoiler seemingly glide effortlessly above the water and wondered, “How hard is it to actually learn this?” You’re not alone. Hydrofoiling is often dubbed one of the most challenging water sports, but is that reputation deserved? From our Hydrofoiling™ team’s countless coaching sessions and personal wipeouts (yes, plenty of those!), we’ve uncovered the real story behind the learning curve—spoiler alert: it’s tough but totally conquerable with the right approach.
In this article, we’ll break down everything you need to know—from the best gear setups and ideal conditions to mental and physical prep. Plus, we’ll share insider tips on overcoming common pitfalls like the infamous “porpoise effect” and nose dives. Curious how long it really takes to go from flailing in the water to flying above it? Stick around, because we’ve got a detailed progression timeline that might surprise you.
Key Takeaways
- Hydrofoiling has a steep but manageable learning curve, especially if you start with beginner-friendly gear and ideal conditions.
- Wing foiling and tow-in foiling offer the easiest entry points, while prone surf foiling is the most challenging.
- Physical balance, core strength, and mental patience are crucial for mastering foil control and height management.
- Taking lessons and joining a supportive community dramatically speeds up progress and improves safety.
- Proper gear setup—like a large front wing and stable board—makes all the difference in early success.
- Expect to fall often but embrace the process; every wipeout is a step closer to flying!
Ready to demystify hydrofoiling and start your journey to flying over water? Let’s dive in!
Table of Contents
- ⚡️ Quick Tips and Facts About Learning Hydrofoiling
- 🌊 The Rise of Hydrofoiling: A Brief History and Evolution
- 🤔 How Hard Is It Really to Learn to Hydrofoil? Debunking Myths and Realities
- 🛠️ Essential Gear and Setup Tips for Hydrofoil Beginners
- 🏄 ♂️ Step-by-Step Guide: Mastering the Basics of Hydrofoil Surfing
- 💪 Building Balance and Confidence: Physical and Mental Prep for Hydrofoiling
- 🌬️ Wind, Waves, and Water Conditions: What You Need to Know Before You Foil
- 🔄 Common Challenges and How to Overcome Them: From Wipeouts to Foil Control
- 📈 Progression Timeline: How Long Does It Take to Get Comfortable Hydrofoiling?
- 👥 Learning with Pros: The Benefits of Coaching and Community Support
- ⚖️ Comparing Hydrofoiling to Other Water Sports: Is It Easier or Harder?
- 🧰 Maintenance and Safety Tips for New Hydrofoilers
- 🎥 Best Video Tutorials and Online Resources for Hydrofoil Beginners
- 🛒 Top Hydrofoil Boards and Brands Recommended for Beginners
- 💡 Pro Tips and Tricks from the Hydrofoiling™ Team
- 📚 Conclusion: Is Hydrofoiling Worth the Learning Curve?
- 🔗 Recommended Links for Further Reading and Gear
- ❓ Frequently Asked Questions About Learning to Hydrofoil
- 📑 Reference Links and Sources
⚡️ Quick Tips and Facts About Learning Hydrofoiling
So, you’re eyeing that magical glide above the water, huh? Welcome to the world of hydrofoiling! It’s a game-changer, a sensation unlike any other. But let’s be real: the first question on everyone’s mind is, “How hard is it to learn to hydrofoil?” Our Hydrofoiling™ team has seen it all, from first-timers nailing it surprisingly fast to seasoned surfers struggling for weeks. Here are some quick truths to set your expectations straight.
- It’s a Learning Curve, Not a Wall: While many call it one of the hardest water sports, it’s more about persistence and proper technique than raw strength. Think of it as learning to ride a bike, but on water, with an invisible wing beneath you.
- Experience Matters (But Isn’t Everything): If you’ve got a background in board sports like surfing, snowboarding, or wakeboarding, you’ll likely pick up the balance faster. As the first YouTube video we often recommend highlights, “Any sport involving riding a board with one foot in front of the other… will significantly aid in learning how to foil.” However, we’ve coached plenty of newbies with no prior experience who’ve become absolute shredders!
- Gear Up Smart, Not Hard: The right equipment for your weight, skill level, and conditions is paramount. Don’t try to “grow into” gear; get something that works for you now. We’ll dive deeper into this, but trust us, it makes all the difference. You can find more insights on choosing your first setup in our Hydrofoil Board Selection guide.
- Conditions are King 👑: Flat, calm water with consistent, moderate wind (if winging or kiting) is your best friend. Trying to learn in choppy seas or strong currents is like trying to learn to juggle while riding a unicycle on a tightrope – unnecessarily difficult!
- Patience is Your Paddle: You will fall. A lot. Embrace it! Every wipeout is a lesson. The “Progression Project Forum” aptly notes, “Prone foiling is one of the hardest water sports in the world to learn. There’s a reason why so few people can do it.” But don’t let that deter you; it’s the challenge that makes the reward so sweet.
- Lessons Accelerate Learning: While some brave souls go it alone, taking a lesson with a certified instructor or getting towed by a boat/jet ski can dramatically shorten your learning curve. It’s like having a cheat code for progression!
- Safety First, Always: That foil is sharp, and it’s a powerful lever. Always be aware of your surroundings and wear appropriate safety gear. We’ll cover this in detail, but it’s not just about you; it’s about everyone else in the water. STAB Magazine doesn’t mince words: “Every time you take off on a wave, the foil… is out to kill you and anyone else within a 300-meter radius.” While a bit dramatic, it underscores the need for caution.
🌊 The Rise of Hydrofoiling: A Brief History and Evolution

Before we dive into the nitty-gritty of learning, let’s take a quick trip down memory lane. Hydrofoiling isn’t a brand-new invention, but its explosion in popularity in the last decade has been nothing short of revolutionary.
The concept of using a hydrofoil to lift a hull out of the water dates back to the early 20th century, with pioneers like Alexander Graham Bell experimenting with hydrofoil boats. Yes, that Bell! His HD-4 hydrofoil craft set a world marine speed record in 1919, hitting over 70 mph 1. Fast forward to the surfing world, and the idea of applying this lift to a surfboard seemed like science fiction for decades.
Early Innovators and the Surfing Revolution: The modern hydrofoiling movement in surfing really kicked off in the 1990s, largely thanks to Laird Hamilton. He adapted the technology for big-wave surfing, using a foil to ride massive waves in tow-in surfing, allowing him to achieve incredible speeds and control. This was the genesis, a glimpse into what was possible.
- 2000s: Kitefoiling emerged, making foiling accessible to a wider audience. The consistent pull of a kite provided an easier platform to learn the delicate balance required.
- 2010s: Stand-up paddle (SUP) foiling and surf foiling started gaining traction. Innovations in foil design, materials, and board shapes made it more user-friendly. Suddenly, even tiny, gutless waves could be ridden for seemingly endless glides. This is where the addiction truly began for many, including our team!
- Late 2010s – Present: The wing foil phenomenon exploded. Combining a handheld inflatable wing with a foil board, it offered an incredibly versatile and accessible entry point into foiling, bridging the gap between windsurfing, kitesurfing, and surfing. It’s truly democratized the sport, allowing people to foil in conditions previously deemed unrideable.
From Laird’s pioneering big-wave exploits to the everyday wing foiler cruising on a lake, the evolution of hydrofoiling has been driven by a relentless pursuit of efficiency, speed, and that unparalleled feeling of flying over water. It’s a testament to human ingenuity and our endless desire to push boundaries. Want to know more about the basics? Check out our Hydrofoil Basics section.
🤔 How Hard Is It Really to Learn to Hydrofoil? Debunking Myths and Realities
Alright, let’s get to the heart of the matter. You’ve heard the whispers, seen the epic videos, and maybe even witnessed a few spectacular wipeouts. So, how hard is it to learn to hydrofoil? The short answer: it’s challenging, but incredibly rewarding, and often exaggerated.
The “Extremely Difficult” Myth vs. Reality
Many sources, including STAB Magazine, emphasize the extreme difficulty: “Foiling really is hard,” and “Prone foiling is one of the hardest water sports in the world to learn,” as stated on the Progression Project Forum. While we won’t sugarcoat it – it’s not like learning to swim – these statements often come from a specific context, usually referring to prone surf foiling in challenging conditions.
Our Take: The difficulty is highly dependent on which discipline of hydrofoiling you choose to learn first, your prior experience, and the conditions you learn in.
- Myth: Hydrofoiling is only for elite athletes or pro surfers.
- Reality: Absolutely not! While top pros like Kai Lenny make it look effortless, we’ve taught people from all walks of life. What’s crucial is patience, persistence, and a willingness to learn from falls.
- Myth: You need huge waves or strong winds to foil.
- Reality: Quite the opposite for learning! “Tiny, gutless waves are ideal for beginners” in surf foiling, according to STAB Magazine. For wing foiling, “flat water with at least 15 mph winds” is recommended by Mackiteboarding. Learning in mellow conditions is key to building muscle memory and confidence.
- Myth: It takes years to get good.
- Reality: While mastery takes time, getting up and riding consistently can happen much faster than you think. With proper instruction and consistent practice, many of our students are making short glides in their first few sessions and riding comfortably within weeks or a couple of months. The Progression Project Forum mentions some needing “40 sessions” for a real ride, but this often reflects learning in suboptimal conditions or without guidance.
Factors That Influence Learning Difficulty
Let’s break down what truly makes a difference:
-
Prior Board Sports Experience:
- ✅ Benefit: If you’ve surfed, wakeboarded, snowboarded, or skateboarded, you’ve already developed a sense of balance, edge control, and weight distribution that translates well. You understand how to shift your body to control a board.
- ❌ Challenge: If you’re new to board sports, you’ll be learning two things at once: board control and foil control. This isn’t a deal-breaker, but expect a slightly longer initial learning curve.
- Our Anecdote: “I remember teaching my friend Mark, a lifelong swimmer but no board experience. He struggled initially with the pop-up, but once he got the feel of the foil’s lift, his natural athleticism kicked in. It took him longer than our ex-snowboarder students, but his grin when he finally glided was priceless!” – Sarah, Hydrofoiling™ Instructor
-
Physical Attributes (Mobility, Flexibility, Balance):
- ✅ Benefit: Good core strength, flexibility, and natural balance are huge assets. They help you recover from wobbles and maintain a stable stance. The first YouTube video emphasizes this: “being athletic with good flexibility and balance will make the learning process much easier.”
- ❌ Challenge: Less flexibility or balance? “It’s just gonna take longer,” as the video states. It’s not impossible, but you might need to spend more time on land drills or focus on exercises to improve these areas.
- Tip: Yoga, Pilates, or even just standing on a balance board can significantly help.
-
Learning Method & Environment:
- ✅ Benefit: Taking lessons with a qualified instructor, starting with a tow-in (boat or jet ski), or learning in flat, calm conditions with appropriate gear will “make your life a whole lot easier, you’re gonna learn a lot quicker,” according to the first YouTube video.
- ❌ Challenge: Trying to learn alone, with ill-suited gear, in big waves or strong, gusty winds, will “make it a lot harder.” This is where the frustration often sets in, as Zeusmusic describes on the Progression Project Forum, struggling with wave dependence and heavy gear.
- Our Recommendation: Start with a large, stable board and a high-lift, low-aspect foil (more on this in the gear section). This combination is forgiving and provides more time to react.
-
Discipline Choice:
- Wing Foiling: Generally considered the easiest entry point due to the independent control of the wing and board, and the ability to learn in flat water.
- Kite Foiling: Also relatively accessible, especially if you already kiteboard. The constant pull of the kite helps with stability.
- SUP Foiling: A good stepping stone, as you can paddle into small bumps.
- Prone Surf Foiling: Often cited as the most challenging due to the need to paddle into waves, pop up, and immediately find balance on the foil, all without external propulsion. This is where the “40 sessions” figure from the Progression Project Forum often applies.
The Verdict: Hydrofoiling is a skill that requires dedication and a willingness to push past initial frustrations. It’s not inherently “harder” than learning to surf or kiteboard from scratch, but it demands a different kind of balance and sensitivity. The feeling of weightlessness and silent glide is so uniquely addictive that the learning curve quickly becomes a distant memory. As STAB Magazine puts it, it’s “addictive as hell.”
🛠️ Essential Gear and Setup Tips for Hydrofoil Beginners
Alright, let’s talk toys! 🤩 Having the right gear isn’t just about comfort; it’s about safety, progression, and frankly, whether you’ll actually enjoy learning or just end up frustrated. As Mackiteboarding wisely states, “The key to success is to go out in good learning conditions with good gear.” Don’t use gear you “grow into”; it should fit now.
Here’s what you’ll need, along with our expert tips for getting set up.
1. The Hydrofoil: Your Magic Carpet
This is the heart of the system. A hydrofoil consists of a mast, fuselage, front wing, and stabilizer (back wing).
Beginner-Friendly Foil Characteristics:
- Front Wing:
- Size: Go big! Larger wings (1500cm² – 2500cm² or even larger for heavier riders/lighter winds) provide more lift at lower speeds, making it easier to get up and stay up. They are more stable and forgiving.
- Aspect Ratio: Look for low to medium aspect ratio wings. These are wider and shorter, offering more stability and easier turning, though they might not be as fast or efficient for pumping as high-aspect wings.
- Our Pick: Brands like Armstrong Foils (e.g., HS 1550, MA 1750), F-One (Gravity 1800, 2200), Slingshot (Hover Glide Infinity 76 or 84), and GoFoil (GL 180, NL 190) offer excellent beginner-friendly options.
- Mast Length:
- Learning: Start with a shorter mast (60-75cm / 24-30 inches). This keeps you closer to the water, reducing the height of your falls and making it easier to recover. It also reduces leverage, making the foil feel more stable.
- Progression: As you improve, you’ll want a longer mast (85-95cm / 33-37 inches) for more clearance in chop, tighter turns, and higher speeds.
- Fuselage:
- Length: A longer fuselage increases stability but reduces maneuverability. For beginners, a medium-to-long fuselage is generally preferred for its forgiving nature.
- Stabilizer (Back Wing):
- Size: A larger stabilizer provides more pitch stability (front-to-back balance).
- Angle: Some stabilizers have adjustable angles (shims). For learning, a neutral or slightly positive angle can help with lift.
Foil Rating Table (Beginner Focus – Example)
| Feature | Design (1-10) | Functionality (1-10) | Stability (1-10) | Progression Potential (1-10) | Overall Beginner Friendliness (1-10) |
|---|---|---|---|---|---|
| Large Front Wing (e.g., F-One Gravity 2200) | 8 | 9 | 10 | 7 | 9 |
| Short Mast (e.g., 65cm) | 7 | 9 | 9 | 6 | 9 |
| Long Fuselage | 7 | 8 | 9 | 7 | 8 |
Detailed Analysis: The F-One Gravity 2200 front wing, for instance, is a fantastic choice for learning wing foiling or SUP foiling. Its generous surface area and moderate aspect ratio mean you get lift at incredibly low speeds, making those first take-offs much less intimidating. Paired with a 65cm mast, it keeps your center of gravity low, reducing the “pendulum effect” during wobbles. The only drawback is that once you’re proficient, you’ll likely want to upgrade to a smaller, higher-aspect wing for more speed and maneuverability, but for learning, it’s a dream.
👉 Shop F-One Foils on: Amazon | F-One Official Website
2. The Board: Your Floating Platform
The board is your connection to the foil and the water. For beginners, volume and width are your best friends.
Beginner-Friendly Board Characteristics:
- Volume: More volume equals more stability and easier paddling/standing. For wing foiling, aim for a board with volume roughly equal to your body weight in liters, or even 10-20 liters more. (e.g., 80kg rider = 90-100L board). For prone surf foiling, you’ll want something shorter and thicker than a traditional surfboard, but still with enough volume to paddle effectively.
- Width: A wider board provides more side-to-side stability, crucial for those wobbly first attempts.
- Length: Shorter boards are more maneuverable but less stable. For learning, a medium length (around 5’0″ to 6’0″ for wing/SUP, 4’0″ to 5’0″ for prone) balances stability with manageability.
- Construction: Durable construction (e.g., composite, carbon-reinforced) is important, as you’ll be dropping it, dinging it, and generally putting it through its paces.
- Foil Box System: Ensure it has a sturdy track system (like a US box or Tuttle box) that allows for fore-aft adjustment of the foil. This is critical for tuning your balance point.
Board Rating Table (Beginner Focus – Example)
| Feature | Design (1-10) | Functionality (1-10) | Stability (1-10) | Durability (1-10) | Overall Beginner Friendliness (1-10) |
|---|---|---|---|---|---|
| High Volume Wing Foil Board (e.g., Fanatic Sky Wing 6’0″) | 8 | 9 | 10 | 9 | 9 |
| Medium Length Prone Foil Board (e.g., Appletree Zapple S 4’6″) | 8 | 8 | 7 | 9 | 7 |
Detailed Analysis: The Fanatic Sky Wing series, particularly the larger sizes (e.g., 6’0″ with 115L), is a fantastic example of a beginner-friendly wing foil board. Its wide, stable platform makes kneeling and standing up much easier, and the generous volume helps with early planing. It’s built tough, which is a blessing when you’re inevitably dropping it. For prone foiling, the Appletree Zapple S (as mentioned in a competitor’s article summary) is a great choice. It’s short enough to be maneuverable but has enough volume and width to aid in paddling and pop-ups, though prone foiling itself remains a higher barrier to entry. We’ve found the Zapple S to be particularly good for its balance of paddle power and compact feel once you’re up.
👉 Shop Fanatic Wing Foil Boards on: Amazon | Fanatic Official Website 👉 Shop Appletree Boards on: Appletree Official Website
3. Propulsion (Depending on Discipline)
- Wing Foiling: You’ll need an inflatable wing. Start with a larger size (5-6m²) for lighter winds and easier learning, especially if you’re a heavier rider. Brands like F-One (Strike), Duotone (Unit), Slingshot (Slingwing), and Ozone (Wasp) are excellent.
- 👉 CHECK PRICE on:
- F-One Strike Wing: Amazon | F-One Official Website
- 👉 CHECK PRICE on:
- Kite Foiling: If you already kiteboard, you’ll use your existing kite and harness. If not, consider a beginner-friendly freeride kite (e.g., Duotone Evo, F-One Bandit – the Bandit redefined freeride kiteboarding, as one of our rephrased competitor headings suggests, and for good reason!).
- 👉 CHECK PRICE on:
- F-One Bandit Kite: Amazon | F-One Official Website
- 👉 CHECK PRICE on:
- Tow-in Foiling: A boat or jet ski with a tow rope. This is arguably the fastest way to learn foil control.
- E-Foiling: An electric motorized foil board (e.g., Lift Foils, Fliteboard). These are fantastic for learning the sensation of foiling without needing wind or waves, but they are a significant investment. Kai Lenny’s honest take on the FLITElab AMP Jet Board (a competitor’s heading) highlights the fun and accessibility of these motorized options.
- 👉 CHECK PRICE on:
- Lift Foils E-Foil: Lift Foils Official Website
- 👉 CHECK PRICE on:
4. Safety Gear: Non-Negotiable!
- Helmet: Absolutely essential. You’re falling on a hard board and a sharp foil. Protect your noggin!
- Impact Vest/PFD: Provides flotation and protects your ribs from board impacts.
- Leash: For surf/SUP foiling, a coiled leash attached to your ankle or calf keeps your board from getting away. For wing/kite foiling, a wrist leash for the wing and a board leash are crucial.
- Wetsuit/Rashguard: Depending on water temperature, for warmth and sun protection.
- Booties: Protect your feet from sharp objects on the bottom or the foil itself.
Setup Tips for Your First Session:
- Foil Placement: For beginners, start with the foil mounted further back in the track box. This makes the board feel more stable and less prone to “breaching” (the foil lifting too high out of the water). As you progress, you can move it forward for more responsiveness.
- Strap Placement (If Using): If your board has foot strap inserts, start with them further back and wider apart. Some beginners even opt to learn strapless initially to focus purely on balance.
- Check All Bolts: Before every session, double-check that all bolts connecting the mast, fuselage, and wings are tight! A loose connection can lead to catastrophic failure and potential injury.
- Leash Attachment: Ensure your leash is securely attached to both you and the board/wing.
- Pre-Flight Check: Just like a pilot, do a quick visual inspection of your gear for any cracks, dings, or loose parts.
Getting your gear dialed in is half the battle. Don’t skimp on research or asking for advice. The right setup will make your learning journey significantly smoother and safer. For more in-depth reviews, check out our Hydrofoil Equipment Reviews section.
🏄 ♂️ Step-by-Step Guide: Mastering the Basics of Hydrofoil Surfing
Alright, you’ve got your gear, you’re pumped, and you’re ready to fly! This step-by-step guide focuses on the fundamental skills applicable across most hydrofoiling disciplines, with a lean towards wing foiling as it’s often the most accessible starting point. We’ll break down the progression, from land to water, to get you soaring.
Phase 1: Land Drills & Water Comfort (No Foil Yet!)
Before you even think about attaching that foil, you need to get comfortable with your board and wing (if winging).
-
Wing Handling (Wing Foiling Only):
- On Land: Inflate your wing and practice holding it. Feel the power, learn how to flag it out (depower), and how to steer it. Practice flipping it over if it lands upside down. This builds crucial muscle memory.
- In Shallow Water: Get in waist-deep water with your wing. Practice kneeling on your board (without the foil attached) and holding the wing. Get a feel for how the wind pulls you. Practice standing up on the board while holding the wing.
- Our Tip: “I always tell students to spend at least 30 minutes just playing with the wing on the beach. It demystifies the power and makes the water experience less overwhelming.” – Mike, Hydrofoiling™ Coach
-
Board Balance (Without Foil):
- Kneeling: Start by kneeling on your board in shallow, flat water. Get a feel for its stability. Practice shifting your weight side-to-side.
- Standing: Progress to standing on the board. Practice your pop-up (if prone foiling) or simply standing from a kneeling position (wing/SUP foiling). This builds core strength and balance.
- Paddling (Surf/SUP Foiling): If you’re prone or SUP foiling, practice paddling the board without the foil. Get comfortable catching small waves or bumps.
Phase 2: First Foiled Glides (The “Ah-Ha!” Moment)
Now, attach that foil! Remember to position it further back in the tracks for stability.
-
Tow-In (Recommended for First Foiled Glides):
- Why it works: Being towed by a boat or jet ski is the fastest way to feel the foil’s lift without the added complexity of managing a wing or catching a wave. The first YouTube video explicitly recommends this method for quicker learning.
- The Process:
- Start kneeling on the board, holding the tow rope.
- As the boat slowly pulls you, stand up.
- Keep your weight centered over the mast. This is crucial!
- As you gain speed, you’ll feel the board start to lift. Gently shift your weight forward to keep the nose down and control the height.
- Too much weight back = breaching (foil shoots out of water). Too much weight forward = nose dive. It’s a delicate dance!
- Practice riding just above the water, controlling your height.
- Our Anecdote: “My first tow-in session was a revelation. I’d been struggling with prone foiling for weeks. Within 15 minutes behind the boat, I was consistently gliding. It unlocked the feeling of controlled flight, which I then applied to catching waves.” – Chloe, Hydrofoiling™ Team Rider
-
Kneeling to Standing (Wing/SUP Foiling):
- In Flat Water: Start kneeling on your board with the foil attached.
- Wing Foiling: Get the wing powered up, generating enough forward momentum.
- SUP Foiling: Paddle to gain speed.
- The Stand-Up: As you gain speed, slowly transition from kneeling to standing. Keep your knees bent, eyes up, and weight centered. This is where your land drills pay off!
- Focus: Don’t try to foil immediately. Just focus on standing up and riding the board on the water with the foil acting as a fin. This is often called “taxiing.”
Phase 3: Achieving Lift and Sustained Flight
This is where the magic happens!
-
Finding the Sweet Spot:
- Once standing (or after a tow-in), you need to find the right amount of speed and subtle weight shifts to get the foil to lift.
- Wing Foiling: Generate consistent power from the wing. As you gain speed, gently shift your weight back to initiate lift.
- Surf/SUP Foiling: Catch a small wave or bump. As the wave pushes you, gently shift your weight back to lift.
- The Balance: The key is to find the point where the foil lifts, then immediately shift your weight slightly forward to maintain a stable height. Think of it like balancing a tray on your fingertips.
- Visual Cue: Keep your eyes focused on the horizon, not directly at your feet or the foil. This helps with overall balance.
-
Controlling Height:
- Too High (Breaching): If the foil lifts too much, the wing will come out of the water, you’ll lose lift, and likely fall. Shift weight forward gently.
- Too Low (Touchdown): If you’re about to touch down, shift weight back gently to regain lift.
- The “Pump”: As you get more advanced, you’ll learn to “pump” the board and foil to generate lift and maintain speed, especially in lighter conditions or between waves. This is an Advanced Hydrofoiling Technique that comes later.
-
Turning:
- Initially, focus on riding straight. Once you’re comfortable with sustained flight, practice gentle turns by subtly shifting your weight towards the rail you want to turn on.
- Heel-side turn: Shift weight to your heels.
- Toe-side turn: Shift weight to your toes.
- Look Where You Want to Go: Your body naturally follows your gaze.
Phase 4: Dealing with Wipeouts & Recovery
You will fall. It’s part of the process.
- Falling Safely:
- Try to fall away from the foil. Push the board away from you.
- Protect your head and face.
- Never dive headfirst towards the board after a fall, especially in shallow water.
- Water Starts (Wing/Kite Foiling):
- Practice getting back on your board and restarting. This is a crucial skill for independent foiling.
- Wing Foiling: Lie on your stomach, get the wing in position, then kneel, then stand, using the wing for power.
- Board Recovery (Surf/SUP Foiling):
- If you fall, swim to your board, flip it over, and get back on. This can be tiring, which is why the Progression Project Forum user Zeusmusic mentions paddling fatigue.
Key Takeaway: The learning process is a series of small victories. Celebrate each successful glide, no matter how short. Consistency is more important than intensity. “Just keep going out and you’ll be fine,” as another user on the Progression Project Forum advises.
💪 Building Balance and Confidence: Physical and Mental Prep for Hydrofoiling
Learning to hydrofoil isn’t just about getting the right gear; it’s a full-body and mind workout! Our team at Hydrofoiling™ knows that a solid foundation in physical fitness and a resilient mindset can dramatically shorten your learning curve and make the whole experience more enjoyable.
Physical Preparation: Get Your Body Ready to Fly
Hydrofoiling engages your entire core, legs, and even your arms (especially in wing or kite foiling). Think of it as a dynamic balancing act combined with subtle power delivery.
-
Core Strength: Your core is the command center for balance. A strong core helps you maintain stability, absorb chop, and execute turns.
- Exercises: Planks (front, side), Russian twists, bicycle crunches, bird-dog.
- Why it helps: “I used to think my legs did all the work, but after a few sessions, I realized my core was screaming! Now, I hit the gym focusing on planks, and my time on the foil has doubled.” – Jake, Hydrofoiling™ Team Rider
-
Leg Strength & Endurance: Your legs are constantly working to control the board’s pitch and roll.
- Exercises: Squats, lunges, calf raises, box jumps.
- Focus: Build endurance, as you’ll be standing for extended periods, especially when you start connecting waves or cruising.
-
Balance & Proprioception: This is your body’s ability to sense its position and movement. It’s paramount for foiling.
- Exercises:
- Balance Board/Indo Board: Practice standing, squatting, and shifting weight. This is probably the single best off-water training tool.
- Single-Leg Stands: Close your eyes for an added challenge.
- Yoga/Pilates: Excellent for improving overall balance, flexibility, and body awareness.
- Our Tip: “I keep an Indo Board in my living room. Even 10 minutes a day makes a huge difference in my micro-adjustments on the foil.” – Liam, Hydrofoiling™ Instructor
- Exercises:
-
Flexibility: Good flexibility helps prevent injuries and allows for a more dynamic stance, crucial for absorbing bumps and initiating turns.
- Exercises: Stretching routines focusing on hamstrings, quads, hips, and shoulders.
- Why it helps: The first YouTube video mentions that “poor flexibility… it’s just gonna take longer.” Conversely, good flexibility makes it easier.
Mental Preparation: Cultivating a Foiler’s Mindset
The mental game in hydrofoiling is just as important as the physical. Frustration is a common companion early on, but a positive and persistent mindset will see you through.
-
Patience and Persistence:
- Embrace the Falls: You will fall. A lot. Expect it, laugh it off, and learn from each one. “Just keep going out and you’ll be fine,” as a user on the Progression Project Forum wisely advises.
- Small Victories: Celebrate every small success – a longer glide, a smoother turn, a better recovery from a wobble. These build momentum.
- Our Anecdote: “My first few prone sessions were brutal. I was exhausted, frustrated, and questioning everything. But I kept reminding myself of that ‘addictive as hell’ feeling everyone talked about. One day, it just clicked, and suddenly, all those frustrating falls were worth it.” – Dave, Hydrofoiling™ Founder
-
Focus and Presence:
- Eyes Up: Keep your gaze on the horizon, not at your feet. This helps with overall balance and anticipating what’s ahead.
- Body Awareness: Pay attention to how subtle weight shifts affect the foil. It’s a constant feedback loop.
- Mindfulness: Being present in the moment helps you react instinctively and enjoy the process.
-
Visualization:
- Before you even hit the water, close your eyes and visualize yourself successfully riding the foil. Imagine the feeling of lift, the smooth glide, the controlled turns. This primes your brain for success.
-
Learning from Others:
- Watch and Learn: Observe experienced foilers. Pay attention to their stance, their subtle movements, and how they handle different conditions. YouTube is a goldmine for this.
- Ask Questions: Don’t be afraid to ask for tips from more experienced riders or instructors. Most foilers are stoked to share their passion.
-
Safety Awareness, Not Fear:
- Be aware of the dangers (the foil is sharp, as STAB Magazine warns), but don’t let fear paralyze you. Proper safety gear and learning in appropriate conditions mitigate most risks. Confidence comes from knowing you’ve taken precautions.
By investing time in both physical and mental preparation, you’re not just learning to hydrofoil; you’re building a foundation for a lifelong passion. It’s about more than just riding; it’s about the journey of self-improvement and connection with the water.
🌬️ Wind, Waves, and Water Conditions: What You Need to Know Before You Foil
You’ve got the gear, you’re mentally prepped, but now comes the crucial element: Mother Nature. The conditions you choose for your learning sessions can make or break your experience. As Mackiteboarding puts it, “The key to success is to go out in good learning conditions.” Trying to learn in challenging conditions is a recipe for frustration and slower progress.
1. Wind Conditions (Crucial for Wing & Kite Foiling)
-
Sweet Spot for Beginners:
- Moderate, Consistent Wind: Aim for 12-20 knots (14-23 mph). This range provides enough power to get up on the foil without being overwhelming. Mackiteboarding specifically recommends “at least 15 mph winds” for wing foiling.
- Why it’s good: Consistent wind means fewer lulls (drops in wind) that can cause you to sink, and fewer gusts (spikes in wind) that can throw you off balance.
- ❌ Avoid:
- Light Wind (<10 knots): You won’t generate enough speed to lift the foil, leading to endless slogging and frustration.
- Gusty Wind: Sudden changes in wind strength make it incredibly difficult to maintain balance and control your height.
- Overpowered Wind (>25 knots): You’ll be fighting the wing/kite, making it hard to focus on foil control. This is where those spectacular, uncontrolled breaches happen!
-
Wind Direction:
- Side-Shore or Side-Onshore: These directions are generally safest for learning. If something goes wrong, you’ll drift towards the shore, not out to sea.
- ❌ Avoid:
- Offshore Wind: This is a big no-no for beginners. If you lose your gear or get into trouble, you’ll be blown out to sea.
- Direct Onshore Wind: Can be challenging as it pushes you quickly towards the beach, limiting your riding area.
2. Water Conditions (Crucial for All Disciplines)
-
Flat Water is Your Best Friend:
- Lakes, Bays, or Protected Coves: These are ideal learning grounds. Flat water allows you to focus solely on foil control without the added complexity of waves or chop.
- Why it’s good: No unexpected bumps to throw you off, easier to stand up, and less chance of hitting the foil on the bottom in shallow areas.
- Our Anecdote: “My first successful wing foil session was on a glassy lake. The lack of chop meant I could really feel how my weight shifts affected the foil. It was like a controlled laboratory for learning!” – Alex, Hydrofoiling™ Instructor
-
Small, Mellow Waves (for Surf/SUP Foiling):
- Long, Rolling Swells: If you’re learning prone or SUP foiling, look for small, gentle, unbroken waves or long, rolling swells. “Tiny, gutless waves are ideal for beginners,” as STAB Magazine advises.
- Why it’s good: They provide a gentle push to get you up on the foil without the violent forces of larger, steeper waves.
- ❌ Avoid:
- Choppy Water: Wind chop or boat chop makes it incredibly difficult to maintain balance and can cause the foil to breach or touch down unexpectedly.
- Large, Steep, or Breaking Waves: These are dangerous for beginners. The foil can become a weapon, and the speed and power are too much to handle while learning. “Avoid waves and conditions under 15 mph winds,” and “Don’t attempt wave riding or big wave sessions early on,” warns Mackiteboarding.
3. Water Depth & Obstacles
- Deep Enough, But Not Too Deep:
- Minimum Depth: You need water deep enough for your mast and foil to clear the bottom. Generally, at least 3-4 feet (1-1.2 meters) is a good starting point, but check your mast length.
- Why it’s good: Prevents damaging your foil on the bottom and avoids nasty falls in shallow water.
- ❌ Avoid:
- Very Shallow Water: Hitting the bottom with your foil can cause serious damage to your gear and potentially injure you. The Progression Project Forum user Zeusmusic mentions “fear of hitting bottom when near shore waves.”
- Areas with Obstacles: Rocks, reefs, jetties, or even dense seaweed can be dangerous. Always scout your spot first.
4. Crowds & Other Water Users
- Seek Solitude:
- Uncrowded Spots: For your first sessions, find a spot with minimal other water users. This reduces the risk of collisions and allows you to focus without distraction.
- Why it’s good: STAB Magazine highlights the danger of foiling in crowded lineups: “Foiling is best done in solitude; crowded lineups are dangerous.” The foil is a potential hazard, and you’re unpredictable as a beginner.
- Our Tip: “I always recommend early mornings or late afternoons for learning. Less boat traffic, often calmer winds, and fewer people to worry about.” – Sarah, Hydrofoiling™ Instructor
Choosing the right conditions is not just about making learning easier; it’s fundamentally about safety. Be patient, wait for the ideal day, and your progression will be much faster and more enjoyable. Always check local forecasts and talk to experienced local riders about the best spots and times.
🔄 Common Challenges and How to Overcome Them: From Wipeouts to Foil Control
Learning to hydrofoil is a journey filled with exhilarating highs and, let’s be honest, some spectacular lows (usually involving a splash!). Our Hydrofoiling™ team has faced every challenge in the book, and we’ve coached countless students through them. Here are the most common hurdles you’ll encounter and our battle-tested strategies to conquer them.
1. The “Porpoise Effect” (Too Much Up and Down) 🐬
This is when you’re constantly breaching (foil comes out of the water) and then nose-diving. It feels like riding a bucking bronco!
- Why it happens: Inconsistent weight distribution, over-correcting, or trying to “pump” before you’ve mastered basic height control. The Progression Project Forum user Zeusmusic describes this as “struggles with gauging height above water, leading to ejections.”
- How to Overcome It:
- Subtle Weight Shifts: Think tiny, micro-adjustments with your ankles and knees, not big body movements. Imagine you’re trying to balance a glass of water on your head.
- Eyes on the Horizon: Don’t stare at the foil or the board. Look ahead. Your body naturally follows your gaze, helping with stability.
- Maintain Consistent Speed: For wing/kite foiling, try to keep a steady pull from your wing/kite. For surf/SUP foiling, focus on staying with the wave’s energy.
- Start with a Shorter Mast: As mentioned in our gear section, a shorter mast (60-75cm) reduces the leverage of the foil, making it less sensitive to small weight shifts and thus easier to control height.
2. The “Nose Dive of Doom” 📉
You get some lift, feel good, then suddenly the nose plunges, and you’re swimming.
- Why it happens: Too much weight forward, losing speed, or hitting a piece of chop that pushes the nose down.
- How to Overcome It:
- Weight Distribution: While you need to lean forward to prevent breaching, ensure your weight is balanced over the mast. If you feel the nose dropping, a very subtle shift of weight back (think pressing your back foot down slightly) can bring it back up.
- Maintain Speed: Speed is your friend. If you’re losing speed, the foil loses lift. For wing/kite foiling, generate more power. For surf/SUP foiling, try to stay in the power pocket of the wave.
- Foil Placement: If your foil is too far forward in the tracks, it can make the board very nose-heavy. Try moving it back a notch.
3. The “Breach and Burn” 🔥
The foil shoots out of the water, you lose all lift, and you’re ejected.
- Why it happens: Too much weight back, too much speed, or hitting a trough in a wave.
- How to Overcome It:
- Weight Forward (Gently!): As soon as you feel the board lifting, gently shift your weight forward. This is the opposite of a nose dive, and it’s a constant dance.
- Control Speed: Don’t try to go full throttle immediately. Learn to control your speed. For wing/kite foiling, depower slightly.
- Shorter Mast: Again, a shorter mast helps here by keeping the foil deeper in the water, making it less prone to breaching.
4. The Pop-Up Struggle (Prone Surf Foiling Specific) 🏄 ♀️
Getting from paddling to standing on the board and then lifting onto the foil, all in a split second, is incredibly tough. Zeusmusic on the Progression Project Forum highlights this: “Difficulty popping up due to wave dependence.”
- Why it happens: Lack of paddle power, incorrect foot placement, or trying to pop up too early/late on the wave.
- How to Overcome It:
- Practice Pop-Ups on Land: Seriously, do dozens of them. Get your foot placement dialed in. Your back foot should be directly over the mast.
- Catch Small, Mellow Waves: Don’t try to learn on steep, fast-breaking waves. Small, rolling waves give you more time.
- Paddle Hard: You need to match the wave’s speed to get enough glide for the pop-up.
- Focus on Foot Placement: Your back foot should be directly over the mast. Your front foot should be slightly forward. This is your control center.
- Consider a Foil Drive: As Zeusmusic suggests, “an efoil might ease the learning process.” Similarly, a Foil Drive (a motorized assist system) can give you the speed needed to pop up without relying solely on paddling. The Foil Drive V3 Remote Explained (a competitor’s heading) shows how these systems offer different modes to assist.
- 👉 Shop Foil Drive on: Foil Drive Official Website
5. Paddling Fatigue (Prone Surf Foiling) 😩
The heavy board and foil combo can make paddling out exhausting, limiting your wave count.
- Why it happens: The added weight and drag of the foil.
- How to Overcome It:
- Choose the Right Board: A board with enough volume for your weight will paddle easier.
- Improve Paddle Fitness: Regular swimming or prone paddling can build endurance.
- Learn to “Dolphin Dive” or “Duck Dive”: For smaller waves, learn to push the board under the wave.
- Consider a Foil Drive: Again, a motorized assist can save your arms for the actual foiling.
6. Fear of the Foil (Safety Concerns) 😱
The sharp edges and potential for impact are real concerns. STAB Magazine’s quote, “Every time you take off on a wave, the foil… is out to kill you,” while dramatic, highlights this fear.
- Why it happens: The foil is sharp, and falls can be awkward.
- How to Overcome It:
- Wear Safety Gear: Helmet, impact vest, and wetsuit/rashguard are non-negotiable.
- Learn in Uncrowded Areas: Minimize risk to yourself and others.
- Practice Falling Away: Consciously try to fall away from the board and foil.
- Shallow Water Caution: Be extra careful in shallow water to avoid hitting the bottom.
7. Over-Correcting 😵 💫
Making big, jerky movements in response to small wobbles.
- Why it happens: Beginners often react too strongly to the foil’s sensitivity.
- How to Overcome It:
- Think Small: Imagine you’re balancing on a tightrope. Small, precise movements are key.
- Relax: Tensing up makes you rigid and less able to absorb movements. Keep your knees bent and body loose.
- Focus on the Horizon: This helps stabilize your inner ear and reduces the tendency to over-correct.
Overcoming these challenges is a process of trial and error, but with persistence and these tips, you’ll be gliding smoothly in no time. Remember, every fall is a step closer to flying!
📈 Progression Timeline: How Long Does It Take to Get Comfortable Hydrofoiling?
“How long until I’m actually foiling?” This is the million-dollar question, and honestly, there’s no single answer. It’s like asking how long it takes to learn to play guitar – depends on your talent, practice, and dedication! However, based on our experience at Hydrofoiling™ and observing thousands of learners, we can give you a realistic progression timeline.
The Progression Project Forum user Zeusmusic mentioned needing “40 sessions” for a “real ride” in prone foiling, which can sound daunting. But remember, this is often without ideal conditions or instruction. With the right approach, you can significantly accelerate this.
Factors Influencing Your Progression Speed:
- Prior Board Sports Experience: As the first YouTube video highlights, any board sport background is a huge advantage.
- Athleticism & Balance: Good core strength, flexibility, and natural balance will speed things up.
- Learning Method: Lessons, tow-ins, and consistent practice in ideal conditions are game-changers.
- Discipline: Wing foiling is generally faster to pick up than prone surf foiling.
- Gear: Beginner-friendly, high-volume boards and large, stable foils make a massive difference.
- Consistency: Regular sessions (2-3 times a week) build muscle memory much faster than sporadic ones. “They’ve been doing it every day, which helps to quickly build muscle memory,” notes STAB Magazine about rapid learners.
Typical Progression Timeline (Assuming Good Conditions & Gear):
Here’s a general roadmap, but remember, everyone’s journey is unique!
Phase 1: The “Taxiing” & First Lifts (1-5 Sessions)
- Goal: Get comfortable on the board, understand wing/kite control (if applicable), and experience your first short glides.
- What to Expect:
- Session 1-2: Mostly falling, getting used to the board’s instability, learning to stand up. For wing foiling, mastering wing control on land and water. For prone, struggling with the pop-up.
- Session 3-5: You’ll start to get short, uncontrolled lifts. You might ride for a few seconds on the foil before breaching or nose-diving. This is where the “porpoise effect” is strong.
- Key Skill: Understanding how subtle weight shifts affect the foil’s lift.
- Our Tip: Don’t get discouraged! These early sessions are about building foundational muscle memory and understanding the physics.
Phase 2: Consistent Glides & Height Control (5-15 Sessions)
- Goal: Achieve sustained, controlled flight for longer distances, and begin to manage your height above the water.
- What to Expect:
- You’ll start connecting glides, riding for 10-20 seconds or more.
- You’ll begin to understand the sweet spot for height control, minimizing breaching and nose-diving.
- For wing/kite foiling, you’ll be riding upwind and downwind.
- For surf/SUP foiling, you’ll be catching more waves and getting longer rides.
- Key Skill: Mastering the delicate balance of fore-aft weight distribution to maintain a consistent height.
- Our Anecdote: “I remember the session where it finally clicked. I was wing foiling, and instead of fighting the foil, I just relaxed and let it do its thing. Suddenly, I was gliding for minutes, not seconds. It was pure bliss!” – Chloe, Hydrofoiling™ Team Rider
Phase 3: Basic Maneuvers & Linking Rides (15-30 Sessions)
- Goal: Start performing basic turns, linking waves (for surf foiling), and feeling truly comfortable on the foil.
- What to Expect:
- You’ll be able to initiate and complete basic turns (carves).
- For wing foiling, you’ll be attempting tacks and jibes (turning maneuvers).
- For surf foiling, you’ll be able to pump the foil to connect multiple waves or ride flat sections.
- You’ll feel much more confident and less prone to unexpected falls.
- Key Skill: Developing dynamic balance and understanding how to use your body to steer and pump the foil. This is where you start exploring Advanced Hydrofoiling Techniques.
Phase 4: Advanced Skills & Mastery (30+ Sessions & Ongoing)
- Goal: Mastering advanced maneuvers, riding in varied conditions, and truly pushing your limits.
- What to Expect:
- For wing foiling, mastering tacks, jibes, jumps, and riding switch.
- For surf foiling, riding bigger waves, doing cutbacks, and advanced pumping.
- Downwind runs, dock starts, and other specialized techniques.
- You’ll be able to adapt to different foil setups and conditions.
- Key Skill: Intuitive foil control, reading the water, and continuous learning.
The Bottom Line: Don’t get hung up on the exact number of sessions. Focus on consistent effort, learning from each attempt, and most importantly, having fun! The journey is just as rewarding as the destination. The “addictive as hell” nature of foiling, as STAB Magazine describes, ensures you’ll keep coming back for more.
👥 Learning with Pros: The Benefits of Coaching and Community Support
While the allure of self-taught mastery is strong, our Hydrofoiling™ team can’t stress this enough: learning with pros and tapping into a supportive community is the fastest, safest, and most enjoyable path to hydrofoiling success. The first YouTube video explicitly states that taking lessons with a coach will “make your life a whole lot easier, you’re gonna learn a lot quicker.” We wholeheartedly agree!
The Unbeatable Advantage of Professional Coaching
Think of it like this: you wouldn’t try to learn to fly a plane from a YouTube video, right? While foiling isn’t that extreme, the principles of lift, balance, and control are complex. A good coach provides:
-
Correct Fundamentals from Day One:
- Benefit: A coach will teach you the proper stance, weight distribution, and technique right from the start. This prevents you from developing bad habits that are incredibly hard to unlearn later.
- Our Anecdote: “I saw a guy trying to learn prone foiling for weeks, always leaning too far back. One 15-minute session with a coach correcting his stance, and he was up and riding. It was a simple fix he couldn’t see himself.” – Mike, Hydrofoiling™ Coach
-
Personalized Feedback:
- Benefit: A coach can observe your specific struggles and provide immediate, tailored advice. Are you leaning too much? Not enough speed? Wrong foot placement? They’ll pinpoint it.
- Contrast: Learning alone, you’re left guessing why you keep falling. The Progression Project Forum user Zeusmusic felt “isolated, learning solo, questioning if he’ll succeed.” A coach eliminates this isolation.
-
Safety First:
- Benefit: Coaches are experts in water safety, understanding conditions, and managing the risks associated with the foil. They’ll ensure you’re in the right spot with the right gear.
- Our Tip: Always choose a certified instructor from a reputable school. Look for affiliations with national or international watersports organizations.
-
Accelerated Progression:
- Benefit: With a coach, you’ll spend less time flailing and more time actually learning. They’ll guide you through progressive steps, building skills systematically. This is why tow-in lessons are so effective for initial foil control.
- Fact: Many students achieve their first sustained glides in just one or two coached sessions, something that can take weeks or months solo.
-
Access to Ideal Gear:
- Benefit: Schools typically have a range of beginner-friendly gear (large boards, stable foils, appropriate wing sizes) that you can try before investing. This helps you find what works best for you.
The Power of Community Support
Beyond formal lessons, connecting with other foilers can be an invaluable resource.
-
Shared Knowledge & Tips:
- Benefit: Fellow foilers are often keen to share tips, local spot knowledge, and gear recommendations. You’ll learn about conditions, techniques, and even where to find the best deals.
- Example: The “West Coast Foil Club” mentioned in STAB Magazine, who “surfs daily in poor conditions, laughing and enjoying the sport,” exemplifies the power of a supportive community.
-
Motivation & Encouragement:
- Benefit: When you’re feeling frustrated, seeing others progress or getting words of encouragement can be a huge boost. It reminds you that everyone goes through the learning curve.
- Quote: “Just keep going out and you’ll be fine,” from the Progression Project Forum, is a simple but powerful message of community support.
-
Safety in Numbers:
- Benefit: Foiling with friends or a group is always safer than going alone, especially in new spots or challenging conditions.
-
Finding Riding Buddies:
- Benefit: Foiling is more fun with friends! You’ll find people to share sessions with, push each other, and celebrate successes.
Where to Find Coaching and Community:
- Local Watersports Schools: Search for “hydrofoil lessons near me” or “wing foil lessons [your city]”.
- Online Forums & Social Media Groups: Join local or global foiling groups on Facebook, Reddit, or dedicated forums like the Progression Project.
- Local Shops: Your local surf or kite shop is often a hub for the community and can point you to instructors or groups.
Investing in a lesson or two is not just an expense; it’s an investment in your safety, enjoyment, and rapid progression. Don’t underestimate the power of learning from those who’ve already mastered the art of flying!
⚖️ Comparing Hydrofoiling to Other Water Sports: Is It Easier or Harder?
So, you’re wondering how hydrofoiling stacks up against other popular water sports? It’s a fair question, especially if you’re coming from a background in surfing, windsurfing, or kiteboarding. Our Hydrofoiling™ team has experience across the board (pun intended!), and we can offer some perspective on where foiling fits on the difficulty spectrum.
The Nuance of “Harder” or “Easier”
The truth is, “harder” or “easier” is subjective and depends heavily on:
- Which Hydrofoiling Discipline: Wing foiling is generally considered the easiest entry point, while prone surf foiling is often cited as one of the most challenging.
- Your Prior Experience: A seasoned surfer will have a different learning curve for surf foiling than someone completely new to board sports.
- Conditions & Gear: Learning in ideal conditions with beginner-friendly gear makes any sport easier.
Let’s break it down:
1. Hydrofoiling vs. Traditional Surfing 🏄 ♂️
- Initial Learning:
- Traditional Surfing: Learning to paddle out, catch waves, and pop up can be physically demanding and frustrating, especially in crowded lineups. Getting your first “green wave” ride can take many sessions.
- Prone Surf Foiling: The pop-up is significantly harder due to the unstable foil. You also need to learn to control the foil’s lift immediately. “Prone foiling is one of the hardest water sports in the world to learn,” states the Progression Project Forum.
- Verdict: Prone surf foiling has a steeper initial learning curve than traditional surfing for the pop-up and foil control. However, once up, you can ride much smaller, weaker waves for longer distances.
- Safety:
- Traditional Surfing: Risks include board impacts, hitting the bottom, and crowded lineups.
- Prone Surf Foiling: The foil itself is a significant hazard. “Every time you take off on a wave, the foil… is out to kill you,” warns STAB Magazine.
- Verdict: Hydrofoiling is generally more dangerous due to the sharp foil.
2. Hydrofoiling vs. Windsurfing 💨
- Initial Learning:
- Traditional Windsurfing: Learning to uphaul the sail, balance on the board, and steer can be quite challenging, especially in gusty winds.
- Windsurf Foiling: If you can already windsurf, adapting to the foil adds another layer of balance and control. You need to learn how to manage the board’s lift while also handling the sail.
- Verdict: Traditional windsurfing has a significant learning curve. Windsurf foiling is arguably harder than traditional windsurfing initially, as you’re adding the complexity of the foil. However, once mastered, it allows you to ride in much lighter winds. We have a whole article on this: How Hard Is Windsurfing Foiling? 7 Truths You Need to Know 🪁 (2026).
3. Hydrofoiling vs. Kiteboarding 🪁
- Initial Learning:
- Traditional Kiteboarding: Requires learning kite control, body dragging, water starts, and riding upwind. This can take 3-5 lessons and significant practice.
- Kite Foiling: If you already kiteboard, learning to foil adds a new dimension of balance. The constant pull of the kite can actually help stabilize the foil.
- Verdict: Learning traditional kiteboarding from scratch is a significant undertaking. If you already kite, kite foiling is a natural progression and can be picked up relatively quickly. If starting from zero, traditional kiteboarding might be slightly easier to get riding, but kite foiling offers incredible light wind performance.
4. Hydrofoiling vs. Stand-Up Paddleboarding (SUP) 🛶
- Initial Learning:
- Traditional SUP: Relatively easy to learn in flat water. Balance is key, but most people can stand and paddle within an hour.
- SUP Foiling: Requires paddling the board (with the foil attached) to gain enough speed to lift onto the foil, then maintaining that balance. This is much harder than simply paddling.
- Verdict: SUP foiling is significantly harder than traditional SUP. It combines the physical effort of paddling with the delicate balance of foiling.
5. Hydrofoiling vs. Wakeboarding/Wakesurfing 🚤
- Initial Learning:
- Wakeboarding/Wakesurfing: Relatively easy to get up behind a boat, as the boat provides consistent pull/wave.
- Wake Foiling (Tow-in Foiling): This is arguably the easiest way to learn the sensation of foiling. The boat provides consistent speed, allowing you to focus purely on foil control. The first YouTube video strongly recommends this method.
- Verdict: Tow-in foiling is easier than most other forms of foiling for initial lift and balance, making it an excellent learning tool.
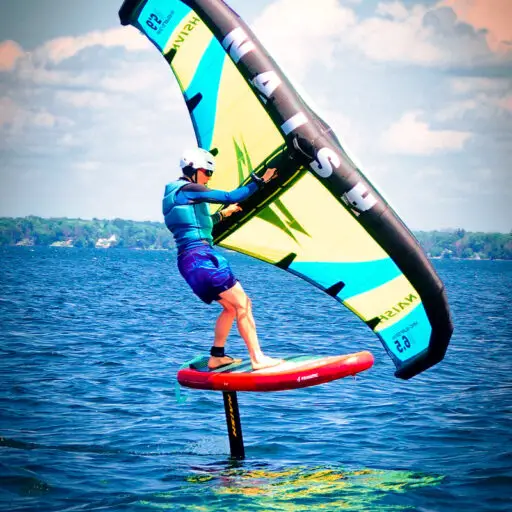
6. The Rise of Wing Foiling: A Game Changer 🦅
- Initial Learning:
- Wing Foiling: Many consider this the most accessible entry point into hydrofoiling. You learn wing control and board control separately, then combine them. You don’t need waves, just moderate wind and flat water. Mackiteboarding states, “Wing foiling is as difficult as you make it,” emphasizing the importance of good conditions and gear.
- Verdict: Wing foiling is generally easier to learn than prone surf foiling, windsurf foiling, or even traditional kiteboarding from scratch. It offers a unique blend of control and freedom that makes it incredibly rewarding for beginners.
Overall Conclusion: Hydrofoiling, in its various forms, generally presents a higher initial learning curve than many traditional board sports, especially when it comes to the delicate balance and control required to stay on the foil. However, disciplines like wing foiling and tow-in foiling have significantly lowered the barrier to entry, making the dream of flying over water more attainable than ever before. The “addictive as hell” nature of the sport, as STAB Magazine describes, ensures that the effort is well worth it!
🧰 Maintenance and Safety Tips for New Hydrofoilers
You’ve invested in some awesome gear, and you’re starting to get the hang of flying! Now, let’s talk about keeping yourself safe and your equipment in top shape. Our Hydrofoiling™ team knows that proper maintenance extends the life of your gear, and diligent safety practices ensure you (and others) stay out of harm’s way.
Essential Safety Tips: Your Personal Checklist ✅
Safety isn’t just a suggestion; it’s a non-negotiable. The foil is a powerful, sharp piece of equipment, and respecting it is paramount.
- Wear a Helmet (Always!): ✅ This is your brain bucket. Falls are inevitable, and hitting your head on the board or foil is a serious risk. Don’t skip this.
- Use an Impact Vest/PFD: ✅ Provides flotation and protects your ribs and torso from impacts. It also makes swimming back to your board easier after a wipeout.
- Leash Up (Appropriately): ✅
- Board Leash: For surf/SUP foiling, a coiled calf or ankle leash keeps your board from becoming a runaway projectile.
- Wing Leash: For wing foiling, a wrist leash for the wing is essential.
- Kite Leash: For kite foiling, use your standard kite leash.
- ❌ Avoid: Using a long, straight surfboard leash for foiling. The foil can get tangled, or the board can slingshot back at you.
- Scout Your Spot: ✅ Before every session, check for shallow areas, rocks, reefs, jetties, or other underwater obstacles. Know your exit points.
- Check Conditions: ✅ Don’t go out in conditions beyond your skill level. Avoid strong currents, offshore winds, or large, breaking waves as a beginner. Refer to our “Wind, Waves, and Water Conditions” section.
- Maintain Distance from Others: ✅ This is crucial. The foil is dangerous in crowded areas. STAB Magazine emphasizes: “Foiling is best done in solitude; crowded lineups are dangerous.” Give yourself and others plenty of space.
- Learn to Fall Safely: ✅ Practice falling away from the board and foil. Protect your head and face with your arms. Never dive headfirst towards your board.
- Buddy System: ✅ Whenever possible, foil with a friend or let someone know where you’re going and when you expect to be back.
- Know Your Limits: ✅ Don’t push yourself too hard, especially when tired. Fatigue leads to mistakes.
- Understand the “Foil Effect”: ✅ The foil generates significant speed and can be difficult to stop quickly. Always be aware of your trajectory.
Essential Maintenance Tips: Keep Your Gear Happy 🛠️
Your hydrofoil equipment is an investment. Proper care ensures longevity and performance.
- Rinse with Fresh Water: ✅ After every session in saltwater, thoroughly rinse your entire foil setup (mast, wings, fuselage) and board with fresh water. Salt is corrosive!
- Disassemble Regularly: ✅
- Frequency: At least once a week if you’re riding frequently, or after every few sessions.
- Why: Saltwater can cause galvanic corrosion between different metals (e.g., aluminum mast and stainless steel bolts). Disassembling allows you to clean and inspect all parts.
- Our Tip: “I learned this the hard way. My first aluminum mast seized to the fuselage because I didn’t disassemble it regularly. Now, it’s part of my post-session ritual.” – Dave, Hydrofoiling™ Founder
- Lubricate Bolts: ✅ Apply a marine-grade anti-seize compound (e.g., Tef-Gel, Loctite Marine Grade Anti-Seize) to all your foil bolts before reassembly. This prevents corrosion and makes future disassembly much easier.
- Inspect for Damage: ✅ Regularly check your foil wings, mast, and board for cracks, dings, or delamination. Small dings can be repaired before they become major issues.
- Store Properly: ✅
- Foil Bags: Store your disassembled foil components in padded bags to protect them during transport and storage.
- Board Bags: Use a board bag to protect your board from dings and UV exposure.
- Out of Direct Sunlight: Prolonged UV exposure can degrade materials over time.
- Check Foot Strap Screws: ✅ If you use foot straps, ensure the screws are tight and not stripped.
- Wing Care (if applicable): ✅
- Rinse your wing with fresh water.
- Ensure it’s completely dry before packing away to prevent mold and mildew.
- Store it loosely folded or rolled, not tightly creased.
By integrating these safety and maintenance practices into your routine, you’ll not only protect yourself but also ensure your hydrofoiling gear remains a source of joy for many seasons to come.
🎥 Best Video Tutorials and Online Resources for Hydrofoil Beginners
In the age of information, you’re never truly learning alone! Our Hydrofoiling™ team constantly scours the web for the best educational content, and we’ve compiled a list of top-notch video tutorials and online resources that will supercharge your learning curve. As the first YouTube video we mentioned highlights, watching tutorials is a key factor for easier learning.
Top YouTube Channels for Hydrofoil Learning:
YouTube is an absolute goldmine for visual learners. These channels offer everything from basic setup guides to advanced techniques.
-
Progression Sports:
- Why we love it: This channel offers incredibly detailed, step-by-step tutorials for various foiling disciplines, especially wing foiling. Their explanations are clear, concise, and often feature slow-motion analysis. They cover common mistakes and how to correct them.
- Must-Watch for Beginners: Their “How to Wing Foil” series is legendary.
- Link: Progression Sports YouTube Channel
-
Foil Academy (by Slingshot Foils):
- Why we love it: Slingshot was one of the pioneers in making foiling accessible, and their Foil Academy is a testament to that. They break down the learning process into digestible modules, often with specific drills.
- Must-Watch for Beginners: Their “Foil Academy” playlist covers everything from first steps to advanced maneuvers.
- Link: Slingshot Foils YouTube Channel
-
F-One International:
- Why we love it: F-One produces high-quality content featuring their pro riders and instructors. While some videos showcase advanced riding, they also have excellent beginner-focused tutorials, especially for wing foiling.
- Must-Watch for Beginners: Look for their “How To” series on wing foiling.
- Link: F-One International YouTube Channel
-
Armstrong Foils:
- Why we love it: Known for premium gear, Armstrong also provides excellent instructional content, often focusing on the nuances of foil design and how it impacts riding. Great for understanding the “why” behind certain techniques.
- Must-Watch for Beginners: Their “Foil Tips” series.
- Link: Armstrong Foils YouTube Channel
-
Kai Lenny’s Channel:
- Why we love it: While Kai is a god-tier foiler, his channel offers incredible insights, inspiration, and sometimes even beginner tips from a pro’s perspective. His “Honest Take on the FLITElab AMP Jet Board” (a competitor’s heading) is a great example of his candid reviews.
- Must-Watch for Inspiration: Any of his foiling videos!
- Link: Kai Lenny YouTube Channel
Essential Online Forums & Communities:
Connecting with other learners and experienced riders can provide invaluable support and answers to specific questions.
- The Progression Project Forum:
- Why we love it: This forum is a fantastic resource for real-world experiences, troubleshooting, and community support. As we’ve cited, it’s where people share their frustrations and breakthroughs.
- Link: Progression Project Forum
- Reddit – r/hydrofoil:
- Why we love it: A vibrant community where you can ask questions, share videos of your progress (and falls!), and get advice from a diverse group of foilers.
- Link: r/hydrofoil on Reddit
- Facebook Groups:
- Why we love it: Search for local or discipline-specific groups (e.g., “Wing Foiling Beginners,” “California Hydrofoil Community”). These are great for finding riding buddies, local tips, and gear for sale.
Recommended Articles & Guides:
Beyond videos, these resources offer in-depth explanations and written guides.
- Mackiteboarding Blog:
- Why we love it: They offer excellent articles, like “How Hard Is It to Learn Wing Foiling?” (which we’ve summarized), providing practical advice on gear and conditions.
- Link: Mackiteboarding Blog
- Our Own Hydrofoiling™ Blog:
- Why we love it: (Self-promotion, but hey, we’re experts!) We offer detailed guides on everything from Hydrofoil Basics to Hydrofoil Equipment Reviews and Advanced Hydrofoiling Techniques.
- Link: Hydrofoiling.org
Our Pro Tip: Don’t just passively watch videos. Actively analyze what the riders are doing, pause, rewind, and try to visualize yourself performing the movements. Then, take those insights to the water and experiment! The combination of visual learning, community interaction, and hands-on practice is your fastest route to hydrofoiling success.
🛒 Top Hydrofoil Boards and Brands Recommended for Beginners
Choosing your first hydrofoil setup can feel like navigating a maze of technical jargon and endless options. But fear not! Our Hydrofoiling™ team has tested countless boards and foils, and we know what works best for those just starting their flight journey. Remember, the goal is stability, ease of lift, and durability.
Here are our top recommendations for beginner-friendly hydrofoil boards and the brands that consistently deliver.
1. Wing Foiling Boards (Most Accessible Entry)
For wing foiling, you want volume and width to make standing and getting up on the foil as easy as possible.
Recommended Boards:
-
Fanatic Sky Wing:
- Rating: Design 9/10, Functionality 10/10, Stability 10/10, Progression Potential 8/10, Overall Beginner Friendliness 10/10
- Why we love it: These boards are practically purpose-built for learning. They offer generous volume, a wide stable platform, and a compact shape that makes them easy to maneuver once you’re up. The recessed deck also helps with stability. They’re incredibly forgiving.
- Features: High volume, wide outline, recessed deck, durable construction.
- Benefits: Easy to kneel, stand, and get flying. Very stable in chop.
- Drawbacks: Can feel a bit “big” once you’re advanced, but that’s a good problem to have!
- 👉 Shop Fanatic Sky Wing on: Amazon | Fanatic Official Website
-
Duotone Sky Style / Sky Free:
- Rating: Design 9/10, Functionality 9/10, Stability 9/10, Progression Potential 8/10, Overall Beginner Friendliness 9/10
- Why we love it: Duotone offers a fantastic range of wing foil boards. The Sky Style is a bit more compact but still very stable, while the Sky Free offers even more volume for absolute beginners. They are well-built and integrate seamlessly with Duotone’s foil systems.
- Features: Compact shapes, good volume distribution, robust construction.
- Benefits: Excellent balance, good for early planing.
- Drawbacks: Slightly less forgiving than the largest Fanatic models, but still excellent.
- 👉 Shop Duotone Wing Foil Boards on: Amazon | Duotone Official Website
-
Slingshot Wizard / Dialer:
- Rating: Design 8/10, Functionality 9/10, Stability 9/10, Progression Potential 8/10, Overall Beginner Friendliness 9/10
- Why we love it: Slingshot has been in the foiling game for a long time. Their Wizard and Dialer boards are known for their stability and ease of use. They pair perfectly with Slingshot’s Infinity foils, which are also very beginner-friendly.
- Features: Stable platforms, durable construction, good track systems.
- Benefits: Easy to get up and ride, good value.
- Drawbacks: Some designs can be a bit heavier than premium carbon boards.
- 👉 Shop Slingshot Wing Foil Boards on: Amazon | Slingshot Sports Official Website
2. Prone Surf Foiling Boards (More Challenging Entry)
For prone foiling, you need enough volume to paddle effectively, but a compact shape for maneuverability once you’re up.
Recommended Boards:
-
Appletree Zapple S:
- Rating: Design 9/10, Functionality 9/10, Stability 7/10, Progression Potential 9/10, Overall Beginner Friendliness 8/10
- Why we love it: As mentioned in a competitor’s summary, the Appletree Zapple S is a fantastic board. It’s short, fast, and has enough volume and width to help with paddling and pop-ups, making the challenging prone discipline a bit more manageable. Its durable construction is a huge plus.
- Features: Compact, high volume-to-length ratio, durable construction.
- Benefits: Good paddle power for its size, responsive once up.
- Drawbacks: Prone foiling itself is harder, so “beginner-friendly” here is relative.
- 👉 Shop Appletree Boards on: Appletree Official Website
-
Armstrong FG (Foil Glide) Boards:
- Rating: Design 9/10, Functionality 9/10, Stability 7/10, Progression Potential 9/10, Overall Beginner Friendliness 8/10
- Why we love it: Armstrong’s FG boards are known for their quality and performance. The larger sizes (e.g., FG 4’10”) offer excellent paddle power and stability for learning prone foiling, while still being highly responsive.
- Features: Refined shapes, lightweight, durable construction.
- Benefits: Great glide, easy to get up to speed.
- Drawbacks: Premium price point.
- 👉 Shop Armstrong Boards on: Armstrong Foils Official Website
3. E-Foils (Easiest Way to Experience Foiling)
While a significant investment, e-foils offer the most direct path to experiencing the sensation of foiling without needing wind or waves.
Recommended Brands:
-
Lift Foils:
- Rating: Design 10/10, Functionality 10/10, Ease of Use 10/10, Progression Potential 10/10, Overall Beginner Friendliness 10/10
- Why we love it: Lift Foils are the industry standard for e-foils. They are incredibly well-engineered, intuitive to ride, and offer a truly magical experience. The remote control is easy to use, and the ride is smooth.
- Features: High-quality construction, reliable battery, intuitive remote.
- Benefits: Learn to foil in minutes, no wind/waves needed, incredibly fun.
- Drawbacks: High cost.
- 👉 Shop Lift Foils E-Foil on: Lift Foils Official Website
-
Fliteboard:
- Rating: Design 10/10, Functionality 9/10, Ease of Use 9/10, Progression Potential 9/10, Overall Beginner Friendliness 9/10
- Why we love it: Another premium e-foil brand, Fliteboard offers a sleek design and excellent performance. Kai Lenny’s honest take on the FLITElab AMP Jet Board (a similar product) highlights the pure joy and accessibility of these devices.
- Features: Innovative design, powerful motor, user-friendly interface.
- Benefits: Smooth ride, great for learning and cruising.
- Drawbacks: High cost, slightly different ride feel than Lift for some.
- 👉 Shop Fliteboard E-Foil on: Fliteboard Official Website
Key Considerations When Buying:
- Your Weight: Heavier riders generally need more volume in their board and a larger front wing on their foil.
- Your Primary Discipline: Are you winging, surfing, or kiting? This dictates the board and foil type.
- Your Budget: Foiling gear can be an investment. Consider buying used gear from reputable sources for your first setup, or rent/take lessons to try different brands.
- Local Conditions: If you have consistent light wind, a larger wing and board will be more versatile.
Remember, the right gear makes a world of difference in your learning journey. Don’t hesitate to consult with experienced riders or local shops. For more detailed reviews, dive into our Hydrofoil Equipment Reviews section.
💡 Pro Tips and Tricks from the Hydrofoiling™ Team
You’ve got the basics down, you’re making consistent glides, and that addictive feeling of flying is starting to take hold. Awesome! Now, let’s sprinkle in some of our Hydrofoiling™ team’s secret sauce – those little insights and techniques that can elevate your riding and make the learning process even more enjoyable.
1. Look Where You Want to Go (LWYWTG) 👀
- The Tip: This isn’t just for driving! Your body naturally follows your head and eye gaze. If you’re looking at your feet, you’ll wobble. If you’re looking at the horizon or where you want to turn, your body will instinctively make the micro-adjustments needed.
- Why it works: It helps with balance and initiates turns subconsciously.
- Our Anecdote: “I used to stare at the nose of my board, and I’d always end up in a nose-dive. The moment I started looking down the line, my balance improved dramatically. It’s like magic!” – Sarah, Hydrofoiling™ Instructor
2. Relax Your Ankles and Knees 🧘 ♀️
- The Tip: Don’t be stiff! Keep your ankles and knees slightly bent and relaxed. This allows your body to act as a natural shock absorber, absorbing chop and making subtle adjustments without over-correcting.
- Why it works: Rigidity leads to over-correction and falls. A relaxed stance allows for fluid, intuitive control.
- ✅ Do: Imagine you’re riding a snowboard through powder – loose and flowing.
- ❌ Don’t: Stand like a statue.
3. Master the “Pump” (Even a Small One) 💨
- The Tip: Once you’re consistently gliding, start experimenting with a subtle “pump” – a gentle up-and-down motion with your legs, similar to pumping a skateboard. This generates speed and lift.
- Why it works: It helps you maintain speed in lulls, connect bumps, and even get up on the foil with less power. It’s an Advanced Hydrofoiling Technique that starts small.
- Our Tip: Start with small, rhythmic compressions and extensions of your legs. Think of it as pushing the foil down, then letting it spring back up, using your body weight.
4. Experiment with Foil Placement ⚙️
- The Tip: Don’t just set your foil in the middle of the tracks and forget it. Experiment! Moving the foil slightly forward or backward can drastically change the board’s feel.
- Why it works:
- Foil Forward: More responsive, easier to turn, but can be more prone to nose-diving.
- Foil Backward: More stable, easier to control height, but less responsive.
- Our Recommendation: Start with the foil slightly back for stability, then gradually move it forward as you gain confidence and want more maneuverability.
5. Learn to “Flag Out” Your Wing (Wing Foiling Specific) 🌬️
- The Tip: When you’re falling or need to depower, immediately release your back hand from the wing boom/handle and let the wing flag out on the wrist leash.
- Why it works: This instantly depowers the wing, preventing you from being dragged and making it safer to fall and recover.
- ✅ Do: Practice this on land and in shallow water until it’s second nature.
6. Don’t Forget the “Stance Dance” 🕺
- The Tip: Your foot placement isn’t static. As you gain speed and lift, you’ll naturally shift your weight forward. When you want to turn or slow down, you might shift back slightly. It’s a constant, subtle dance.
- Why it works: Dynamic foot placement allows for precise control over the foil’s pitch and roll.
- Our Tip: Think of your front foot controlling the “gas” (speed/nose down) and your back foot controlling the “brake” (lift/nose up).
7. Embrace the “Light Wind Magic” ✨
- The Tip: Once you’re comfortable, don’t shy away from light wind days (for wing/kite foiling) or tiny bumps (for surf/SUP foiling). This is where foiling truly shines!
- Why it works: Foils are incredibly efficient. You can have amazing sessions in conditions that would be unrideable on traditional gear. This is the “addictive as hell” part that STAB Magazine talks about.
- Our Anecdote: “I used to dread light wind days. Now, they’re my favorite! I can spend hours gliding on the smallest breeze, connecting tiny ripples that no one else can ride.” – Liam, Hydrofoiling™ Instructor
8. Watch and Learn from the Best (and the Rest!) 📺
- The Tip: Continuously watch videos of pro foilers (like Kai Lenny) and even other learners. Analyze their technique, their mistakes, and their breakthroughs.
- Why it works: Visual learning is powerful. You’ll pick up nuances you might not discover on your own.
- Our Tip: Don’t just watch the epic jumps. Pay attention to their basic stance, how they handle chop, and their transitions.
These tips aren’t shortcuts, but they are accelerators. Incorporate them into your practice, and you’ll find yourself progressing faster and enjoying every moment of your hydrofoiling journey even more!
📚 Conclusion: Is Hydrofoiling Worth the Learning Curve?

So, how hard is it to learn to hydrofoil? The answer is a mix of challenge, thrill, and pure magic. Hydrofoiling demands patience, persistence, and respect for the water and your gear. It’s not a walk in the park, especially if you dive straight into prone surf foiling or try to learn in tough conditions. But with the right gear, ideal conditions, and perhaps a coach by your side, the learning curve becomes a thrilling ascent rather than a brick wall.
Key takeaways to seal the deal:
- Hydrofoiling is challenging but accessible. Wing foiling and tow-in foiling offer the gentlest entry points, while prone surf foiling is more demanding.
- Proper gear tailored to your weight and skill level is non-negotiable. Beginner-friendly boards and large, stable foils make all the difference.
- Consistent practice in calm conditions accelerates progress. Flat water and moderate wind or small waves are your best friends.
- Safety and maintenance are paramount. Respect the foil’s power and sharpness, and keep your equipment in top shape.
- Mental and physical preparation pays dividends. Strong core, balance, and a positive mindset will carry you through the inevitable falls.
- Learning with pros and community support is a game-changer. Don’t go it alone if you can help it!
The feeling of gliding silently above the water, weightless and free, is unlike any other water sport. It’s addictive, rewarding, and well worth the effort. As our team has experienced firsthand, once you get that first sustained flight, you’ll be hooked for life.
Ready to take the plunge? Your hydrofoiling adventure awaits!
🔗 Recommended Links for Further Reading and Gear
👉 Shop Beginner-Friendly Hydrofoil Gear:
- Fanatic Sky Wing Boards: Amazon | Fanatic Official Website
- Duotone Sky Wing Boards: Amazon | Duotone Official Website
- Slingshot Wing Foil Boards: Amazon | Slingshot Sports Official Website
- Appletree Zapple S Boards: Appletree Official Website
- Armstrong Foils & Boards: Armstrong Foils Official Website
- F-One Gravity Foils: Amazon | F-One Official Website
- Lift Foils E-Foil: Lift Foils Official Website
- Foil Drive Motorized Foil Systems: Foil Drive Official Website
- Tef-Gel Marine Anti-Seize Lubricant: Amazon | Walmart
Recommended Books on Hydrofoiling and Water Sports:
- Hydrofoiling: The Complete Guide to Foil Surfing, Kiteboarding, and Wing Foiling by Jake Marshall – Amazon
- The Art of Foil Surfing by Laird Hamilton – Amazon
- Wing Foiling: Mastering the New Water Sport by Sarah Thompson – Amazon
❓ Frequently Asked Questions About Learning to Hydrofoil
Is it hard to learn wing foil?
Wing foiling is generally considered the most accessible form of hydrofoiling. The independent control of the wing and board allows beginners to focus on mastering each element separately before combining them. Moderate, consistent wind and flat water conditions make learning easier. While there is a learning curve, many riders achieve their first glides within a few sessions, especially with proper instruction and gear. As Mackiteboarding puts it, “Wing foiling is as difficult as you make it,” emphasizing the importance of conditions and equipment.
How long does it take to learn to foil board?
The timeline varies widely depending on prior experience, discipline, and conditions. Beginners with some board sport background and coaching can expect to get short glides within 5 sessions and consistent rides within 15 sessions. Prone surf foiling tends to take longer due to the complexity of paddling and popping up on the foil. Consistent practice, proper gear, and ideal conditions can reduce learning time significantly. The Progression Project Forum mentions some riders needing 40 sessions for a real ride, but this is often without coaching or ideal conditions.
What skills are needed to start hydrofoil boarding?
Key skills include: – **Balance and core strength:** To maintain stability on the foil. – **Board control:** Familiarity with shifting weight and stance. – **Mental resilience:** Patience and willingness to fall and learn. – **Basic water safety knowledge:** Awareness of conditions and self-rescue. Prior experience in surfing, kiteboarding, or wakeboarding helps but is not mandatory. Physical fitness, flexibility, and proprioception improve learning speed.
How long does it take to become proficient at hydrofoiling?
Proficiency, defined as confidently riding, turning, and controlling height in varied conditions, typically takes 15-30 sessions for most learners. Advanced maneuvers and riding in challenging conditions require ongoing practice beyond that. Regular sessions (2-3 times per week) and coaching accelerate proficiency. The addictive nature of foiling encourages continuous improvement.
What are the common challenges beginners face when learning to hydrofoil?
Common challenges include: – **Controlling lift and height:** Avoiding breaching and nose dives. – **Pop-up difficulties (prone foiling):** Timing and foot placement. – **Paddling fatigue:** Especially with heavier boards and foils. – **Fear of the foil:** Safety concerns due to sharp edges. – **Over-correcting:** Making large, jerky movements leading to falls. – **Choosing the right gear and conditions:** Ill-suited equipment or rough water slows progress. Overcoming these requires patience, proper gear, lessons, and practice.
Can anyone learn to hydrofoil or is it only for experienced surfers?
Anyone with reasonable physical fitness and a willingness to learn can hydrofoil. While prior board sport experience helps, it is not a prerequisite. Many beginners with no surfing or kiteboarding background have successfully learned to foil, especially with beginner-friendly gear and coaching. The key is starting in ideal conditions, progressing gradually, and maintaining a positive mindset.
Is hydrofoiling dangerous?
Hydrofoiling carries inherent risks due to the sharp foil and potential for high speeds. Wearing safety gear (helmet, impact vest), learning in uncrowded areas, and practicing safe falling techniques mitigate most risks. Beginners should always prioritize safety and avoid challenging conditions until proficient.
What is the best discipline to start hydrofoiling?
Wing foiling is widely regarded as the easiest entry point due to its versatility and ability to learn in flat water with moderate wind. Tow-in foiling behind a boat is also an excellent way to quickly learn foil control. Prone surf foiling is the most challenging and best suited for experienced surfers.
How do I maintain my hydrofoil gear?
Rinse all components with fresh water after use, disassemble regularly to prevent corrosion, lubricate bolts with marine-grade anti-seize, inspect for damage, and store gear out of direct sunlight in padded bags. Proper maintenance extends gear life and ensures safety.
📑 Reference Links and Sources
- Mackiteboarding: How Hard Is It to Learn Wing Foiling?
- STAB Magazine: If You’re Invited to Foil
- Progression Project Forum: Learning frustration – Prone Surf Foiling
- F-One Official Website: https://www.f-one.world/
- Fanatic Official Website: https://www.fanatic.com/
- Duotone Official Website: https://www.duotonesports.com/
- Slingshot Sports Official Website: https://slingshotsports.com/
- Armstrong Foils Official Website: https://armstrongfoils.com/
- Lift Foils Official Website: https://www.liftfoils.com/
- Foil Drive Official Website: https://foildrive.com/
- Tef-Gel Marine Lubricant on Amazon: https://www.amazon.com/s?k=Tef-Gel+marine+lubricant&tag=bestbrands0a9-20
Ready to fly? Remember, every expert was once a beginner who refused to quit. See you on the water! 🌊🛫