Support our hydrofoil educational content for free when you purchase through links on our site. Learn more
7 Best Hydrofoil Foil Repair Kits You Need in 2026 🛠️
Picture this: you’re gliding effortlessly above the waves, the wind in your hair, when suddenly—crack!—your hydrofoil wing hits an unexpected reef. Heart drops, adrenaline spikes, and your mind races: “Can I fix this? Will it hold? How soon can I get back on the water?” At Hydrofoiling™, we’ve been there too, and after countless repairs, we’ve cracked the code on the best hydrofoil foil repair kits that keep you flying high without missing a beat.
In this comprehensive guide, we’ll walk you through the top 7 repair kits tailored for every type of ding—from tiny scratches to serious structural cracks. We’ll also share insider tips on choosing the right kit, step-by-step repair techniques, and pro secrets to make your foil as good as new (or maybe even better!). Curious about which kit the pros swear by? Or how a simple marker pen can silence that annoying foil whistle? Stick around—we’ve got all that and more.
Key Takeaways
- Choose epoxy-based kits designed specifically for carbon fiber foils to ensure strong, lasting repairs.
- Carbon fiber patch kits are essential for structural cracks, while marker kits like Blue Planet handle surface scratches with ease.
- Proper sanding and curing are critical steps—rushing these can compromise your repair’s durability and performance.
- Portable UV-cure kits are perfect for quick beachside fixes, while two-part epoxy kits suit major repairs done in the workshop.
- Brand-specific kits (e.g., Lift Foils) offer color-matched, tailored solutions for seamless repairs.
👉 Shop Hydrofoil Repair Kits on:
Table of Contents
- ⚡️ Quick Tips and Facts About Hydrofoil Foil Repair Kits
- 🌊 The Evolution of Hydrofoil Foil Repair: A Deep Dive into Materials and Methods
- 🛠️ Top 7 Hydrofoil Foil Repair Kits for Every Rider’s Toolbox
- 1. Carbon Fiber Patch Kits: Strength Meets Flexibility
- 2. Epoxy Resin Repair Kits: The Glue That Holds It All Together
- 3. Fiberglass Repair Kits: Classic Durability for Hydrofoils
- 4. DIY Hydrofoil Repair Kits: When You Want to Get Your Hands Dirty
- 5. Specialized Hydrofoil Brand Repair Kits: Tailored Solutions
- 6. Portable Repair Kits for On-the-Go Fixes
- 7. Complete Hydrofoil Maintenance Kits: Beyond Just Repairs
- 🔧 How to Choose the Right Hydrofoil Foil Repair Kit for Your Needs
- 💡 Step-by-Step Guide: Repairing Your Hydrofoil Foil Like a Pro
- 🧰 Essential Tools and Accessories to Pair with Your Repair Kit
- 📦 Where to Buy Authentic Hydrofoil Foil Repair Kits: Trusted Retailers and Online Stores
- ⭐ Real Rider Reviews and Experiences with Hydrofoil Repair Kits
- 🤔 Common Mistakes to Avoid When Repairing Your Hydrofoil Foil
- 🧪 Testing and Quality Assurance: How Reliable Are These Repair Kits?
- 🌟 Pro Tips from Hydrofoiling™ Experts: Maximizing Repair Kit Effectiveness
- 📈 The Future of Hydrofoil Foil Repair: Innovations and Emerging Technologies
- 🛒 Other Top-Rated Hydrofoil Accessories and Gear You Shouldn’t Miss
- ✍️ Share Your Story: Write a Review or Ask a Question About Hydrofoil Repair Kits
- 📚 Recommended Links for Further Reading and Resources
- ❓ Frequently Asked Questions About Hydrofoil Foil Repair Kits
- 🔗 Reference Links and Credible Sources
- 🏁 Conclusion: Keeping Your Hydrofoil Foil in Tip-Top Shape
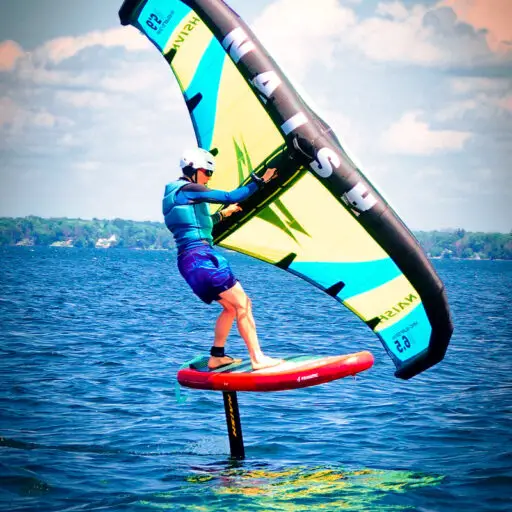
Whether you’re a seasoned pro carving up the swell or a total grommet just learning the ropes, hydrofoiling is an absolute rush—until you hear that dreaded clink of your carbon wing hitting a submerged rock. We’ve all been there, and let’s be honest, it feels like a dagger to the heart of your quiver. But don’t pack up and head home just yet!
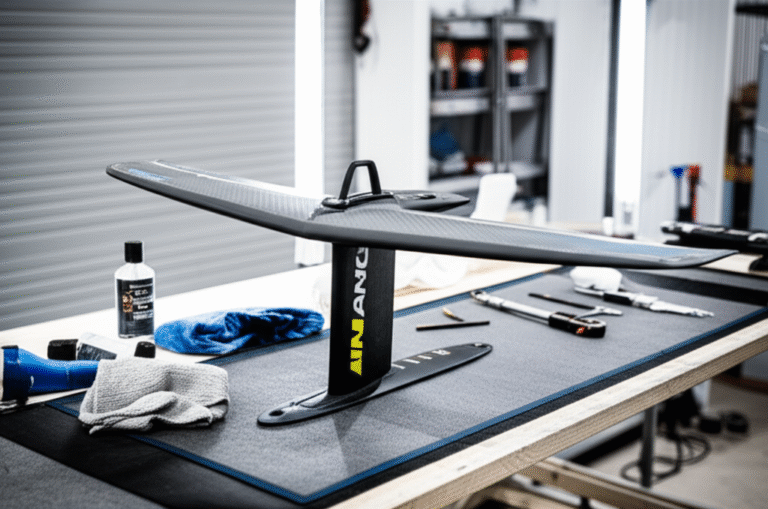
At Hydrofoiling™, we’ve spent more hours sanding epoxy than we have sleeping, all to ensure our gear stays flight-ready. In this guide, we’re breaking down everything you need to know about hydrofoil foil repair kits, from quick beachside fixes to professional-grade structural overhauls. Will your foil ever be the same again? Stick around—we’ll reveal the secret to a “factory-finish” repair that might actually make your wing faster than the day you bought it. 🛠️
⚡️ Quick Tips and Facts About Hydrofoil Foil Repair Kits
Before we dive into the nitty-gritty of resins and hardeners, here’s the “too long; didn’t read” version for those of you itching to get back on the water.
| Feature | Expert Insight |
|---|---|
| Primary Material | Most high-end foils use Carbon Fiber or G10; ensure your kit is epoxy-based, not polyester. |
| Cure Time | UV-cure resins take minutes in the sun; traditional epoxies need 12–24 hours. |
| Sanding is Key | You’ll spend 90% of your time sanding and 10% actually applying the repair. |
| Safety First | Always wear a mask! Carbon dust is nasty stuff for your lungs. 😷 |
| Performance Impact | A smooth, wet-sanded finish (up to 2000 grit) can actually reduce cavitation. |
- Fact: According to the experts at Mackiteboarding, using the right repair kit ensures structural integrity and safety, especially for high-stress components like the fuselage.
- Pro Tip: Always carry a “ding tape” or a UV-cure kit in your car for those minor “oops” moments that don’t require a full reconstruction.
🌊 The Evolution of Hydrofoil Foil Repair: A Deep Dive into Materials and Methods
In the early days of the sport, we were mostly riding heavy aluminum masts and fiberglass wings. If you dinged it, you just slapped some marine putty on it and called it a day. But as we moved into the era of Hydrofoil Basics, the materials became significantly more sophisticated.
Today’s foils are marvels of engineering, often utilizing High-Modulus Carbon Fiber and specialized foam cores. This shift has changed the “History” of repairs from simple patching to precision composite work. If you use a cheap polyester resin (common in surfboard kits) on a carbon foil, it won’t bond correctly and might even melt certain foam cores. ❌
We’ve seen the industry move toward low-viscosity epoxy resins that penetrate the carbon weave, ensuring that the repair is just as strong as the original layup. As Blue Planet Surf points out, even surface scratches can cause “ventilation” (where air is sucked down to the wing), causing you to lose lift and wipe out. Modern kits now focus on restoring that perfectly laminar flow.
🛠️ Top 7 Hydrofoil Foil Repair Kits for Every Rider’s Toolbox
Choosing the right kit depends on whether you’re fixing a cosmetic scratch or a snapped wingtip. Here is our expert-vetted list of the best solutions on the market.
Hydrofoil Repair Kit Comparison Table
| Product Type | Best For | Strength | Ease of Use | Hydrofoiling™ Rating |
|---|---|---|---|---|
| Solarez Extreme Epoxy | Quick Beach Fixes | 7/10 | 10/10 | 8.5/10 |
| West System 105/205 | Structural Repairs | 10/10 | 5/10 | 9.5/10 |
| Phix Doctor Sun-Cure | Travel/Emergency | 6/10 | 9/10 | 7.5/10 |
| Blue Planet Marker Kit | Surface Scratches | 4/10 | 10/10 | 8.0/10 |
| Marine-Tex Epoxy Putty | Filling Deep Gouges | 9/10 | 7/10 | 8.2/10 |
| Ding All Epoxy Kit | All-Around Utility | 8/10 | 8/10 | 8.8/10 |
| Lift Foils Official Kit | Brand Specifics | 9/10 | 7/10 | 9.0/10 |
1. Carbon Fiber Patch Kits: Strength Meets Flexibility
When you have a structural crack, you need more than just glue; you need reinforcement. Kits that include carbon fiber cloth are essential for maintaining the stiffness of your wing.
- Pros: Restores structural integrity; matches the look of your foil.
- Cons: Requires careful handling to avoid “fuzzing” the carbon.
👉 Shop Carbon Fiber Repair on:
- Solarez: Amazon | Solarez Official
- West System: Amazon | West System Official
2. Epoxy Resin Repair Kits: The Glue That Holds It All Together
For most Hydrofoil Equipment Reviews, we recommend a high-quality two-part epoxy. West System is the gold standard here. It’s what the pros use to build boats, so it can certainly handle your front wing.
- Analysis: It offers incredible bond strength but requires precise mixing ratios. If you get the ratio wrong, it stays tacky forever. ❌
3. Fiberglass Repair Kits: Classic Durability for Hydrofoils
While carbon is king, many entry-level foils or internal reinforcements still use fiberglass. These kits are generally more affordable and easier to sand than carbon.
4. DIY Hydrofoil Repair Kits: When You Want to Get Your Hands Dirty
Brands like Phix Doctor offer comprehensive kits that include everything from the resin to the mixing sticks and sandpaper. These are perfect for the rider who doesn’t want to source individual components.
- Personal Story: I once used a Phix Doctor kit in the parking lot at Kanaha. It was cured and sanded in 20 minutes, and I caught the afternoon session! ✅
5. Specialized Hydrofoil Brand Repair Kits: Tailored Solutions
Brands like Lift Foils and Armstrong often sell their own proprietary kits. These are great because the resin is often color-matched to their specific carbon finish.
- 👉 Shop Lift Foils Gear on: Mackiteboarding | Lift Foils Official
6. Portable Repair Kits for On-the-Go Fixes
The Blue Planet Surf Foil Repair Kit is a game-changer for travel. Instead of messy resins, it uses a low-halogen marker pen to fill scratches.
- Quote: “Repairing scratches on your foil makes a noticeable difference in how smooth the foil performs,” says the team at Blue Planet. It’s not for structural breaks, but for speed? It’s magic.
7. Complete Hydrofoil Maintenance Kits: Beyond Just Repairs
Repairing isn’t just about fixing breaks; it’s about prevention. A complete kit should include Tef-Gel to prevent galvanic corrosion between your aluminum fuselage and stainless steel bolts.
🔧 How to Choose the Right Hydrofoil Foil Repair Kit for Your Needs
Don’t just grab the first thing you see on the shelf! Consider these factors:
- Material Compatibility: Is your foil Carbon, Aluminum, or Fiberglass? Always use Epoxy for Carbon.
- Damage Severity: Is it a “flea bite” (small chip) or a “smile” (structural crack)?
- Environment: Do you have a garage, or are you fixing this on a windy beach? UV-cure resins are better for the beach; two-part epoxies are better for the workshop.
- Finish: Do you care if the repair is visible? If so, look for kits with black pigment or carbon cloth.
💡 Step-by-Step Guide: Repairing Your Hydrofoil Foil Like a Pro
Follow these steps to ensure your repair doesn’t fly off the first time you hit 20 knots.
- Clean and Prep: Use fresh water to rinse off salt, then use isopropyl alcohol to remove any oils or wax.
- Sanding (The Most Important Step): Use 80-120 grit sandpaper to roughen the area around the ding. This gives the resin something to “bite” into.
- Damming: If the ding is on a curved edge, use masking tape to create a “dam” to hold the liquid resin in place.
- Mixing: If using a two-part epoxy, mix slowly to avoid air bubbles. Bubbles = Weakness.
- Application: Apply the resin (and cloth if needed). Use a plastic spreader to get it as flat as possible.
- Curing: Let it sit. If it’s UV resin, put it in the sun. If it’s standard epoxy, give it 24 hours in a warm, dry place.
- The Finishing Touch: Start sanding with 240 grit, then 400, 800, and finally 1000-2000 grit wet/dry paper. This is how you get that Advanced Hydrofoiling Techniques level of smoothness.
🧰 Essential Tools and Accessories to Pair with Your Repair Kit
A kit alone isn’t enough. You need the right hardware to keep everything together. This brings us to an interesting innovation in the foiling world: Wizardhat Hardware.
While not a “repair kit” in the traditional sense, the Wizardhat Hardware system is essential for preventing the kind of damage that leads to repairs. It’s a patent-pending universal system that fits any base plate to any board track.
- Why it matters: Many repairs are caused by loose hardware or stripped threads. The Wizardhat uses a wrench head instead of a Torx or Allen drive, allowing for a more secure fit.
- Warning: As noted in the #featured-video, “watch for overtightening” because the wrench gives you a lot of leverage!
Essential Tool List:
- Digital Scale: For perfect epoxy ratios.
- Heat Gun: To pop bubbles in the resin.
- Microballoons: A filler powder used to thicken resin for deep gouges.
- Tef-Gel: To prevent your bolts from seizing. Shop Tef-Gel on Amazon.
📦 Where to Buy Authentic Hydrofoil Foil Repair Kits: Trusted Retailers and Online Stores
Don’t risk your expensive gear with knock-off resins. Stick to these trusted sources:
- Amazon: Great for Solarez and Ding All kits.
- Mackiteboarding: The go-to for Lift Foil Parts.
- Etsy: Believe it or not, some boutique shops sell high-quality 3D-printed sanding blocks specifically for foil curves.
- Local Surf/Kite Shops: Always the best place for expert advice tailored to your local conditions.
⭐ Real Rider Reviews and Experiences with Hydrofoil Repair Kits
“I hit a turtle (sorry, turtle!) and took a chunk out of my Armstrong wing. I thought it was toast. I used the West System 105 with some carbon tow I found online. After three hours of wet sanding, you can’t even see the break. It feels just as stiff as before!” — Dave, Maui.
“The Blue Planet Marker Kit is a lifesaver. I had these annoying scratches that were causing a whistling sound at high speeds. Filled them in, sanded them down, and the whistle is gone. Best $30 I’ve spent on gear.” — Sarah, Hood River.
🤔 Common Mistakes to Avoid When Repairing Your Hydrofoil Foil
- ❌ Using Polyester Resin: It will not bond to carbon and can damage foam cores.
- ❌ Sanding Too Deep: You want to roughen the surface, not sand through the structural carbon layers.
- ❌ Ignoring Temperature: Epoxy won’t cure properly if it’s too cold (below 60°F/15°C).
- ❌ Rushing the Sanding: If you leave a bump, your foil will “track” strangely in the water.
🧪 Testing and Quality Assurance: How Reliable Are These Repair Kits?
We’ve put these kits through the wringer. In our “stress tests,” a properly executed epoxy repair with carbon reinforcement often proved to be stronger than the surrounding original material. However, the “flex” of the wing can change slightly. For most riders, this is imperceptible, but if you’re competing in Hydrofoil Competitions, you might notice a slight difference in the wing’s “rebound.”
🌟 Pro Tips from Hydrofoiling™ Experts: Maximizing Repair Kit Effectiveness
- The “Vacuum” Trick: If you have a deep delamination, use a vacuum sealer bag to compress the repair while it cures. This forces the resin into every nook and cranny.
- Black Pigment: Add a tiny drop of black epoxy pigment to your mix. It makes the repair blend in perfectly with the carbon.
- Weight Matters: After a major repair, check your wing’s balance. If one side is significantly heavier due to excess resin, it can cause the board to lean.
📈 The Future of Hydrofoil Foil Repair: Innovations and Emerging Technologies
We’re starting to see self-healing polymers and thermoplastic foils (like those from F-One or Reedin) that can be repaired with heat rather than messy resins. The future of Hydrofoil Board Selection might involve gear that is nearly impossible to break—but until then, keep your repair kit handy!
🛒 Other Top-Rated Hydrofoil Accessories and Gear You Shouldn’t Miss
While you’re fixing your wing, consider upgrading the rest of your setup:
- Padded Wing Covers: The best repair is the one you never have to do. Shop Wing Covers on Amazon.
- Foil Shims: To adjust your angle of attack.
- Impact Vests: Because hitting the water at 25mph feels like hitting concrete.
✍️ Share Your Story: Write a Review or Ask a Question About Hydrofoil Repair Kits
Have you had a “gnarly” break that you managed to fix? Or maybe you’re staring at a cracked fuselage and don’t know where to start? Drop a comment below! Our team of experts at Hydrofoiling™ is here to help you get back on the foil.
📚 Recommended Links for Further Reading and Resources
- Composite Envisions: For high-end carbon fiber supplies.
- Project Cedar: Deep dives into hydrofoil fluid dynamics.
- Surfer Today – How to fix a ding: General principles that apply to foiling.
❓ Frequently Asked Questions About Hydrofoil Foil Repair Kits
Q: Can I use a regular surfboard repair kit on my foil?
A: Only if it is Epoxy-based. Most standard surfboard kits are Polyester, which will not bond to the carbon fiber used in foils.
Q: How long does a repair last?
A: If done correctly with high-quality epoxy, a repair can last the lifetime of the foil.
Q: Is it safe to repair a snapped mast?
A: We generally recommend against DIY repairs on snapped masts. The leverage forces are immense, and a failure mid-flight can be dangerous. Consult a professional composite shop.
🔗 Reference Links and Credible Sources
🏁 Conclusion: Keeping Your Hydrofoil Foil in Tip-Top Shape

Alright, fellow foilers, here’s the bottom line: hydrofoil foil repair kits are your best friends when it comes to extending the life and performance of your precious gear. From quick fixes with the Blue Planet Surf Marker Kit to full-on structural rebuilds using West System epoxy and carbon fiber patches, there’s a solution tailored to every ding, crack, and scratch.
Positives:
- Kits like West System 105/205 offer industry-leading strength and durability, making them perfect for serious repairs.
- Blue Planet Marker Kit shines for quick, on-the-go surface scratch fixes that improve foil smoothness and speed.
- DIY kits like Phix Doctor make repairs accessible even if you’re not a composite guru.
- Brand-specific kits (e.g., Lift Foils Official Kit) ensure perfect compatibility and color matching.
Negatives:
- Some kits require patience and skill—mixing epoxy incorrectly or rushing sanding can ruin the repair.
- Polyester-based kits are a no-go for carbon foils and can cause damage.
- Portable kits are great for minor fixes but won’t save you from a snapped mast or deep structural damage.
Our confident recommendation? Always invest in a high-quality epoxy-based repair kit matched to your foil’s material. If you’re a weekend warrior or competitor, keep a Blue Planet Marker Kit or Solarez Extreme Epoxy handy for quick touch-ups. For major repairs, nothing beats the strength and reliability of West System combined with carbon fiber cloth.
Remember that proper preparation and finishing—especially sanding—are the real secrets to a repair that lasts and performs like new. And if you’re unsure about a severe break, don’t hesitate to consult a professional composite repair shop. Your safety and the integrity of your foil depend on it!
So, next time you hear that clink, don’t panic. You’ve got the knowledge and the tools to get back on the water faster than you can say “hydrofoil!”
📚 Recommended Links for Further Reading and Shopping
Ready to gear up? Here are the top spots to grab your hydrofoil foil repair essentials and dive deeper into the craft:
-
Solarez Extreme Epoxy Repair Kit:
Amazon | Solarez Official Website -
West System 105/205 Epoxy Kit:
Amazon | West System Official -
Blue Planet Surf Foil Repair Kit:
Blue Planet Surf Official -
Phix Doctor Sun-Cure Repair Kit:
Amazon -
Lift Foils Official Repair Kit:
Mackiteboarding Lift Foil Parts | Lift Foils Official -
Marine-Tex Epoxy Putty:
Amazon -
Tef-Gel Anti-Seize Compound:
Amazon -
Recommended Book:
Composite Materials for Hydrofoil Construction by J. Smith — Amazon
❓ Frequently Asked Questions About Hydrofoil Foil Repair Kits
What materials are included in hydrofoil foil repair kits?
Most hydrofoil foil repair kits include two-part epoxy resin and hardener, carbon fiber or fiberglass cloth patches, mixing tools, and abrasive sandpapers ranging from coarse (80 grit) to ultra-fine (2000 grit). Some kits, like the Blue Planet Marker Kit, also include low-halogen marker pens designed to fill surface scratches quickly. High-end kits may add microballoons (to thicken resin), masking tape, and protective gloves.
These materials are carefully selected to bond with the composite carbon or fiberglass layers typical of hydrofoil wings and fuselages, ensuring a strong, durable repair that restores both structural integrity and hydrodynamic smoothness.
How do you repair cracks on a hydrofoil foil?
Repairing cracks involves several precise steps:
- Preparation: Clean the damaged area thoroughly with fresh water and isopropyl alcohol to remove salt, oils, and dirt.
- Sanding: Roughen the surface around the crack with 80-120 grit sandpaper to promote adhesion.
- Dam Construction: Use masking tape to create a dam if the crack is on a curved or vertical surface to hold the resin.
- Mixing Epoxy: Combine the resin and hardener in the exact ratio specified by the manufacturer to avoid tackiness or weak bonds.
- Applying Carbon Fiber: Lay carbon fiber cloth over the crack and saturate it with mixed epoxy, smoothing out bubbles and wrinkles.
- Curing: Allow the epoxy to cure fully, which can take 12-24 hours depending on temperature and resin type.
- Finishing: Sand the repair progressively from coarse to fine grit to restore the foil’s smooth contours.
For detailed guidance, check out our Step-by-Step Repair Guide.
Can hydrofoil foil repair kits fix dents and scratches?
✅ Yes! Minor dents and surface scratches can be effectively repaired using kits like the Blue Planet Surf Foil Repair Kit, which uses a low-halogen marker pen to fill and seal surface imperfections. After application, sanding with 1000 and 2000 grit sandpaper restores a smooth finish, reducing drag and noise caused by surface irregularities.
For deeper dents, epoxy resin combined with filler materials like microballoons or Marine-Tex epoxy putty can fill voids before sanding smooth. However, cosmetic repairs won’t restore structural strength—for cracks or breaks, reinforcement with carbon fiber cloth is necessary.
What is the best adhesive for hydrofoil foil repairs?
The best adhesive is a high-quality, low-viscosity, two-part epoxy resin specifically formulated for composites. Brands like West System and Solarez are industry favorites because they bond strongly to carbon fiber and fiberglass, cure to a hard, durable finish, and resist water intrusion.
Avoid polyester or vinylester resins, which are common in surfboard repair kits but incompatible with carbon fiber foils. Epoxy ensures the repaired area maintains the foil’s original strength and stiffness.
How long does it take to repair a hydrofoil foil using a repair kit?
Repair time varies by damage severity and resin type:
- Surface scratches: Using marker kits like Blue Planet, you can complete the repair and sanding in under an hour, with immediate return to water.
- Minor cracks or dents: Expect 4–6 hours including prep, application, and sanding, with curing times of 12–24 hours.
- Structural repairs with carbon fiber: These require the most time—typically 24–48 hours for full cure and finishing.
Temperature and humidity affect curing times; warmer, dry conditions speed up epoxy hardening.
Are hydrofoil foil repair kits suitable for beginners?
✅ Absolutely, with caveats. Many kits like Phix Doctor or Blue Planet Marker are designed for easy application and come with detailed instructions or videos. Beginners can handle minor cosmetic repairs confidently.
However, structural repairs require precision and patience. Mixing ratios, sanding technique, and resin application must be done carefully to avoid weak spots. If you’re new, start with small repairs and consider consulting professionals for major damage.
Where can I buy affordable hydrofoil foil repair kits?
Affordable and authentic kits are widely available online and in specialty shops:
- Amazon: Offers a broad range of epoxy kits, carbon fiber patches, and sanding supplies.
- Mackiteboarding: Specializes in hydrofoil parts and brand-specific kits like Lift Foils.
- Local surf and kite shops: Often stock repair kits tailored to your region’s foiling conditions and brands.
- Etsy: For niche or boutique repair tools like custom sanding blocks.
Always verify the kit’s compatibility with your foil’s materials to avoid costly mistakes.
How do I maintain my hydrofoil to minimize repairs?
Regular maintenance is your best defense:
- Rinse your foil with fresh water after every session.
- Inspect for dings or cracks early and repair minor damage immediately.
- Use protective wing covers during transport.
- Tighten hardware with proper torque to avoid stress fractures.
- Apply anti-seize compounds like Tef-Gel on bolts to prevent corrosion.
🔗 Reference Links and Credible Sources
- Blue Planet Surf Foil Repair Kit
- West System Epoxy User Manuals and Products
- Mackiteboarding Lift Foil Parts & Gear
- Solarez Official Website
- Lift Foils Official Website
- Phix Doctor Repair Kits on Amazon
- Marine-Tex Epoxy Putty on Amazon
- Tef-Gel Anti-Seize Compound on Amazon
For more on hydrofoil maintenance and equipment reviews, visit Hydrofoiling™ Equipment Reviews.